TEAC AD-850 AD-850 Owner s Manual - Page 36
Timer-controlled playback and recording, Connections, Timer-Controlled Playback
 |
View all TEAC AD-850 manuals
Add to My Manuals
Save this manual to your list of manuals |
Page 36 highlights
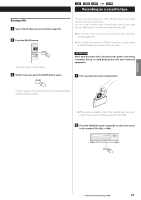
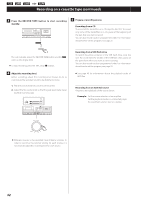
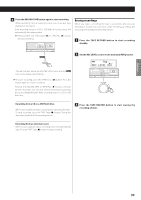
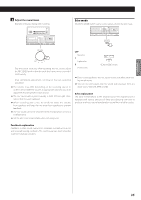
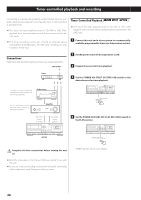
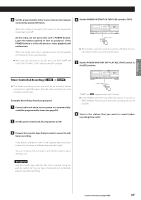
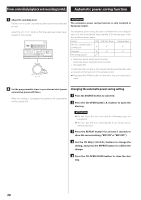
Timer-controlled playback and recording Connecting a commercially-available programmable timer to your audio setup lets you wake up to your favorite music or start recording at specified times. < The source for timer playback must be CD, TAPE or USB. Timer playback does not work with external devices connected to the LINE inputs. < The timer recording source can only be an external device connected to the LINE inputs. And the timer recording can only record to cassette tape. Timer-Controlled Playback ( ) < The source for timer playback must be CD, TAPE or USB. Timer playback does not work with an external device connected to the LINE input. 1 Connect this unit and a stereo system to a commercially- available programmable timer (see the previous section). Connections Referring to the illustration below, connect your audio equipment. Wall socket 2 Set the power switch of all components to ON. 3 Prepare the source for timer playback. Timer 4 Set the POWER ON START CD-TAPE-USB switch to the desired source for timer playback. To make a timer-controlled recording of a radio program, set your tuner as required. Audio source Set the input/output selectors and other options to their proper positions. Amplifier Signal flow during recording Signal flow during playback 5 Set the POWER ON START OFF-PLAY-REC (TAPE) switch to the PLAY position. AD-850 VVComplete all other connections before turning the unit on. oo Read the instructions of each device that you intend to use with this unit. oo Be sure to connect each plug securely. Do not bundle connecting cables with power cords. Doing so could cause noise. "TIMER" appears on this unit's display. 36
-
 1
1 -
2
-
3
-
4
-
5
-
6
-
7
-
8
-
9
-
10
-
11
-
12
-
13
-
14
-
15
-
16
-
17
-
18
-
19
-
20
-
21
-
22
-
23
-
24
-
25
-
26
-
27
-
28
-
29
-
30
-
 31
31 -
 32
32 -
 33
33 -
 34
34 -
 35
35 -
 36
36 -
 37
37 -
 38
38 -
 39
39 -
 40
40 -
 41
41 -
42
-
43
-
44
-
45
-
46
-
47
-
48
-
49
-
50
-
51
-
52
-
53
-
54
-
55
-
56
-
57
-
58
-
59
-
60
-
61
-
62
-
63
-
64
-
65
-
66
-
67
-
68
-
69
-
70
-
71
-
72
-
73
-
74
-
75
-
76
-
77
-
78
-
79
-
80
-
81
-
82
-
83
-
84
-
85
-
86
-
87
-
88
-
89
-
90
-
91
-
92
-
93
-
94
-
95
-
96
-
97
-
98
-
99
-
100
-
101
-
102
-
103
-
104
-
105
-
106
-
107
-
108
-
109
-
110
-
111
-
112
-
113
-
114
-
115
-
116
-
117
-
118
-
119
-
120
-
121
-
122
-
123
-
124
-
125
-
126
-
127
-
128
 |
 |
