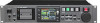
TEAC HS-4000 HS-4000 V1.22 Manual Addendum - Page 2
Playlist mode changes to ADJUST screen operations, and addition of rehearsal playback function
 |
View all TEAC HS-4000 manuals
Add to My Manuals
Save this manual to your list of manuals |
Page 2 highlights
X Playlist mode changes to ADJUST screen operations and addition of rehearsal playback function for audio monitoring When editing playlist mode entries, the contents and operation of the screen opened by the ADJUST button have been changed. 00 Additional items shown The following items have been added to the playback area display. ii Standard level line (0 dB) ii Adjusted level line ii Various mark icons Use the . and / buttons to change the entry being adjusted. 00 Editing the playback beginning and ending points 111 Press the HOME key on the front panel to open the Home Screen. 222 Touch a file name or title name button and then touch the ADJUST ENTRY button in the pull-down menu to open the ADJUST XXX screen. ("XXX" is the entry number.) NOTE You can also open this by touching the MENU button and then touching the ADJUST button in the pull-up menu when a take is selected on the ENTRY screen or one of the key assign buttons on the left is selected on the ASSIGN screen. 333 Touch the Start End Point tab to open that page (if not open). 444 Touch a time display unit to highlight it yellow. The corresponding cursor will blink. When a time field is selected, you can use the dial to adjust the Start/End position. If the selected field is increased/decreased past its maximum/ minimum, the next higher/lower field will also be increased/decreased by 1. 555 Select the frame field to edit at frame precision, and select the sample field to edit at sample precision. Touch the CURRENT button to capture the current playback position as the Start/End position. Touch the EDIT button to switch between the number button and mark list screens. 666 Touch the BC$, button to open a confirmation pop-up window to decide whether or not the BC$STANDBY and END mark times are loaded as the start and end points. Touch the OK button in the pop-up window to load the BC$STANDBY and END mark times as the Start and End points. Touch the RESET button in the pop-up window to reset the start and end points to the beginning and end of the file. NOTE When changing the playback start and end time, settings will automatically be restricted so that the total length between the start and end is longer than the total fade-in and fade-out length. If the length between BC$STANDBY and END is shorter than the total fade-in and fade-out time, the fade-in and fade-out times will be cleared. 00 Editing the playback starting time 111 Press the HOME key on the front panel to open the Home Screen. 222 Touch a file name or title name display and then touch the ADJUST ENTRY button in the pull-down menu to open the ADJUST XXX screen. ("XXX" is the entry number.) HS-4000 NOTE You can also open this by touching the MENU button and then touching the ADJUST button in the pull-up menu when a take is selected on the ENTRY screen or one of the key assign buttons on the left is selected on the ASSIGN screen. 333 Touch the Start TC Fade/Level tab to open the following screen. 444 Touch the EDIT button to open the EDIT START TC screen, and use the number buttons to adjust the Start TC. 00 Editing the fade-in/fade-out lengths and levels 111 Press the HOME key on the front panel to open the Home Screen. 222 Touch a file name or title name button and then touch the ADJUST ENTRY button in the pull-down menu to open the ADJUST XXX screen. ("XXX" is the entry number.) 333 Touch the Start TC Fade/Level tab to open the screen shown above. 444 After selecting the Fade In, Fade Out or Level knob, turn the DATA dial to change the setting. Setting values: ii Fade In/Out Length: 0-30 seconds (0.1 seconds/step when turning; 1.0 seconds/step when pressing and turning) ii Level range: - ∞ to +10 dB NOTE When changing the fade-in and fade-out lengths, their settings will automatically be restricted so they are less than the total length between the playback start and end. 00 Rehearsal playback operation Using the transport on this screen allows rehearsal playback. The . and / keys function the same as regular transport controls except they can be used to move between the file beginning, Start point, End point and file ending. Use the PREVIEW button to change the rehearsal playback contents. ii If you change the Start point or Fade In length, the Start point will become the current playback position. If you make a change during playback, playback will continue after moving to the new playback position. ii If you change the End Point or Fade Out Length, the current playback position will change as follows. If you make a change during playback, playback will continue after moving to the new playback position. When changing End Point PREVIEW OFF PREVIEW ON 2 seconds before End Point 2 seconds before Fade Out start position When changing Fade Out length 2 seconds before Fade Out start position 2 seconds before Fade Out start position Rehearsal playback when PREVIEW OFF ii The recording is played back without being changed by the Fade In, Fade Out and Level Adjust settings. ii You can move to parts of the file outside the Start/End Point range. ii When you reach the End Point during playback, playback will stop and the Start Point will become the playback position. Press the PLAY key to start playback from the Start Point. Use the ,, / and SHIFT+/ keys or the JOG/SHUTTLE dial to move past the End Point. 2 TASCAM HS-4000
-
 1
1 -
 2
2 -
 3
3 -
 4
4 -
 5
5 -
 6
6 -
 7
7 -
 8
8 -
9
-
10
-
11
-
12
 |
 |
