TEAC LP-R550USB Owners Manual - Page 26
Recording 2, cassette recorder or portable player etc. - cd recorder with cassette turntable by
 |
View all TEAC LP-R550USB manuals
Add to My Manuals
Save this manual to your list of manuals |
Page 26 highlights
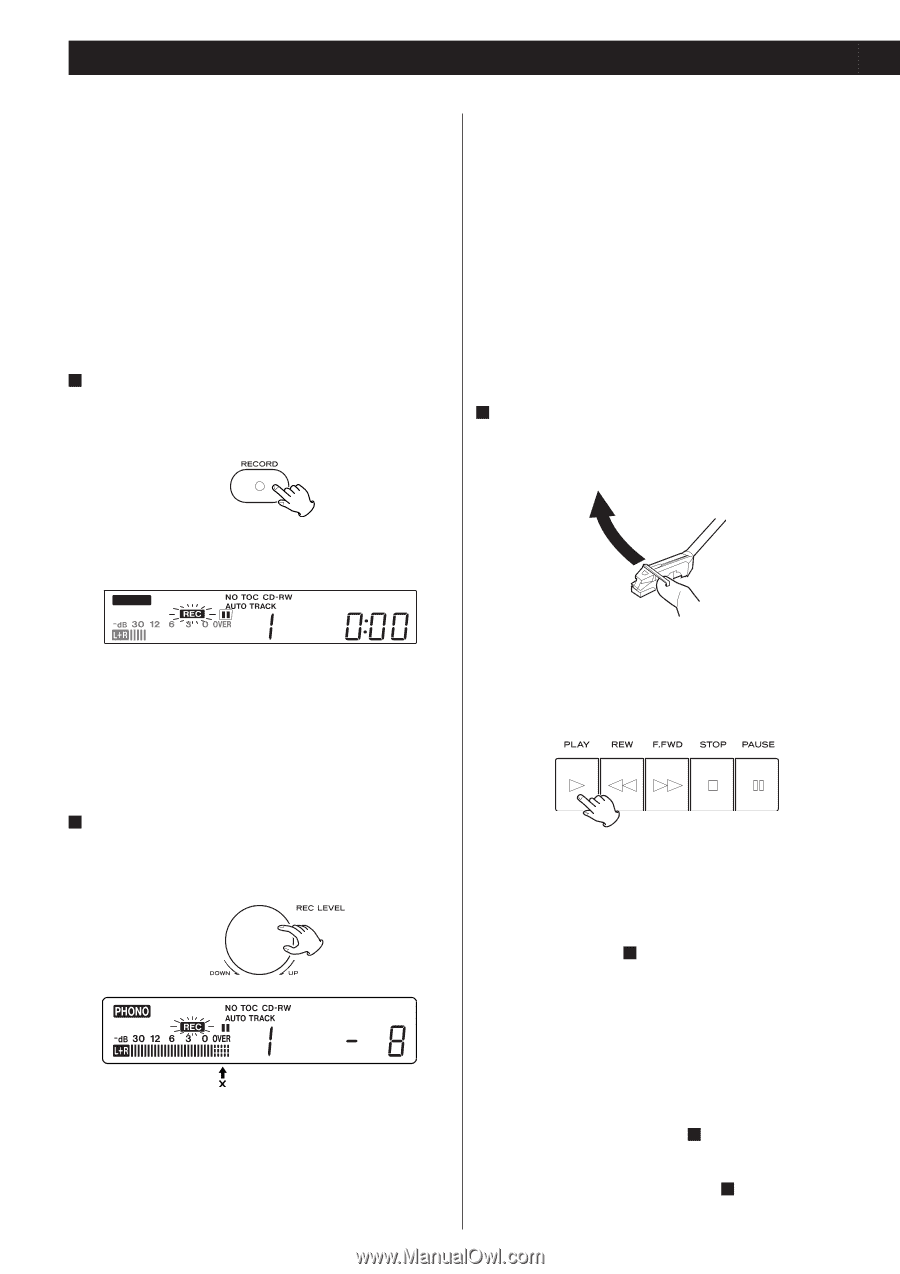
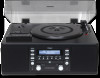
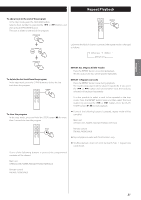
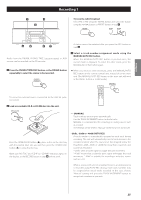
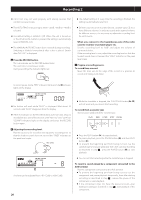
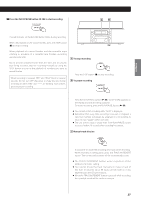
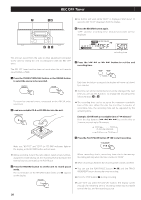
Recording 2 < AUTO REC may not work properly with analog sources that contain low-level noises. < The default setting is 0. Every time the recording is finished, the setting is automatically reset to 0. < The AUTO TRACK indicator lights when -20dB, -30dB or -40dB is selected. < The default setting is MANUAL (off). When the unit is turned on or the OPEN/CLOSE button is pressed, the setting is automatically reset to MANUAL (off). < The MANUAL/AUTO REC button does not work during recording. Switching is disabled immediately after a disc is placed. Switch after "NO TOC" is displayed. 4 Press the RECORD button. The red indicator on the RECORD button blinks. The unit enters record pause mode. During recording, the indicator lights red. < Different sources to be recorded (record, cassette tape, CD, etc.) have different volumes. In order to record at the optimal volume for different sources, it is necessary to adjust the recording level for each source. When you connect to the headphones jack of the radio cassette recorder or portable player etc. Set the recording level to "0dB" and adjust the volume of connected device. If the recording level is row, adjust the recording level so that the loudest sound does not exceed the "OVER" indicator on the peak level meter. 6 Prepare a recording source. To record from a record Move the tone arm to the edge of the record or a position to record and slowly put it down. In record pause mode, "REC" indicator blinks and the J indicator lights on the display. PHONO < No button will work while "bUSY" is displayed. Wait about 10 seconds until "bUSY" disappears from the display. < If the red indicator on the RECORD button does not blink, reload a recordable disc, wait a few seconds until "NO TOC" and "CD-R" (or "CD-RW") indicators light on the display, and press the RECORD button again. < While the turntable is stopped, the PLAY/PAUSE button(y/J) will not work and you cannot start recording. To record from a cassette tape Start or pause playback of the cassette tape. 5 Adjusting the recording level. Play the source to be recorded and adjust the recording level so that the loudest sound does not exceed the "OVER" indicator on the peak level meter. < Press the PLAY button (y) to start playback. < To pause playback, press the PAUSE button (J) and then PLAY button (y). < To prevent the beginning part from being cut out, cue the cassette tape and pause playback, then after starting recording as described in step 7 , press the PUASE button (J) to start playback. < You can not start recording while the cassette tape is stopped. The level can be adjusted from -8 (-12dB) to +8(+12dB). 26 To record a sound played by a component connected to the AUX terminal Play the component connected to the AUX terminal. < To prevent the beginning part from being cut out, cue the component and pause playback temporarily, then after starting recording as described in step 7 , release the pause of the component to start playback. < If the component does not have the pause function, after starting recording as described in step 7 , start playback of the component.
-
 1
1 -
2
-
3
-
4
-
5
-
6
-
7
-
8
-
9
-
10
-
11
-
12
-
13
-
14
-
15
-
16
-
17
-
18
-
19
-
20
-
 21
21 -
 22
22 -
 23
23 -
 24
24 -
 25
25 -
 26
26 -
 27
27 -
 28
28 -
 29
29 -
 30
30 -
 31
31 -
32
-
33
-
34
-
35
-
36
-
37
-
38
-
39
-
40
-
41
-
42
-
43
-
44
-
45
-
46
-
47
-
48
-
49
-
50
-
51
-
52
-
53
-
54
-
55
-
56
-
57
-
58
-
59
-
60
-
61
-
62
-
63
-
64
-
65
-
66
-
67
-
68
-
69
-
70
-
71
-
72
-
73
-
74
-
75
-
76
-
77
-
78
-
79
-
80
-
81
-
82
-
83
-
84
-
85
-
86
-
87
-
88
-
89
-
90
-
91
-
92
-
93
-
94
-
95
-
96
-
97
-
98
-
99
-
100
 |
 |