TP-Link 3.75G MA180 V2 User Guide - Page 16
Connect to Network
 |
View all TP-Link 3.75G manuals
Add to My Manuals
Save this manual to your list of manuals |
Page 16 highlights
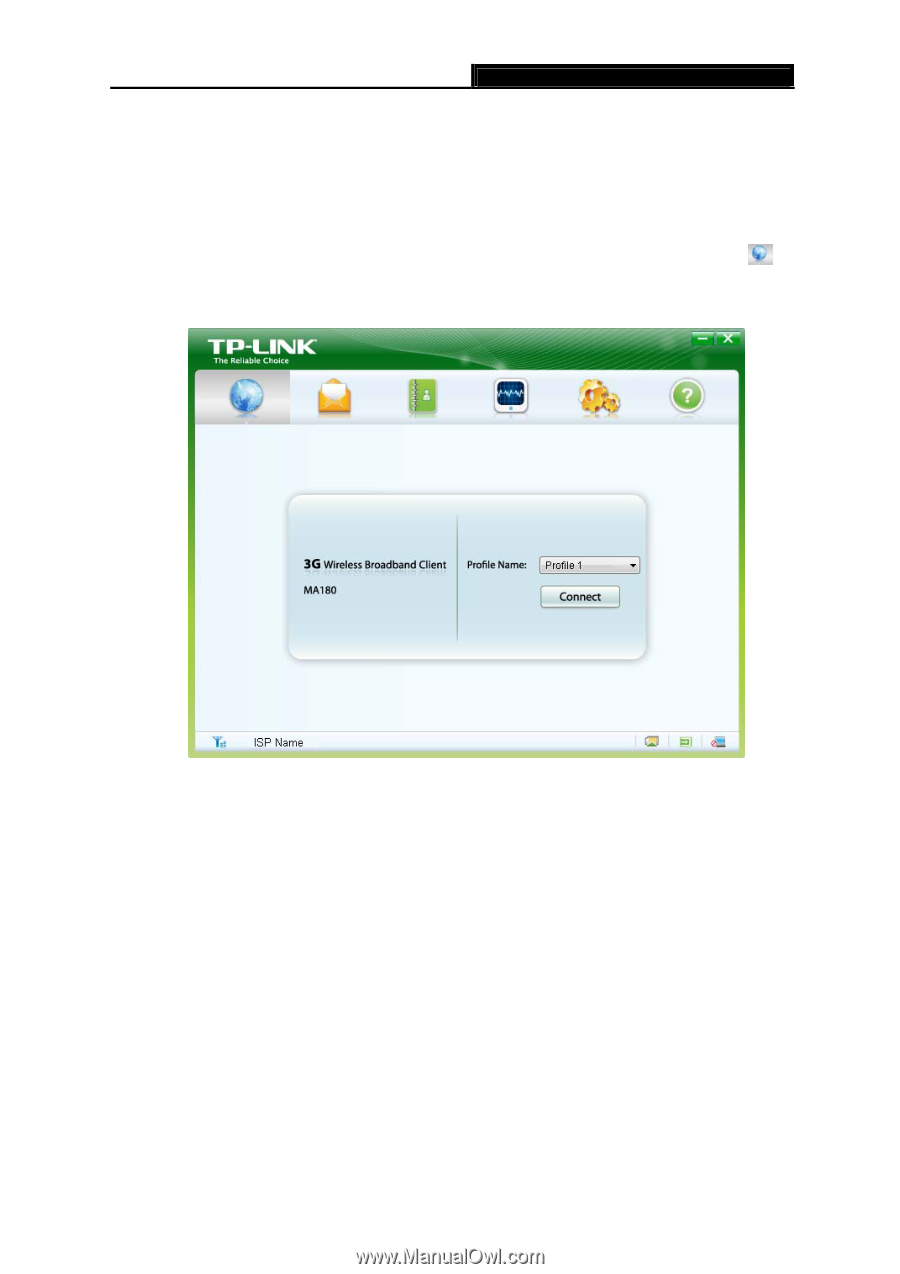
MA180 3.75G HSUPA USB Adapter User Guide Chapter 3. Connect to Network With both the hardware and software successfully installed into your computer, you can quickly connect to network following the steps below. 1. After installation, the utility will automatically appear on your desktop. Click on the icon to display the Network interface. Figure 3-1 2. The network parameters will be configured automatically according to the SIM/USIM card inserted. With successful configuration, a profile name (your ISP name by default) will appear on the interface. Here we use the Profile 1 as an example. Click Connect to establish an Internet connection. 9
-
 1
1 -
2
-
3
-
4
-
5
-
6
-
7
-
8
-
9
-
10
-
 11
11 -
 12
12 -
 13
13 -
 14
14 -
 15
15 -
 16
16 -
 17
17 -
 18
18 -
 19
19 -
 20
20 -
 21
21 -
22
-
23
-
24
-
25
-
26
-
27
-
28
-
29
-
30
-
31
-
32
-
33
-
34
-
35
-
36
-
37
-
38
-
39
-
40
 |
 |
MA180
3.75G HSUPA USB Adapter User Guide
9
Chapter 3. Connect to Network
With both the hardware and software successfully installed into your computer, you can quickly
connect to network following the steps below.
1.
After installation, the utility will automatically appear on your desktop. Click on the icon
to
display the
Network
interface.
Figure 3-1
2. The network parameters will be configured automatically according to the SIM/USIM card
inserted. With successful configuration, a profile name (your ISP name by default) will appear
on the interface. Here we use the Profile 1 as an example. Click
Connect
to establish an
Internet connection.