TP-Link Archer VR400 Archer VR400EU V1 Quick Install Guide - Page 1
TP-Link Archer VR400 Manual
 |
View all TP-Link Archer VR400 manuals
Add to My Manuals
Save this manual to your list of manuals |
Page 1 highlights
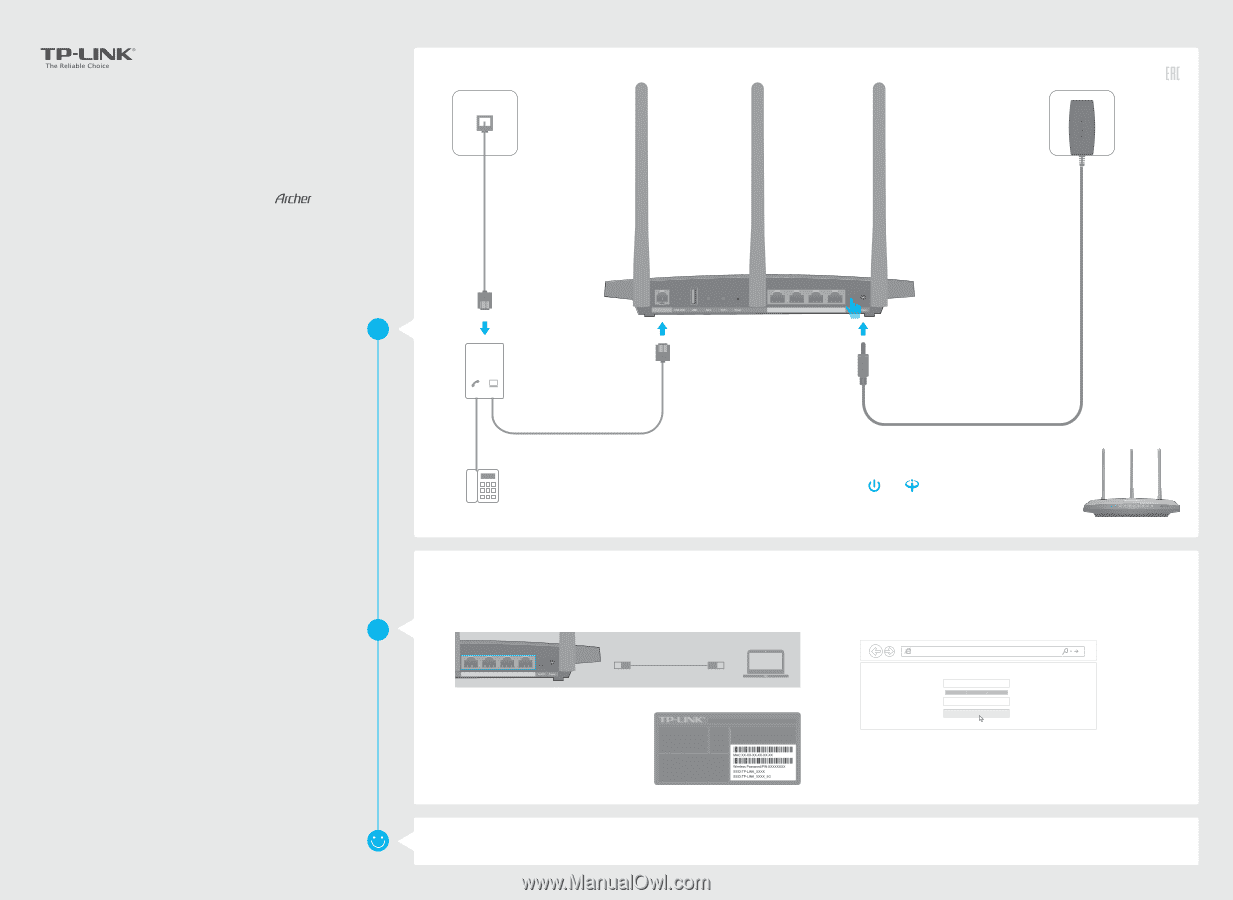
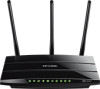
Quick Installation Guide AC1200 Wireless VDSL/ADSL Modem Router Phone Jack VR400 Power Adapter Connect the Hardware Configure the Modem Router DSL Enjoy the Internet LINE 1 DSL Splitter PHONE MODEM Phone Cable DSL 2 Phone (Optional) If you don't need the phone service, just directly connect the modem router to the phone jack with the provided phone cable, then follow steps 3 and 4 to complete the hardware connection. LAN1 LAN2 LAN3 LAN4/WAN Modem Router 3 Push in to turn on the modem router. 4 Verify that the following LEDs turn stable before continuing with the con guration. Power On DSL On Note: The DSL LED takes about 1 to 2 minutes to stabilize. 1 Connecting your computer to the modem router via a wired or wireless connection Wired Ethernet Cable LAN1 LAN2 LAN3 LAN4/WAN Wireless Connect wirelessly by using the SSID (network name) and Wireless Password printed on the product label at the bottom of the modem router. 2 Configuring the modem router via a web browser A Launch a web browser and type in http://tplinkmodem.net or 192.168.1.1. Create a new password (1-15 characters) and click Save. Note: If the login page does not appear, please refer to FAQ->Q1. http://tplinkmodem.net New Password Low Middle High Confirm Password Save B Enter the password you created and click Log in. Note: For subsequent logins, you only need to enter the password that you have created. C Select your Region and Time Zone, then click Next. Follow the step-by-step instructions of the Quick Setup to complete the initial con guration. Now you can enjoy your Internet. If you want more advanced settings, please refer to the User Guide on TP-LINK o cial website at www.tp-link.com.
-
 1
1 -
 2
2
 |
 |