TP-Link RE580D RE580DUS V1 Quick Install Guide
TP-Link RE580D Manual
 |
View all TP-Link RE580D manuals
Add to My Manuals
Save this manual to your list of manuals |
TP-Link RE580D manual content summary:
- TP-Link RE580D | RE580DUS V1 Quick Install Guide - Page 1
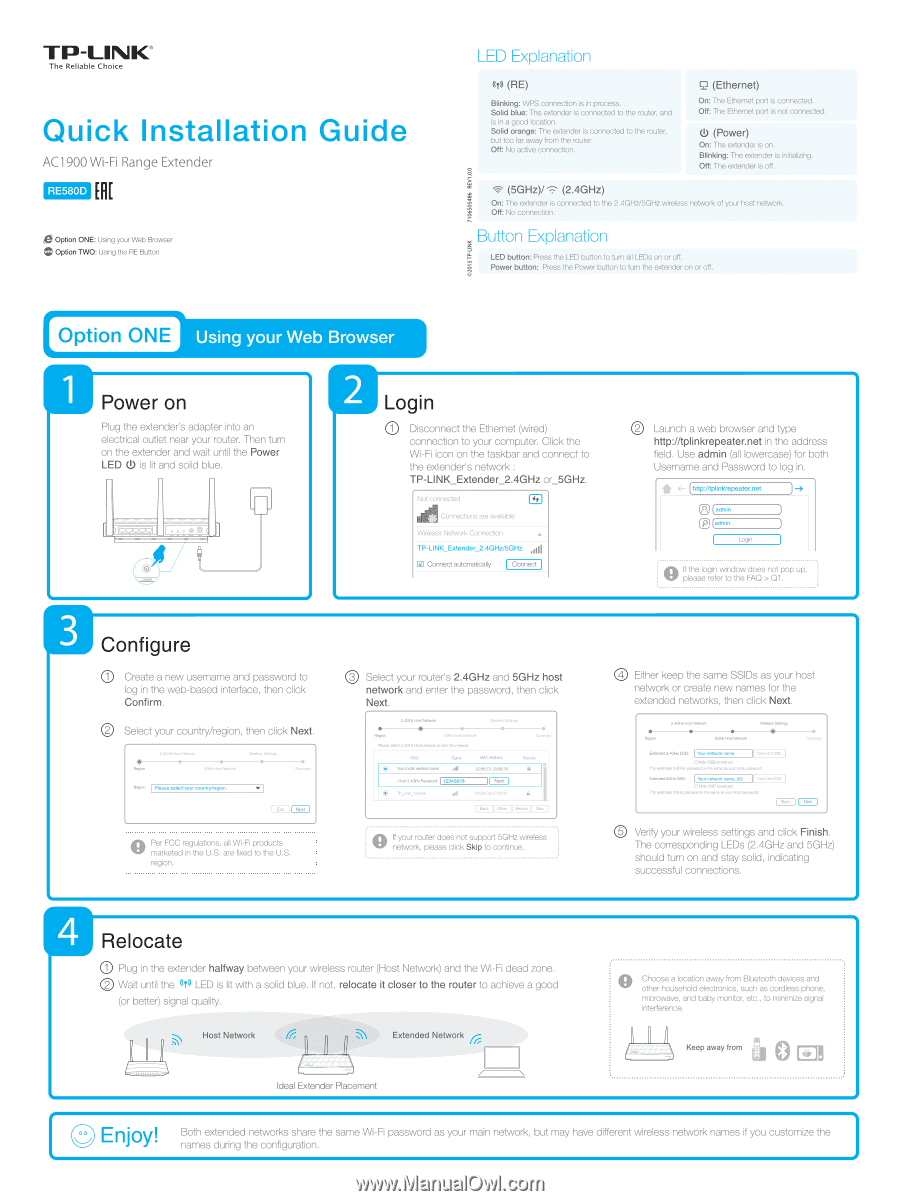
e TP-LINK® The Reliable Choice Quick Installation Guide AC1900 Wi-Fi Range Extender RE580D Option ONE: Using your Web Browser CP Option TWO: Using the RE Button LED Explanation (TO (RE) Blinking: WPS connection is in process. Solid blue: The extender is connected to the router, and is in a good - TP-Link RE580D | RE580DUS V1 Quick Install Guide - Page 2
configuration. Please log into the extender's web management page to check the password and try again. A2. If the 4* LED still doesn't change to solid, please reset the extender and go through the configuration again. Q4. How do I reset the extender? A. While the extender is powered on, use a pin
-
 1
1 -
 2
2
 |
 |
TP-LINK®
The
Reliable
Choice
LED
Explanation
Quick
Installation
Guide
AC1900
Wi-Fi
Range
Extender
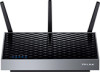
RE580D
Option
ONE:
Using
your
Web
Browser
CP
Option
TWO:
Using
the
RE
Button
Option
ONE
Using
your
Web
Browser
Power
on
Plug
the
extender's
adapter
into
an
electrical
outlet
near
your
router.
Then
turn
on
the
extender
and
wait
until
the
Power
LED
0.)
is
lit
and
solid
blue.
7106505486
REV1.0.0
(TO
(RE)
Blinking:
WPS
connection
is
in
process.
Solid
blue:
Th
e
extender
is
connected
to
the
router,
and
is
in
a
good
location.
Solid
orange:
The
extender
is
connected
to
the
router,
but
too
far
away
from
the
router.
Off:
No
active
connection.
r_
2
(Ethernet)
On:
The
Ethernet
port
is
connected.
Off:
The
Ethernet
port
is
not
connected.
(!)
(Power)
On:
The
extender
is
on.
Blinking:
Th
e
extender
is
initializing.
Off:
The
extender
is
off.
(5GHz)/
(2.4GHz)
On:
The
extender
is
connected
to
the
2.4GHz/5GHz
wireless
network
of
your
host
network.
Off:
No
connection.
Button
Explanation
li
LED
button:
Press
the
LED
button
to
turn
all
LEDs
on
or
off.
Power
button:
Press
the
Power
button
to
turn
the
extender
on
or
off.
r
Login
0
Disconnect
the
Ethernet
(wired)
connection
to
your
computer.
Click
the
Wi-Fi
icon
on
the
taskbar
and
connect
to
the
extender's
network
:
TP-LINK_Extender_2.4GHz
or_5GHz.
Not
connected
Connections
are
available
Wireless
Network
Connection
TP-LINK_Extender_2.4GHz/5GHz
a
id
GE
Connect
automatically
Connect
0
Launch
a
web
browser
and
type
http://tplinkrepeater.net
in
the
address
field.
Use
admin
(all
lowercase)
for
both
Username
and
Password
to
log
in.
*
4—
http://tplinkrepeater.net
-4
LJ
admin
admin
Login
dik
If
the
login
window
does
not
pop
up,
please
refer
to
the
FAQ
>
Q1.
a
Configure
Create
a
new
usemame
and
password
to
log
in
the
web
-based
interface,
then
click
Confirm.
0
Select
your
country/region,
then
click
Next.
Regbn
Region:
2.4GHz
Host
Network
Wi
reless
Settings
5GH.
Host
Network
Please
select
your
country/region.
Dtit
Summery
[Next
.
)
n
Per
FCC
regulations,
all
Wi-Fi
products
Mr
marketed
in
the
U.S.
are
fixed
to
the
U.S.
region.
0
Select
your
router's
2.4GHz
and
5GHz
host
network
and
enter
the
password,
then
click
Next.
2.4GHz
Host
Network
Wireless
Settings
•
e
Region
5GHz
Host
Network
Summary
Please
select
2.4GHz
Host
network
or
skip
this
network.
SSID
Signal
MAC
Address
Security
Your
router
Male.
name
All
30:B5:G1:33:99:76
a
Host
2.4Ght
Password:
[
12345678
][
Next
*
TP_UNt
l
23456
..ill
23:B5G0:30:20:06
a
Beck
Other...][
Rescan][
SO
If
your
router
does
not
support
5GHz
wireless
network,
please
click
Skip
to
continue.
0
Either
keep
the
same
SSIDs
as
your
host
network
or
create
new
names
for
the
extended
networks,
then
click
Next.
2.4GHz
Host
Network
•
Region
Extended
2.4GHz
SSID:
•
5Ghe
Host
Network
Your
network
name
Wireless
Settings
4D
Summery
Copy
Host
SSID
D
Hide
SSID
broadcast
The
extended
2.4GHz
password
is
the
same
as
your
Host
password.
Extended
5GHz
SSID:
Your
network
name_5G
copy
Host
sac
D
Hide
SSID
broadcast
The
extended
5GHz
password
is
the
same
as
your
Host
password.
Back
Next
0
Verify
your
wireless
settings
and
click
Finish.
The
corresponding
LEDs
(2.4GHz
and
5GHz)
should
turn
on
and
stay
solid,
indicating
successful
connections.
Relocate
0
Plug
in
the
extender
halfway
between
your
wireless
router
(Host
Network)
and
the
Wi-Fi
dead
zone.
0
Wait
until
the
4
0
LED
is
lit
with
a
solid
blue.
If
not,
relocate
it
closer
to
the
router
to
achieve
a
good
(or
better)
signal
quality.
Host
Network
Ideal
Extender
Placement
Extended
Network
(
0
Choose
a
location
away
from
Bluetooth
devices
and
other
household
electronics,
such
as
cordless
phone,
microwave,
and
baby
monitor,
etc.,
to
minimize
signal
interference.
Keep
away
from
0
Eli
•
Enjoy!
Both
extended
networks
share
the
same
Wi-Fi
password
as
your
main
network,
but
may
have
different
wireless
network
names
if
you
customize
the
names
during
the
configuration.