TP-Link TL-WR720N TL-WR720N V1 QIG 7106503893 - Page 1
TP-Link TL-WR720N Manual
 |
View all TP-Link TL-WR720N manuals
Add to My Manuals
Save this manual to your list of manuals |
Page 1 highlights
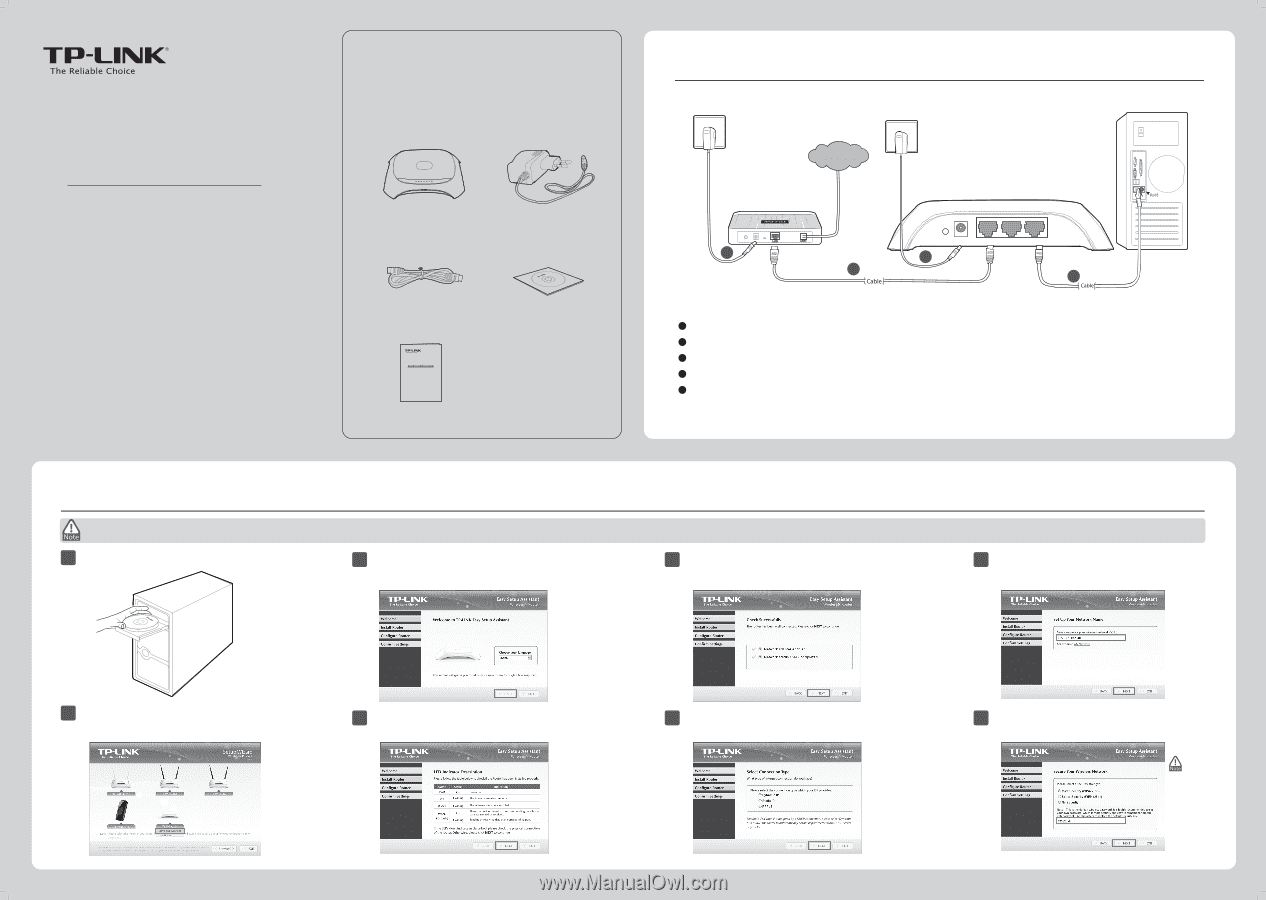
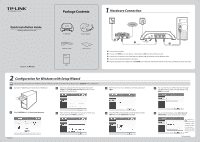
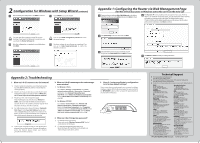
Quick Installation Guide 150Mbps Wireless N Router MODEL NO. TL-WR720N Package Contents TL-WR720N Power Adapter Ethernet Cable 150Mbps Wireless N Router MODEL NO. TL-WR740N/TL-WR741ND QIG Resource CD 1 Hardware Connection Wall Socket Wall Socket Internet Cable/DSL Modem 4 2 WPS/ RESET POWER WAN 1 2 5 3 Computer 1 Power o your modem. 2 Connect the WAN port on your Router to the modem's LAN port with an Ethernet cable. 3 Connect your computer to one of the LAN ports labeled 1~2 on the Router with an Ethernet cable. 4 Power on the modem and wait for one minute . 5 Plug the provided Power Adapter into the POWER jack on the back of the Router and the other end to a standard electrical wall socket. 2 Con guration for Windows with Setup Wizard If you are using a MAC/Linux or a Windows computer without a CD drive to run the mini CD, please refer to Appendix 1 for configuration. 1 Insert the TP-LINK Resource CD into the CD-ROM drive. 3 Select your language from the drop-down menu. Click START and the Easy Setup Assistant will guide you step by step to set up the Router. 5 After the connectivity is checked successfully, please click NEXT. 7 You can rename your wireless network on this page. The default wireless name is TP-LINK_XXXXXX. Click NEXT to continue. 2 SelectTL-WR720Nand click Easy Setup Assistant. 7106503893 4 After con rming the hardware connection and the status of LEDs, please click NEXT to continue. 6 Select the WAN connection type your ISP provides and click NEXT. Here we take Dynamic IP for example. 8 You are recommended to select Most Security (WPA2-PSK) to secure your wireless network. The Router is pre-encrypted. The default wireless password, the same as the PIN code, is printed on the label at the bottom of the Router. (To be continued)
-
 1
1 -
 2
2
 |
 |