TP-Link TL-WR743ND User Guide - Page 20
TL-WR743ND, Primary, Secondary DNS, BSSID, Search, Key type, WEP Index, Auth type, Password, Connect - wireless n access point & client router
 |
UPC - 845973051556
View all TP-Link TL-WR743ND manuals
Add to My Manuals
Save this manual to your list of manuals |
Page 20 highlights
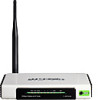
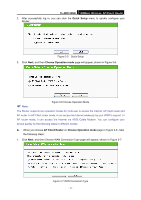
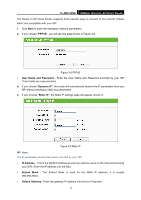
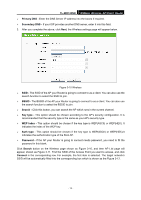
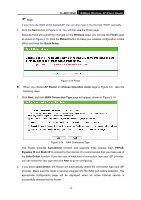
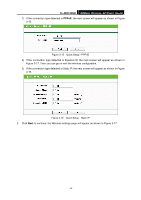
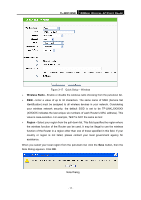
TL-WR743ND 150Mbps Wireless AP/Client Router ¾ Primary DNS - Enter the DNS Server IP address into the boxes if required. ¾ Secondary DNS - If your ISP provides another DNS server, enter it into this field. 3. After you complete the above, click Next, the Wireless settings page will appear below. Figure 3-10 Wireless ¾ SSID - The SSID of the AP your Router is going to connect to as a client. You can also use the search function to select the SSID to join. ¾ BSSID - The BSSID of the AP your Router is going to connect to as a client. You can also use the search function to select the BSSID to join. ¾ Search - Click this button, you can search the AP which runs in the current channel. ¾ Key type - This option should be chosen according to the AP's security configuration. It is recommended that the security type is the same as your AP's security type. ¾ WEP Index - This option should be chosen if the key type is WEP(ASCII) or WEP(HEX). It indicates the index of the WEP key. ¾ Auth type - This option should be chosen if the key type is WEP(ASCII) or WEP(HEX).It indicates the authorization type of the Root AP. ¾ Password - If the AP your Router is going to connect needs password, you need to fill the password in this blank. Click Search button on the Wireless page shown as Figure 3-10, and then AP List page will appear, shown as Figure 3-11. Find the SSID of the Access Point you want to access, and click Connect in the corresponding row. For example, the first item is selected. The target network's SSID will be automatically filled into the corresponding box which is shown as the Figure 3-12. - 13 -
-
 1
1 -
2
-
3
-
4
-
5
-
6
-
7
-
8
-
9
-
10
-
11
-
12
-
13
-
14
-
 15
15 -
 16
16 -
 17
17 -
 18
18 -
 19
19 -
 20
20 -
 21
21 -
 22
22 -
 23
23 -
 24
24 -
 25
25 -
26
-
27
-
28
-
29
-
30
-
31
-
32
-
33
-
34
-
35
-
36
-
37
-
38
-
39
-
40
-
41
-
42
-
43
-
44
-
45
-
46
-
47
-
48
-
49
-
50
-
51
-
52
-
53
-
54
-
55
-
56
-
57
-
58
-
59
-
60
-
61
-
62
-
63
-
64
-
65
-
66
-
67
-
68
-
69
-
70
-
71
-
72
-
73
-
74
-
75
-
76
-
77
-
78
-
79
-
80
-
81
-
82
-
83
-
84
-
85
-
86
-
87
-
88
-
89
-
90
-
91
-
92
-
93
-
94
-
95
-
96
-
97
-
98
-
99
-
100
-
101
-
102
-
103
-
104
-
105
-
106
-
107
-
108
-
109
-
110
-
111
-
112
-
113
-
114
-
115
-
116
 |
 |