TP-Link TL-WR843ND TL-WR843ND V1 QIG 7106503962 - Page 1
TP-Link TL-WR843ND Manual
 |
View all TP-Link TL-WR843ND manuals
Add to My Manuals
Save this manual to your list of manuals |
Page 1 highlights
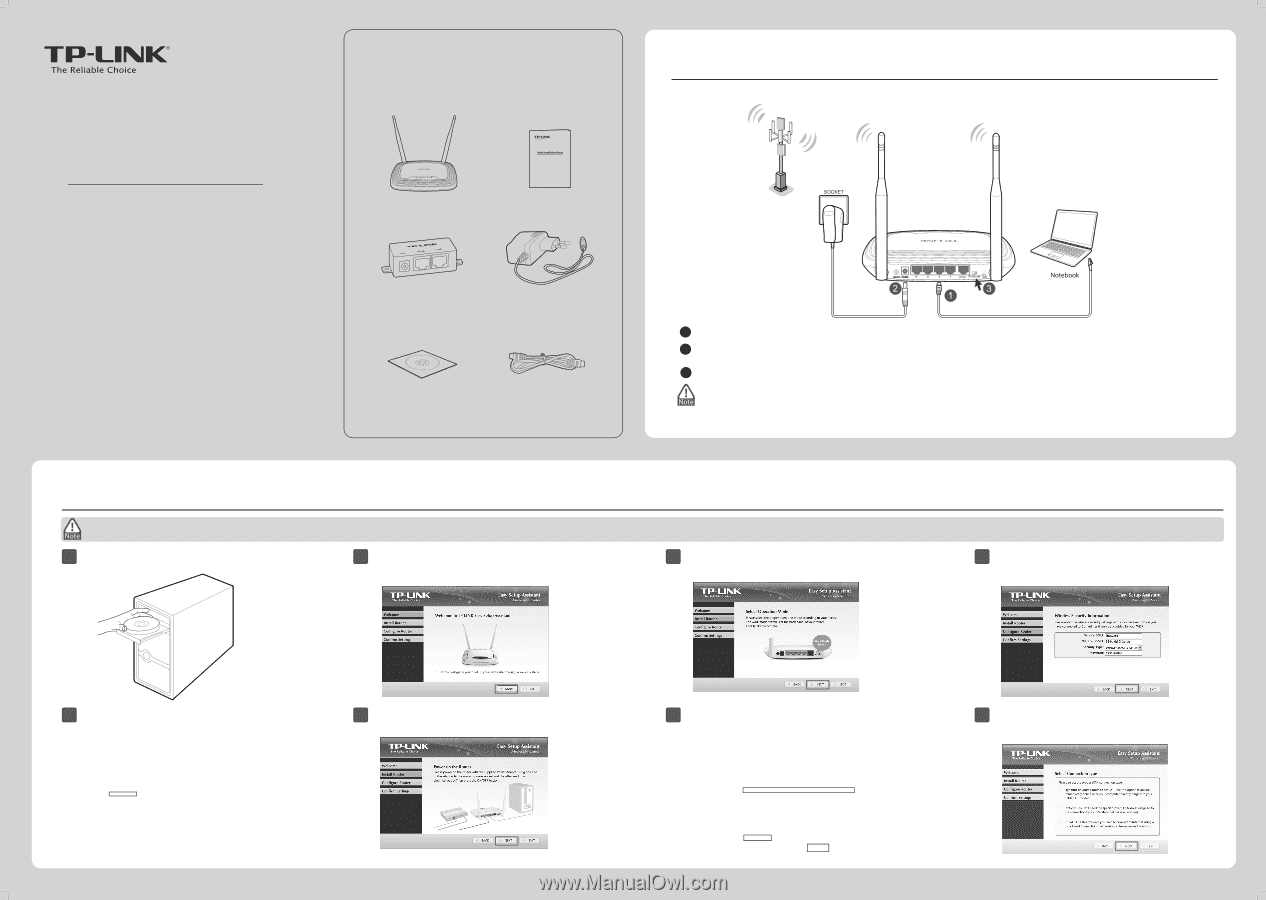
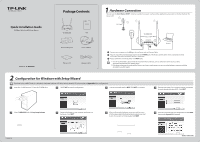
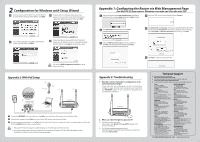
Quick Installation Guide 300Mbps Wireless AP/Client Router Package Contents 3 4 TL-WR843ND 300Mbps Wireless AP/Client Router MODEL NO. TL-WR843ND QIG 1 Hardware Connection Here we take the Client Router (WISP)Ḥmode for example. If you want to achieve other applications, please refer to the User Guide on the resource CD. WISP Signal TL-WR843ND MODEL NO. TL-WR843ND Passive PoE Injector Power Adapter Resource CD Ethernet Cable WPS/ INTERNET ROUTER WISP RESET 1 Connect your computer to the LAN port of your Router with an Ethernet Cable. 2 Plug one end of the provided power adapter into the POWER jack of the Router, and the other end to a standard electrical wall socket. Then press the ON/OFF button of the Router. 3 Please con rm the work mode switch is in WISP mode. 1. You are recommended to place the Router away from electrical devices, such as ceiling fans, home security systems, microwave and the base for a cordless phone. 2. If the distance between the outlet and the Router is too long to supply power, you can set up the hardware connection with the provided Passive PoE Injector. 2 Con guration for Windows with Setup Wizard If you are using a MAC/Linux or a windows computer without a CD drive to run the mini CD, please refer to Appendix 1 for configuration. 1 Insert the TP-LINK Resource CD into the CD-ROM drive. 3 Click START to start the con guration. 5 Turn the work mode switch to WISP. Click NEXT to continue. 7 Enter the password of your wireless network. Sometimes it may be provided by your WISP. Cllick NEXT. 2 Select TL-WR843ND and click Easy Setup Assistant. 4 Connect the Router to your computer and power on the Router. Click NEXT. 6 After con rming the hardware connection and the status of LEDs, please select the target wireless network you want to join. You can also set it mannually. Click NEXT. 8 Select the connection type your ISP provides and click NEXT. Here we take Dynamic IP for example. 7106503962 (To be continued)
-
 1
1 -
 2
2
 |
 |