TRENDnet TPL-310AP Quick Installation Guide - Page 5
Con the TPL-310AP - installation
 |
UPC - 710931506150
View all TRENDnet TPL-310AP manuals
Add to My Manuals
Save this manual to your list of manuals |
Page 5 highlights
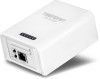
2. Configure the TPL-310AP Note: When installing for the first time, it is required that you configure the Access Point from a wired computer. Assign a Static IP address to your computer's network adapter in the subnet of 192.168.10.x. Since the Access Point's default IP address is 192.168.10.100, make sure no other network devices are assigned an IP address of 192.168.10.100. (Refer to Troubleshooting section on how to configure TCP/IP settings on your PC.) 1. Plug the TPL-310AP into an available power outlet. The TPL-310AP should be within reach of your computer's network cable. Outlet 2. Connect a network cable from the TPL-310AP's network port into your computer's network port. 3. Move the Power switch to the "On" position. 4. Assign a Static IP address to your computer's network adapter in the subnet of 192.168.10.x. (Refer to Troubleshooting section on how to configure TCP/IP settings on your PC.) 5. Open your web browser, type http://192.168.10.100 in the Address bar, and then press Enter. 6. Enter the User Name and password and then click OK. Default Settings: User name: admin Password: admin Note: User name and Password are case sensitive. 3
-
 1
1 -
 2
2 -
 3
3 -
 4
4 -
 5
5 -
 6
6 -
 7
7 -
 8
8 -
 9
9 -
 10
10 -
 11
11 -
12
-
13
-
14
-
15
-
16
-
17
-
18
-
19
-
20
-
21
 |
 |
