TRENDnet TV-IP321PI Quick Installation Guide - Page 6
Using the TV-IP321PI with a PoE switch TPE-S44
 |
View all TRENDnet TV-IP321PI manuals
Add to My Manuals
Save this manual to your list of manuals |
Page 6 highlights
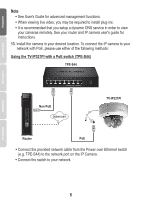
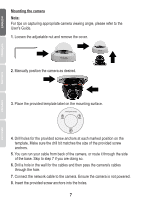
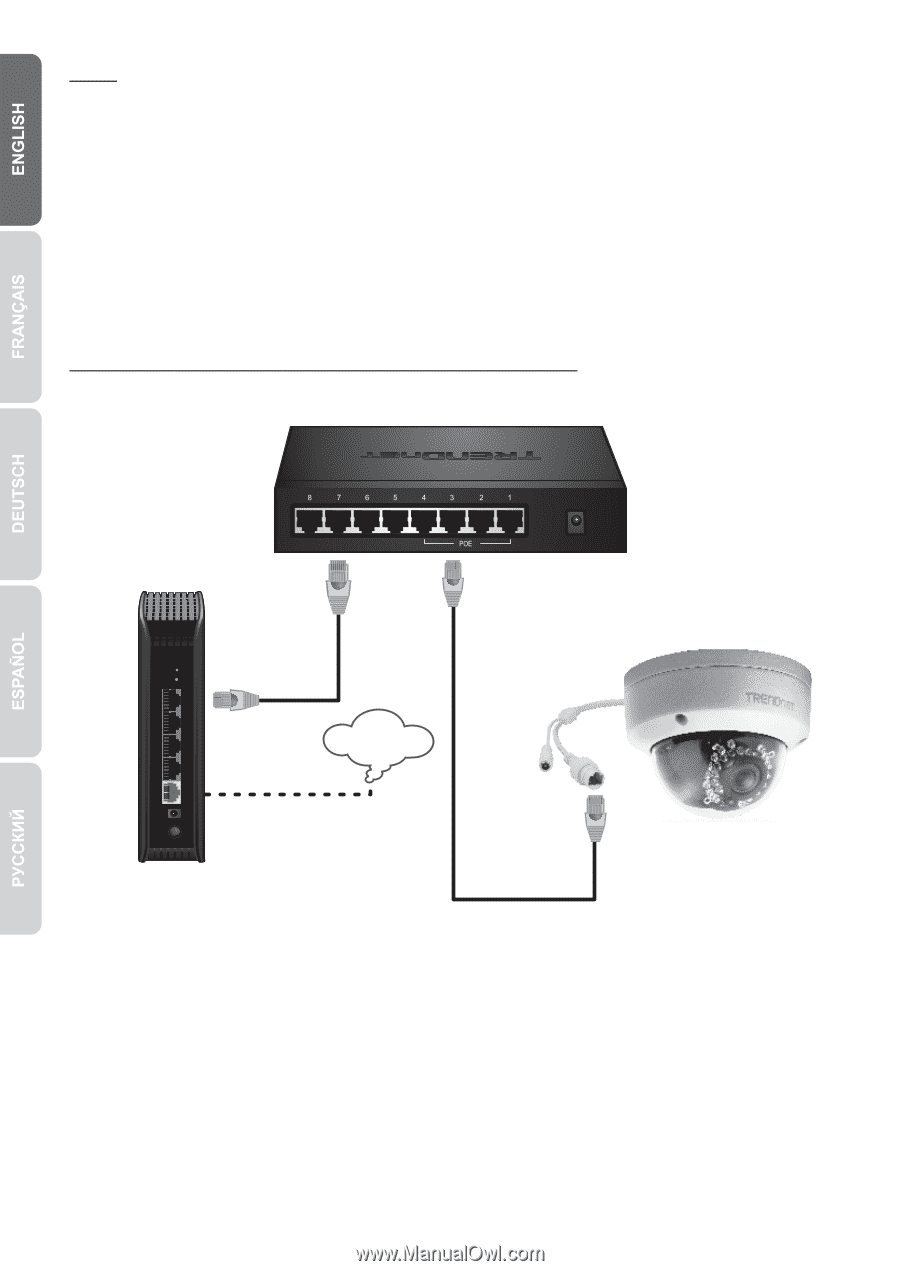
Note Ÿ See User's Guide for advanced management functions. Ÿ When viewing live video, you may be required to install plug-ins. Ÿ It is recommended that you setup a dynamic DNS service in order to view your cameras remotely. See your router and IP camera user's guide for instructions. 13. Install the camera in your desired location. To connect the IP camera to your network with PoE, please use either of the following methods: Using the TV-IP321PI with a PoE switch (TPE-S44) TPE-S44 Non PoE Internet TV-IP321PI Router PoE Ÿ Connect the provided network cable from the Power over Ethernet switch (e.g. TPE-S44) to the network port on the IP Camera. Ÿ Connect the switch to your network. 5
-
 1
1 -
 2
2 -
 3
3 -
 4
4 -
 5
5 -
 6
6 -
 7
7 -
 8
8 -
 9
9 -
 10
10 -
 11
11 -
 12
12 -
13
-
14
 |
 |
5
Note
Ÿ
See User's Guide for advanced management functions.
Ÿ
When viewing live video, you may be required to install plug-ins.
Ÿ
It is recommended that you setup a dynamic DNS service in order to view
your cameras remotely. See your router and IP camera user's guide for
instructions.
13
. Install the camera in your desired location. To connect the IP camera to your
network with PoE, please use either of the following methods:
Using the TV-IP321PI with a PoE switch (TPE-S44)
Ÿ
Connect the provided network cable from the Power over Ethernet switch
(e.g. TPE-S44) to the network port on the IP Camera.
Ÿ
Connect the switch to your network.
TPE-S44
TV-IP321PI
PoE
Internet
Router
Non PoE