Tanaka TCS40EA18 Owner's Manual - Page 11
Felling, Trunk, Diameter, Twice, Guide, Length, Warning, Limbing, Thick, Branches, Cross, Cutting/
 |
View all Tanaka TCS40EA18 manuals
Add to My Manuals
Save this manual to your list of manuals |
Page 11 highlights
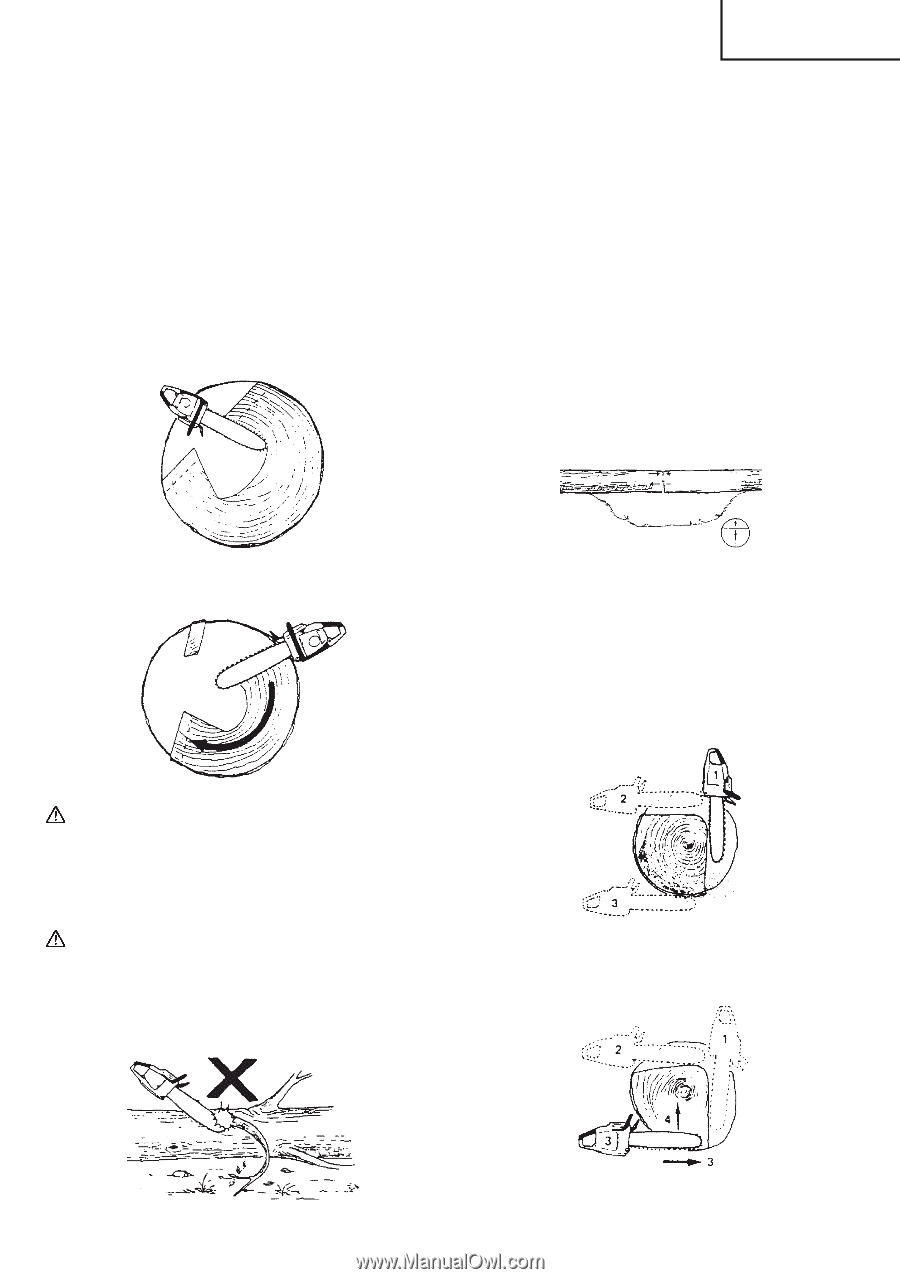
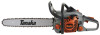
English 20. Felling direction 21. 45° minimum notch opening 22. Hinge 23. Felling cut Never saw completely through the trunk. Always leave a hinge. The hinge guides the tree. If the trunk is completely cut through, you lose control over the felling direction. Insert a wedge or a felling lever in the cut well before the tree becomes unstable and starts to move. This will prevent the guide bar from binding in the felling cut if you have misjudged the falling direction. Make sure no people have come into the range of the falling tree before you push it over. FELLING CUT, TRUNK DIAMETER MORE THAN TWICE GUIDE BAR LENGTH Cut a large, wide notch. Then cut a recess into the center of the notch. Always leave a hinge on both sides of the center cut. (Fig. 22) Stand on the left side of the trunk. Maintain a secure footing and rest the saw on the trunk. Hold the saw close to you so that you are in full control of it. Keep well away from the chain. Move only when the trunk is between you and the chain. Watch out for spring back of limbs under tension. LIMBING THICK BRANCHES When limbing thick branches, the guide bar may get pinched easily. Branches under tension often snap up, so cut troublesome branches in small steps. Apply the same principles as for cross cutting. Think ahead and be aware of the possible consequences of all your actions. CROSS CUTTING/BUCKING Before starting to cut through the log, try to imagine what is going to happen. Look out for stresses in the log and cut through it in such a manner that the guide bar will not get pinched. CROSS CUTTING LOGS, PRESSURE ON TOP Take a firm stance. Begin with an upper cut. Do not cut too deeply, about 1/3 of the log diameter is enough. Finish with a bottom cut. The saw cuts should meet. (Fig. 25) 26 24 27 28 25 Fig. 22 Complete the felling cut by sawing around the trunk as in the Fig. 23. 29 Fig. 25 24. Relieving cut 25. Cross cut 26. Pressure on top 27. Pressure side 28. Tension side 29. Relative depth of saw cuts THICK LOG, LARGER THAN GUIDE BAR LENGTH Begin by cutting on the opposite side of the log. Pull the saw towards you, followed by previous procedure. (Fig. 26) Fig. 23 WARNING These methods are extremely dangerous because they involve the use of the nose of guide bar and can result in kickback. Only properly trained professionals should attempt these techniques. LIMBING Limbing is removing the branches from a feller tree. WARNING A majority of kickback accidents occur during Iimbing. Do not use the nose of the guide bar. Be extremely cautious and avoid contacting the log, other limbs or objects with the nose of the guide bar. Be extremely cautious of limbs under tension. They can spring back towards you and cause loss of control resulting in injury. (Fig. 24) Fig. 26 If the log is lying on the ground make a boring cut to avoid cutting into the ground. Finish with a bottom cut. (Fig. 27) Fig. 24 Fig. 27 11
-
 1
1 -
2
-
3
-
4
-
5
-
 6
6 -
 7
7 -
 8
8 -
 9
9 -
 10
10 -
 11
11 -
 12
12 -
 13
13 -
 14
14 -
 15
15 -
 16
16 -
17
-
18
-
19
-
20
-
21
-
22
-
23
-
24
-
25
-
26
-
27
-
28
-
29
-
30
-
31
-
32
-
33
-
34
-
35
-
36
-
37
-
38
-
39
-
40
-
41
-
42
-
43
-
44
-
45
-
46
-
47
-
48
-
49
-
50
-
51
-
52
 |
 |