Thermador PODC302 Quick Reference Guide - Page 2
Assembling the Rotisserie, Trussing Poultry for the Rotisserie
 |
View all Thermador PODC302 manuals
Add to My Manuals
Save this manual to your list of manuals |
Page 2 highlights
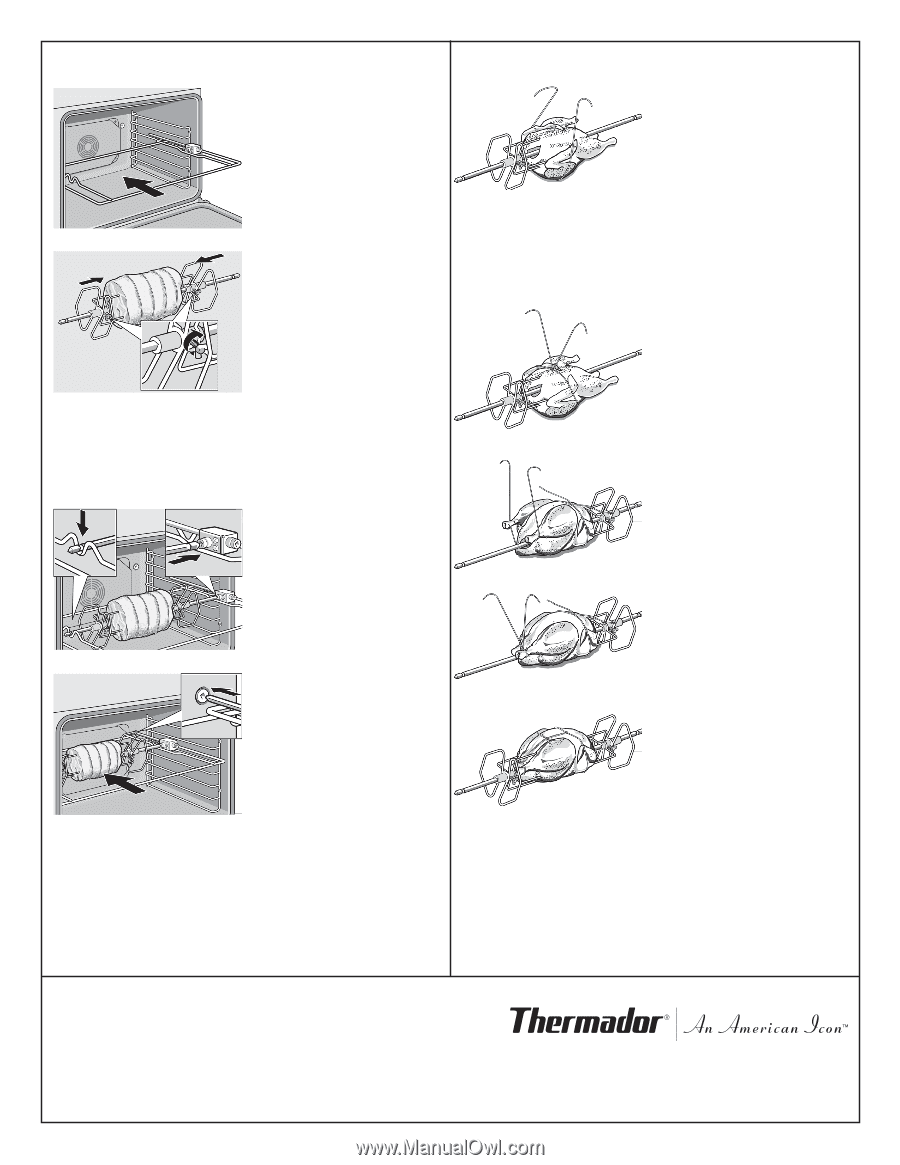
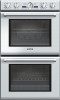
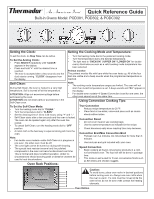
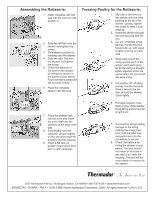
Assembling the Rotisserie: 1. Insert rotisserie rack half way into the oven on rack position 4. 2. Slide the left fork onto the skewer and tighten the screw. 3. Slide meat or poultry for roasting onto the skewer. 4. Slide the right fork onto the skewer and tighten the screw. 5. Check the balance of the food on the skewer by rolling the skewer in the palms of your hands. Food not evenly balanced will not cook evenly. 6. Place the rotisserie skewer onto the rack. Trussing Poultry for the Rotisserie: 1. Slip one of the forks on the skewer with the tines pointing to the tip of the skewer. Loosely tighten the screw to keep it from slipping. 2. Insert the skewer through the bird securing with the fork. 3. Cut 24" of kitchen string and lay it under the bird, breast side up, with equal lengths of string on each side. 4. Wrap each end of the string around each of the wings; catch each wing tip as the string is brought tightly together at the top and knotted. Do not cut off the extra string. 5. Cut another 20" of string and lay it under the back. Wrap it around the tail then around the skewer. Cinch tightly. 7. Place the skewer rack into the oven and insert the drive shaft into the opening on the back oven wall. 8. If necessary, turn the rotisserie skewer slightly so that the drive shaft fits properly into the opening. 9. Insert a flat rack on position 0 and insert broil pan to catch drippings. 6. Pull legs forward; cross them on top of the skewer; bring string around and tie a tight knot. 7. Connect the string holding the legs to the string holding the wings; then knot. Add the other fork and push tines into the drumsticks to secure. 8. Check the balance by rolling the skewer in your palms. The bird should not rotate or be loose in any way. If so, redo the trussing. The bird will not cook evenly if it moves on the skewer. 5551 McFadden Avenue, Huntington Beach, CA 92649 • 800-735-4328 • www.thermador.com 9000202740 • 5V09RX • Rev A • 12/06 © BSH Home Appliances Corporation, 2006 • All rights reserved • Litho U.S.A.
-
 1
1 -
 2
2
 |
 |