Thermador PRG364WLG Instructions for Use
Thermador PRG364WLG Manual
 |
View all Thermador PRG364WLG manuals
Add to My Manuals
Save this manual to your list of manuals |
Thermador PRG364WLG manual content summary:
- Thermador PRG364WLG | Instructions for Use - Page 1
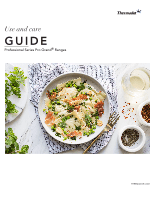
Use and care GUIDE Professional Series Pro Grand® Ranges THERMADOR.COM - Thermador PRG364WLG | Instructions for Use - Page 2
4 Table de matières (Français 58 Índice de materias (Español 120 Models | Modèles | Modelos: PRD364WDGU/C PRD364WIGU/C PRD364WLGU/C PRD366WGU/C PRD484WCGU/C PRD486WDGU/C PRD486WIGU/C PRD486WLGU/C PRG364WDG PRG364WLG PRG366WG PRG486WDG PRG486WLG THERMADOR.COM - Thermador PRG364WLG | Instructions for Use - Page 3
and smart devices. This module is integrated at the factory, under direct control of BSH Home Appliances Corporation, and is not user serviceable or upgradable. At least 20 cm separation distance should be maintained from device to user. FCC COMPLIANCE STATEMENT CAUTION: Changes or modifications - Thermador PRG364WLG | Instructions for Use - Page 4
Guide. You will find the answers to all of your questions as well as some very important safety information. Pay special attention to the Important Safety Instructions located at the beginning of the manual. Your Thermador reportez vous "Avant d'appeler le service technique"). Nous savons bien que - Thermador PRG364WLG | Instructions for Use - Page 5
safety instructions 5 service 54 Troubleshooting 54 Service information 55 Remote costumer service connection 55 Product registration 55 Statement of limited product warranty 56 Support you to important information and/or tips. This THERMADOR® appliance is made by BSH Home Appliances Corporation 1901 - Thermador PRG364WLG | Instructions for Use - Page 6
9 IMPORTANT SAFETY INSTRUCTIONS READ AND SAVE THESE INSTRUCTIONS Please read carefully Installer: Please leave this guide with this unit for the owner. Owner: Please retain this guide for future reference. Use the appliance only for its intended purpose as described in this manual. WARNING When - Thermador PRG364WLG | Instructions for Use - Page 7
a tag to the service panel. Ensure proper installation and servicing. Follow the Installation Instructions provided with this product 5 minutes for the gas to dissipate before lighting the burner manually. To light the burners manually, carefully hold a lighted match to the burner ports and turn - Thermador PRG364WLG | Instructions for Use - Page 8
. Always disconnect the electrical plug from the wall receptacle before servicing this unit. See the Installation Instructions for electrical requirements and grounding instructions. Have the installer show you where the electric circuit breaker and the gas supply shut off valve are located so - Thermador PRG364WLG | Instructions for Use - Page 9
READ AND SAVE THESE INSTRUCTIONS General safety WARNING To reduce the risk of injury to persons, in the event of a range top grease fire, observe the following: • Smother flames with a - Thermador PRG364WLG | Instructions for Use - Page 10
READ AND SAVE THESE INSTRUCTIONS Never leave the appliance unattended when using high flame settings. only the bottom of the pan and does not extend beyond the bottom of the pan. This instruction is based on safety considerations. Use caution to ensure that drafts like those from forced air vents - Thermador PRG364WLG | Instructions for Use - Page 11
"flaming" liquor or other spirits on the appliance, follow manufacturer's instructions. Use caution when cooking foods with high alcohol content (e.g. rum, This type of ventilation system may cause ignition and combustion problems with the appliance resulting in personal injury, property damage, - Thermador PRG364WLG | Instructions for Use - Page 12
1 Island trim included or low backguard ordered separately (See Installation Instructions concerning spacing behind the range when using the range with the island (If additional leg covers are required, they may be ordered from the service center by calling 1-800-735-4328 at no charge for up to one - Thermador PRG364WLG | Instructions for Use - Page 13
9 Rack positions Gas oven(s) interior 1 23 4 1 23 4 5 16 7 6 8 9 10 5 1 Oven interior light 2 Broil igniter 3 Infrared broil burner 4 Oven thermostat 5 Rack guides 10 9 8 6 Meat probe outlet 7 Rack positions 8 Convection fan cover 9 Bake burner (hidden) 10 Oven racks Page. 12 - Thermador PRG364WLG | Instructions for Use - Page 14
Control panel identification NOTE: Not all knobs, modes, and features are available to all models. ExtraLow® POWERBOOST® Standard Griddle Grill Oven temp selector Induction Oven digital display 1 06:30 2 TIMERS SETTINGS ENTER 3 4 5 6 1 Digital display screen 2 Left - Thermador PRG364WLG | Instructions for Use - Page 15
Top surface identification Model 364 with induction 1 3 5 2 4 Model 364 with grill 1 4 3 2 5 1 ExtraLow burner 2 ExtraLow and PowerBoost burner 3 Standard burner 4 Standard burner 5 Induction Natural 15000, LP 12000 BTU Natural 22000, LP 18000 BTU Natural 15000, LP 12000 BTU Natural - Thermador PRG364WLG | Instructions for Use - Page 16
Model 486 with induction 1 3 5 7 2 4 6 Model 486 with griddle 1 3 2 4 6 5 7 1 ExtraLow burner 2 ExtraLow and PowerBoost burner 3 Standard burner 4 Standard burner 5 Standard burner 6 Standard burner 7 Induction Natural 15000, LP 12000 BTU Natural 22000, LP 18000 BTU Natural 15000, LP - Thermador PRG364WLG | Instructions for Use - Page 17
safety hooks under the front of the rack guides. Data rating label • Record the model and serial number. • The model and serial number must be provided when calling customer support for assistance. • Register your BSH product to ensure timely service and access to your product related information - Thermador PRG364WLG | Instructions for Use - Page 18
To install flat racks 1. Grasp rack firmly on both sides and insert rack. 2. Tilt rack up to allow stop into rack guide. Oven operation 9 WARNING To help prevent burns, never remove or reposition the oven racks while the oven is ON or while the oven is cooling. - Thermador PRG364WLG | Instructions for Use - Page 19
placed on the burner bases for the cooktop to function properly. If the burner cap is not properly placed, one or more of the following problems may occur: • Burner flames are too high. • Flames shoot out of burners. • Burners do not ignite. • Burner flames light unevenly. • Burner emits gas odor - Thermador PRG364WLG | Instructions for Use - Page 20
Control knobs The control knobs for two sealed gas burners, one in front and one in the rear, are located directly in front of and below the pair of burners on the control panel. Operation of the burners To turn on the burners 1. Press in on the knob and turn it counter-clockwise HI. - The igniter - Thermador PRG364WLG | Instructions for Use - Page 21
the event of a power failure, turn all knobs to the OFF position. Only the standard burners can be lit manually. • In the event of a power failure, only the standard burners can be manually lit. It is necessary to light each one individually. • If the rangetop is being used when the power failure - Thermador PRG364WLG | Instructions for Use - Page 22
Cookware recommendations 9 WARNING To avoid risk of serious injury, damage to appliance or cookware, please observe the following: • Bakeware, such as large casserole pans, cookie sheets, etc. should never be used on the rangetop. • Placement of large stock pots should be staggered when used on the - Thermador PRG364WLG | Instructions for Use - Page 23
Round bottom woks must be used with a support ring. • The wok pan and the porcelain-coated cast iron wok support ring must be purchased separately. Canners and cooking recommendations • Use the chart beginning on page 23 as a guide. The settings you use will vary depending on the pans selected and - Thermador PRG364WLG | Instructions for Use - Page 24
Surface burner cooking recommendations Food Start setting Finish setting standard burners Finish setting XLO® burners Beverages MED - heat milk, cover LO - finish heating XLO - keep warm, cover Cocoa Breads MED - preheat skillet French toast, pancakes, grilled sandwiches LO to MED - - Thermador PRG364WLG | Instructions for Use - Page 25
Food Start setting Finish setting standard burners Finish setting XLO® burners Simmering: Stewed chicken, corned beef, tongue, etc. HI - cover, bring liquid to a boil XLO - to simmer slowly XLO - to hold, cover Pastas Macaroni, noodles, spaghetti HI - bring water to a boil, MED HI to HI - to - Thermador PRG364WLG | Instructions for Use - Page 26
never operate the griddle without the griddle plate installed. Never use the griddle in a manner that is not prescribed by the Use and Care Guide. NOTE: Not available on all models. Griddle widths vary. A maple chopping block and stainless steel cover are available as accessories and are purchased - Thermador PRG364WLG | Instructions for Use - Page 27
12'' griddle cooking recommendations Food * Setting Eggs 325° - 350°F Bacon, breakfast sausage 450° - 475°F Toasted sandwiches 375° - 400°F Boneless chicken breasts 425° - 450°F Boneless pork chops, 1'' (25.4 mm) 425° - 450°F Steaks, 1'' (25.4 mm) thick 450° - 475°F Ground beef - Thermador PRG364WLG | Instructions for Use - Page 28
help regain the griddle's non-stick properties. For optimal performance and long life of your griddle plate, follow these simple cleaning and seasoning instructions. NOTE: 24'' griddles will not fit in the oven cavity for seasoning. Therefore, care should be taken not to overheat and damage their - Thermador PRG364WLG | Instructions for Use - Page 29
is easy to clean. A non-stick cast iron griddle plate is available as an accessory and may be purchased separately. See the instructions that come with the griddle plate accessory for more details. 6 4 3 2 5 1 1 Grill housing 2 Drip tray 3 Briquette basket 4 Ceramic briquettes 5 Heating element (x2 - Thermador PRG364WLG | Instructions for Use - Page 30
elements (5) down. The grill heating elements must lie flat. Supports should rest inside of side notches. 6. Install the grill also be cleaned periodically as needed and as recommended by the Use and Care Guide as well as surrounding surfaces. • Keep a fire extinguisher nearby and accessible. - Thermador PRG364WLG | Instructions for Use - Page 31
Grill cooking recommendations IMPORTANT: • GRILL SHOULD NOT BE OPERATED WITHOUT PROPER VENTILATION. • Foods with excessive fat or grease should not be prepared on an indoor grill. Grilling foods with high fat content (certain types of ground beef, sausage, etc) increases the chances of smoke and - Thermador PRG364WLG | Instructions for Use - Page 32
Using the oven Symbols and descriptions Symbol/mode Definitions and recommendations Electric Gas Electric Gas main main aux. aux. Bake Cooks with dry, heated air. Variety of foods, such as cakes, cookies, pastries, quick breads, quiche and casseroles. Conv bake Similar to bake, - Thermador PRG364WLG | Instructions for Use - Page 33
Symbol is displayed during and after the self-clean mode when the door is locked. Symbol is displayed if customer service is connected during remote access. Electric Gas Electric Gas main main aux. aux. Initial start-up Start-up settings The time of day, language and - Thermador PRG364WLG | Instructions for Use - Page 34
menu. The Home Connect app must first be successfully installed on a mobile device. See the section "Setting up Home Connect™" on page 45 for full instructions on how to install the Home Connect app. Setting up Home Connect You can start the Home Connect assistant to connect to the Home Connect - Thermador PRG364WLG | Instructions for Use - Page 35
require longer baking times. This mode is not recommended for baked goods. • The unit will continue to run the fast preheat indefinitely until the user manually changes it in the settings, or until the unit loses power, in which case fast preheat will need to be reset. • Fast preheat will also - Thermador PRG364WLG | Instructions for Use - Page 36
modes except self-clean. • By default, the temperature is set at 0°. • The unit will continue to run the input offset value indefinitely until the user manually changes it, or until the unit loses power, in which case offset will need to be reset. To set offset 1. Begin from the STANDBY mode - Thermador PRG364WLG | Instructions for Use - Page 37
To program the meat probe 1. Insert the plug end into the probe outlet in the oven wall and insert the meat probe end into the meat. b a c d a. Probe c. Outlet b. Plug d. Cable 2. Close the oven door. 3. Turn the MODE and TEMPERATURE knobs to your desired settings. 4. Press the right ( or ) to - Thermador PRG364WLG | Instructions for Use - Page 38
• All food should be placed in the oven before the Sabbath begins, since none may be placed in the oven during the Sabbath. Please note that easily perishable foodstuffs must not be left in the oven for too long. • The oven temperature should not be turned on, adjusted, or turned off while observing - Thermador PRG364WLG | Instructions for Use - Page 39
availability of Home Connect services in your country. Home Connect services are not available in Ensure that you follow the safety instructions in this instruction manual and that you comply with these rely on the instructions in the latest version of the Home Connect app to guide you through the - Thermador PRG364WLG | Instructions for Use - Page 40
Getting the most out of your appliance Oven rack positions Rack level positions in the oven are numbered on the front frame like an elevator. Number one level is the lowest and number five level is at the top. Main oven two rack baking Levels 2 and 5 dual fuel 2 and 4 gas Bake or conv bake mode - Thermador PRG364WLG | Instructions for Use - Page 41
cooking times will vary. For accurate information, write the Extension Service, Colorado State University, Fort Collins, Colorado 80521. There may be a cost for the guides. Specify which high altitude food preparation guide you prefer: general information, cakes, cookies breads, etc. Condensation It - Thermador PRG364WLG | Instructions for Use - Page 42
Utensils • Your appliance comes with a large two-piece broiler pan. The slotted grid allows drippings to flow into the lower pan, away from the intense heat of the broil element, minimizing spattering, smoking, and the chance of a grease fire. DO NOT cover the slotted grid (top) with aluminum foil. - Thermador PRG364WLG | Instructions for Use - Page 43
One rack convection baking Level Conv bake mode 3 -- When baking on one rack, best results are obtained in the bake mode. 2 -- Roasting a turkey or a large piece of meat. Two rack convection baking Levels Conv bake mode 2 and 4 -- --- Use for cakes, cookies, biscuits, and other baked - Thermador PRG364WLG | Instructions for Use - Page 44
True convection About true convection True convection cooks with heat from a third element behind the back wall of the oven. The heat is circulated throughout the oven by the convection fan. Dual fuel levels True conv mode 4 and 5 -- Cookies 2, 3, and 4 -- Cookies 1, 3, and 5 -- Pastries and - Thermador PRG364WLG | Instructions for Use - Page 45
temperatures that foods must reach to be considered safe to eat, as determined by the U. S Department of Agriculture Food Safety and Inspection Service, are as follows: Egg dishes, casseroles 160°F (72°C) Leftovers 165°F (74°C) Ground beef, veal, lamb, or pork 160°F (72°C) Beef, veal, lamb - Thermador PRG364WLG | Instructions for Use - Page 46
: Please ensure that you follow the safety instructions given at the beginning of this instruction manual and that these are also observed when operating login details here: Network name (SSID Password (Key The app will guide you through the steps of adding your appliance to Home Connect. Step - Thermador PRG364WLG | Instructions for Use - Page 47
button on your router. -- Please consult your router's manual to locate the WPS button. -- The app will the app on your mobile device and follow the instructions in the app. 2. The login process is updated (e.g. for the purpose of optimization, troubleshooting or security updates). To do this, you - Thermador PRG364WLG | Instructions for Use - Page 48
imperative that all cleaning products be used in strict accordance with the instructions on its package. About self-clean • The self-cleaning mode of THE OVEN TO SELF-CLEAN • Remove all utensils. • Remove racks and rack guides. • Clean the oven front frame and outer door edges. • Wipe up large - Thermador PRG364WLG | Instructions for Use - Page 49
. 1. Turn the mode knob to OFF. 2. Turn the temperature knob to OFF. To set end time of self-clean 1. Remove all utensils, racks, and rack guides. Ensure the oven door is shut. 2. Turn the mode knob to SELF CLEAN. 3. Press the right ( or ) to set the desired clean level and press - Thermador PRG364WLG | Instructions for Use - Page 50
back into the grill before using the grill again. • New ceramic briquettes can be purchased from the Thermador eShop (order number PABRICKBKN). See the back cover for support information. Door(s) / stainless steel 9 CAUTION: Ceramic briquettes must be replaced when they begin to turn black. This - Thermador PRG364WLG | Instructions for Use - Page 51
Steel Liquid Cleaner -- Cleaner polish: Stainless Steel Magic® to protect the finish from staining and pitting; enhances appearance. -- Thermador Stainless Steel Conditioner (00576697) -- For hard water spots use household vinegar. For heat discoloration; rinse and dry immediately: -- Barkeepers - Thermador PRG364WLG | Instructions for Use - Page 52
Part/material Griddle / aluminum with • non-stick coating • • • • Griddle grease tray • • • Grill grates / porcelain • enamel on cast iron • • • • Igniters / ceramic • • Cleaning notes NEVER flood a hot griddle with cold water. This can warp or crack the aluminum plate. DO NOT - Thermador PRG364WLG | Instructions for Use - Page 53
and dry immediately: -- Hot water and detergent -- Bar Keeper's Friend® -- Vinegar and water -- Soft Scrub® -- Bon-ami® Oven racks and rack guides • Some commercial oven cleaners cause darkening and discoloration. Test the cleaner on a small part of the rack and check for discoloration before - Thermador PRG364WLG | Instructions for Use - Page 54
bulb in any oven. Call Thermador Customer Care Center at 1-800-735-4328 or your nearest Thermador dealer to determine the proper replacement screw driver between the holder clip and the lamp housing (figure, a). 4. Support the glass lens cover with fingers along the bottom edge to prevent the cover - Thermador PRG364WLG | Instructions for Use - Page 55
for service Before calling for service, check the following to avoid unnecessary service charges. Troubleshooting Guide. • Oven door may not be sealing properly. • Clean the oven door gasket. Replace if worn. • Appliance not level. • Refer to the Installation Instructions for instructions - Thermador PRG364WLG | Instructions for Use - Page 56
service access to the appliance 1. Contact customer support (see back page). Follow the instructions given to you by the technician. - The display screen as customer support on the registration card, including the points ( ). PHOTOREGISTERSM THERMADOR 2. Text the photo to 21432. (USA only, text - Thermador PRG364WLG | Instructions for Use - Page 57
any display, floor, "As Is", or "B" stock appliances. Repair/replace as your exclusive remedy During this warranty period, Thermador or one of its authorized service providers will repair your Product without charge to you (subject to certain limitations stated herein) if your Product proves to - Thermador PRG364WLG | Instructions for Use - Page 58
or damage that are not the direct fault of Thermador, including without limitation, one or more of the follow operating instructions, mishandling, unauthorized service (including nothing wrong with the Product; correction of installation problems (you are solely responsible for any structure and - Thermador PRG364WLG | Instructions for Use - Page 59
MATIÈRES Sécurit 59 Instructions importants de sécurit ampoule du four 114 Avant d'appeler le service technique 115 Dépannage 115 Information pour le service technique 116 Enregistrement de produit 116 Connexion pour 1-800-735-4328 www.thermador.ca Nous attendons de vos nouvelles! Page. 58 - Thermador PRG364WLG | Instructions for Use - Page 60
un adulte pourrait faire basculer l'appareil et perdre la vie. Ne faites pas fonctionner l'appareil si le support antibascule n'est pas installé et qu'il ne retient pas l'appareil. La non-observation de ces instructions peut entraîner la mort ou causer de graves brûlures à des enfants ou des adultes - Thermador PRG364WLG | Instructions for Use - Page 61
tuyau de gaz ne doit pas excéder 36 po (914 mm). S'assurer que l'installation et l'entretien sont effectués correctement. Suivre les instructions du Manuel d'installation accompagnant ce produit. Confier l'installation et la mise à la terre électrique de l'appareil à un technicien qualifié. Si le br - Thermador PRG364WLG | Instructions for Use - Page 62
de la prise murale avant de procéder à l'entretien de l'appareil. Consultez les exigences d'alimentation électrique et de mise à la terre dans les Instructions d'Installation. Demandez à l'installateur de vous montrer où se trouvent le disjoncteur et la vanne d'arrêt de gaz pour savoir où et comment - Thermador PRG364WLG | Instructions for Use - Page 63
IMPORTANTS DE SÉCURITÉ LIRE TOUTES LES INSTRUCTIONS AVANT DE PROCÉDER NE permettez PAS que risques de brûlure. Si les flammes ne disparaissent pas immédiatement, évacuez les lieux et appelez le service d'incendie. • Ne prenez jamais un poêlon en feu - Vous pourriez vous brûler. • N'UTILISEZ - Thermador PRG364WLG | Instructions for Use - Page 64
cuisinez, réglez les brûleurs de façon à ce que la flamme ne chauffe que le fond du récipient sans déborder sur les côtés. Cette instruction est basée sur des considérations de sécurité. Soyez prudent et assurez-vous que les courants provenant de grilles d'aération ou de ventilateurs ne soufflent - Thermador PRG364WLG | Instructions for Use - Page 65
accumulations de graisse. En cas d'incendie ou si vous faites flamber intentionnellement de l'alcool sur la table de cuisson, suivez les instructions du fabricant. Faites preuve de prudence lorsque vous cuisinez avec de l'alcool (ex. : rhum, brandy, bourbon). L'alcool s'évapore à haute température - Thermador PRG364WLG | Instructions for Use - Page 66
IMPORTANTS DE SÉCURITÉ LIRE TOUTES LES INSTRUCTIONS AVANT DE PROCÉDER AVERTISSEMENT Vous ne devriez pas installer cet appareil avec un système de ventilation à aspiration descendante. Ce type de système - Thermador PRG364WLG | Instructions for Use - Page 67
les varient) 9 Assemblages des recouvrements de pattes (Des pièces de recouvrement supplémentaires sont requises, vous pouvez en commander sans frais au centre de service à la clientèle en appelant au 1-800-735-4328 jusqu'à un an après la date d'achat de l'appareil.) 10 Pieds de cuisinière Page. 66 - Thermador PRG364WLG | Instructions for Use - Page 68
Description des tableaux de commande REMARQUE : Les molettes, les boutons, les modes et les fonctionnalités ne sont pas offerts sur tous les modèles. ExtraLow® Standard Plaque chauffante Gril Induction Sélecteur de température du four Indicateur de température 350 300 400 250 450 200 - Thermador PRG364WLG | Instructions for Use - Page 69
Identification de la surface supérieure Modèle 364 avec gril Modèle 364 avec induction 1 3 5 2 4 1 Brûleur ExtraLow 2 Brûleur ExtraLow et PowerBoost 3 Brûleur standard 4 Brûleur standard 5 Induction Naturel 15000, GPL 12000 BTU Naturel 22000, GPL 18000 BTU Naturel 18000, GPL 12000 BTU - Thermador PRG364WLG | Instructions for Use - Page 70
Modèle 486 avec Induction Modèle 486 avec plaque chauffante 1 3 5 7 2 4 6 1 3 2 4 6 5 7 1 Brûleur ExtraLow Naturel 15000, GPL 12000 BTU 2 Brûleur ExtraLow et Naturel 22000, GPL 18000 BTU PowerBoost 3 Brûleur standard Naturel 15000, GPL 12000 BTU 4 Brûleur standard Naturel 18000, GPL - Thermador PRG364WLG | Instructions for Use - Page 71
Description de l'intérieur des fours Intérieur du four ÉLECTRIQUE 1 2 3 1 2 3 4 1 9 8 7 65 4 1 Lumière du four 2 Élément du griloir 3 Capteur thermostat du four 4 Glissières des griles 5 Griles de four Intérieur du four à GAZ 1 23 4 1 5 7 6 8 6 Élément de cuisson (dissimulé) 7 - Thermador PRG364WLG | Instructions for Use - Page 72
service à la clientèle. Pour plus d'informations sur l'enregistrement du produit, voir "Avant d'appeler le service situés à l'arrière de la cavité du four. Les guides sont conçus pour pouvoir s'installer d'un côté ou d'un dans le four, assurez-vous que les supports frontaux des glissières de la grille - Thermador PRG364WLG | Instructions for Use - Page 73
de la grille plate dans le four 1. Saisir fermement la grille par les côtés. 2. Incliner la grille vers le haut pour mettre la butée dans le guide. Utilisation du four 9 AVERTISSEMENT Pour prévenir les risques de brûlure, n'enlevez ou ne déplacez JAMAIS les grilles lorsque le four est en marche - Thermador PRG364WLG | Instructions for Use - Page 74
Utilisation de la table de cuisson Brûleurs STAR® scellés 9 AVERTISSEMENT Pour prévenir toute brûlure, éviter de toucher les chapeaux et les grilles des brûleurs lorsqu'ils sont chauds. Éteignez la table de cuisson et laissez les brûleurs refroidir. 9 AVERTISSEMENT Pour prévenir toute brûlure, é - Thermador PRG364WLG | Instructions for Use - Page 75
Boutons de commande Le symbole au-dessus de chaque bouton identifie soit la position du brûleur sur la surface de cuisson ou le contrôle de la grille, selon le modèle. Fonctionnement des brûleurs 1. Poussez sur le bouton et tournez-le dans le sens antihoraire jusqu'au réglage HI. - L'allumeur du brû - Thermador PRG364WLG | Instructions for Use - Page 76
OFF. • La plaque chauffante et le gril ne peuvent être utilisés pendant une panne de courant. • Si vous détectez une odeur de gaz, consultez les Instructions de Sécurité. Hauteur de la flamme • La hauteur correcte de la flamme dépend : (1) de la taille et du matériau du récipient utilisé; (2) des - Thermador PRG364WLG | Instructions for Use - Page 77
Récipients recommandés 9 MISE EN GARDE Pour éviter tout risque de dommages sérieux à l'appareil ou à un récipient, observez les consignes suivantes: • Les grands récipients, les plaques à biscuits, etc. ne doivent pas être utilisés sur la surface de cuisson. • Placez les grandes casseroles de façon - Thermador PRG364WLG | Instructions for Use - Page 78
Récipients pour spécialités Woks • Les woks à fond plat ou rond avec un anneau de support peuvent être utilisés sur tous les modèles. Un anneau de support doit être utilisé avec les woks à fond rond. • Le wok et l'anneau à wok en fonte revêtu d'une couche de porcelaine sont vendus séparément - Thermador PRG364WLG | Instructions for Use - Page 79
LO à MED LO - suivre les indications sur l'emballage LO - Finir de chauffer LO à MED - cuire LO à MED - terminer la cuisson selon les instructions sur l'emballage. LO à MED LO XLO - Maintenir au chaud, couvrir Identique aux brûleurs standards Laisser fondre XLO - Pour maintenir la température - Thermador PRG364WLG | Instructions for Use - Page 80
chaleur, couvrir Congelés HI - Couvrir, porter l'eau et les légumes à ébullition LO à MED - faire cuire Identique aux brûleurs standards selon les instructions du paquet Grande friture HI - Faire chauffer l'huile MED à MED HI - pour Identique aux brûleurs standards conserver la température de - Thermador PRG364WLG | Instructions for Use - Page 81
de blessure, n'utilisez jamais la plaque chauffante sans sa plaque. N'utilisez jamais la plaque chauffante d'une manière non indiquée dans le guide d'utilisation et d'entretien. NOTE : Seulement sur certains modèles. Les largeurs de la plaque varient. Une planche à découper en érable, un couvercle - Thermador PRG364WLG | Instructions for Use - Page 82
Conseils de cuisson 12'' plaque chauffante Aliment Réglage Œufs 325° - 350°F Bacon, saucisses à déjeuner Sandwichs grillés Poitrines de poulet désossées Côtelettes de porc désossées de 1 po (25,4 mm) d'épaisseur Steaks de 1 po (25,4 mm) d'épaisseur Boulettes de bœuf haché de 6 onces Boulettes - Thermador PRG364WLG | Instructions for Use - Page 83
et son plateau à graisse sont lavables au lave-vaisselle. • Lorsqu'elle a refroidi, versez la graisse dans un contenant résistant à la graisse avant de la jeter. Instructions de graissage de la plaque chauffante Si la plaque chauffante perd ses propriétés antiadhérentes au fil du temps, suivez les - Thermador PRG364WLG | Instructions for Use - Page 84
la chaleur et sont faciles à nettoyer. Il est possible d'installer une plaque chauffante de fonte antiadhérente, vendue séparément. Consultez les instructions de l'accessoire de la plaque chauffante pour obtenir plus de détails. Assemblage du gril 6 4 3 2 5 1 1 Boîtier du gril 2 Plateau à graisse - Thermador PRG364WLG | Instructions for Use - Page 85
5. Rabattez les deux éléments chauffants du gril vers le bas (5). Les éléments chauffants du gril doivent être à plat. Les supports doivent reposer à l'intérieur des crans latéraux. 6. Installez les grilles du gril (6). Assurez-vous que les grilles sont installées de niveau dans le - Thermador PRG364WLG | Instructions for Use - Page 86
Recommandations pour la cuisson sur le gril IMPORTANT : • VOUS NE DEVRIEZ PAS UTILISER LE GRIL SANS UNE VENTILATION ADÉQUATE. • Vous ne devriez pas préparer d'aliments à forte teneur en gras sur un gril intérieur. Le fait de faire griller des aliments à forte teneur en gras (comme certains types de - Thermador PRG364WLG | Instructions for Use - Page 87
Utilisation du four Symboles et descriptions Symbole/Mode Cuisson Cuisson conv. Conv. vérit. Gril Gril ê conv. Apprêt Rôtir Rôtir conv. Sabbath/Cuisson prolongée Garder chaud Autonettoyage Définitions et recommandations Cuit les aliments avec de l'air chaud et sec. Différents types d'aliments - Thermador PRG364WLG | Instructions for Use - Page 88
é au cours du mode d'autonettoyage et après celui-ci alors que la porte est verrouillée. Ce symbole est affiché lorsque le service après-vente est connecté pour un accès à distance. Principal gazier Électrique secondaire Gazier secondaire Page. 87 - Thermador PRG364WLG | Instructions for Use - Page 89
de -35 à +35 °F (-20/+20 °C) Sabbat Home Connect Réglages usine Accès pour service Service après-vente Marche/arrêt Configuration avec l'assistant Restauration Connexion Affiche les coordonnées du Service après-vente First start up finished fi8d TIMERS SETTINGS ENTER Assistant Home - Thermador PRG364WLG | Instructions for Use - Page 90
(STANDBY) et sélectionnez RÉGLAGES (SETTINGS). 2. Appuyez sur la gauche ( ou ) pour et sélectionnez HOME CONNECT. 3. Appuyez sur ENTRÉE (ENTER). 4. Suivre les instructions de l'afficheur. Protection des données Les catégories suivantes de données sont transmises au serveur Home Connect lors de la - Thermador PRG364WLG | Instructions for Use - Page 91
Modification d'une minuterie en cours de fonctionnement : 1. Effleurez MINUTERIES (TIMERS). 2. Appuyez de droite (ou) pour sélectionner la durée souhaitée et effleurez ENTRÉE (ENTER). Oven timer (minuterie de four) À propos la minuterie de four La minuterie du four sert à éteindre mécaniquement le - Thermador PRG364WLG | Instructions for Use - Page 92
Panel lock (verrouillage panneau commande) À propos du verrouillage panneau commande • Le dispositif de verrouillage du tableau de commande est un mécanisme de sécurité pour enfants afin d'éviter que ces derniers n'allument le four par mégarde ou qu'ils n'en modifient les paramètres. • Le - Thermador PRG364WLG | Instructions for Use - Page 93
Probe (sonde thermique) À propos de la sonde thermique La sonde thermique vous permet de mieux contrôler la façon dont vos aliments sont cuits en annulant automatiquement le mode de cuisson choisi lorsque la température désirée d'un plat, déterminée par l'utilisateur, est atteinte. La sonde donne la - Thermador PRG364WLG | Instructions for Use - Page 94
Sabbath (Sabbat) Le mode Sabbat est conforme aux normes établies par Star K. Sachez qu'il existe des restrictions d'utilisation des appareils de cuisson le jour du Sabbat et lors des Fêtes. Veuillez remarquer que lorsque les deux coïncident, les lois régissant le Sabbat prévalent. Si vous n'êtes pas - Thermador PRG364WLG | Instructions for Use - Page 95
6. Effleurez la gauche ( ou ) pour défiler jusqu'à SABBATH TIMER (minuteur sabbat). 06:30 › Sabbath Timer --min--s TIMERS SETTINGS ENTER 7. Effleurez la droite ( ou ) et saisissez la durée (DURATION TIME) par incréments de 30 minutes. 8. Effleurez ENTER (entrée). - Un avis de - Thermador PRG364WLG | Instructions for Use - Page 96
et peut toujours être commandé par l'écran. • La disponibilité de la fonction Home Connect dépend de l'offre des services Home Connect dans votre pays. Home Les services Home Connect ne sont pas offerts dans tous les pays. Pour de plus amples renseignements, veuillez consulter : www.homeconnect.com - Thermador PRG364WLG | Instructions for Use - Page 97
s'appliquent à la cuisson au four; toutefois, si une recette suggère une position de grille différente, vous devriez suivre la recette ou les instructions de l'emballage. Bake (cuisson) À propos de la cuisson Le mode Cuisson revient à faire cuire avec de l'air chaud et sec. Les éléments supérieur - Thermador PRG364WLG | Instructions for Use - Page 98
en mode cuisson ou cuisson à convection, les recettes et les durées de cuisson varient. Pour une information précise, écrivez à Extension Service, Colorado State University, Fort Collins, Colorato 80521. Vous pourriez avoir à payer des frais pour obtenir les bulletins. Précisez le type d'information - Thermador PRG364WLG | Instructions for Use - Page 99
• Ne retournez les aliments qu'une fois, au milieu du temps total de cuisson. Il n'est pas nécessaire de retourner les morceaux très fins (tranches de jambon, filets de poisson, etc). Les tranches de foie doivent être retournées indépendamment de leur épaisseur. • Placez les aliments directement - Thermador PRG364WLG | Instructions for Use - Page 100
Cuisson à une grille Niveau Mode cuisson à convection 3 -- Pour la cuisson avec une grille, de meilleurs résultats sont obtenus en mode cuisson. 2 -- Pour faire rôtir une dinde ou une grosse pièce de viande. Cuisson à deux grilles Niveau Mode cuisson à convection 2 et 4 -- Les plats - Thermador PRG364WLG | Instructions for Use - Page 101
Fraises Poivrons Champign ons Tomates Nettoyez et séchez avec un linge. Coupez des tranches d'un demipouce d'épaisseur (1/2 po). Placez-les la peau contre la grille. Nettoyez et séchez avec un linge. Enlevez la peau. Coupez grossièrement des morceaux d'environ un pouce. Nettoyez et séchez avec un - Thermador PRG364WLG | Instructions for Use - Page 102
Roast (rôtissage) À propos du rôtissage La température de la fonction rôtissage est plus élevée que la cuisson au four traditionnelle. Cette température sert pour rôtir de façon traditionnelle, lorsque de la graisse de cuisson est désirée, ou pour rôtir avec un plat couvert. Conseils avec le mode rô - Thermador PRG364WLG | Instructions for Use - Page 103
les assiettes et les tasses. • Les mets devraient être à la température de service (supérieure à 140 °F [60 °C]) avant d'être placés dans le four. chaud dans le plat de cuisson ou de les transférer dans un plat de service résistant la chaleur. • Il est possible de couvrir le plat de papier d' - Thermador PRG364WLG | Instructions for Use - Page 104
d'habitude par le panneau tactile. REMARQUE : Veuillez vous assurer que vous respectez la notice de sécurité décrite au début du présent manuel d'instructions et que cette dernière sera aussi respectée lors de la télécommande de l'appareil électroménager par l'appli lorsque vous n'êtes pas la maison - Thermador PRG364WLG | Instructions for Use - Page 105
les directives de l'appli et consultez le guide Home Connect uniquement sur invitation de l'appli. Effleurez ENTER. 4. Appuyez sur CONNEXION MANUELLE (CONNECT MANUALLY). -- Préparez votre appareil mobile à la appli sur l'appareil mobile et respectez les instructions de connexion affichées. 2. Le - Thermador PRG364WLG | Instructions for Use - Page 106
Mise à jour du logiciel Il est possible de mettre à jour le logiciel avec la fonctionnalité à cet effet (par ex., mises à jour d'optimisation, de dépannage ou de sécurité). Pour ce faire, vous devez être inscrit comme utilisateur Home Connect, disposer de l'appli sur votre appareil mobile et avoir - Thermador PRG364WLG | Instructions for Use - Page 107
Entretien et nettoyage 9 AVERTISSEMENT • Ne laissez pas d'enfants seuls ou sans surveillance dans un endroit où des électroménagers sont en cours d'utilisation. • Durant le cycle d'autonettoyage, les surfaces extérieures de l'appareil peuvent devenir plus chaudes que d'habitude. Certaines pièces de - Thermador PRG364WLG | Instructions for Use - Page 108
mode autonettoyant sur les modèles de 30 po (76 cm) de la série Harmony 1. Retirez tous les ustensiles de cuisine, les grilles et les guides de grille. Assurez-vous que la porte du four est fermée. 2. Sélectionnez NETTOYAGE (SELF CLEAN) avec l'anneau de sélection de mode. 3. Placez le bouton de - Thermador PRG364WLG | Instructions for Use - Page 109
Conseils de nettoyage 9 ATTENTION Évitez de nettoyer les pièces de la cuisinière lorsqu'elles sont encore chaudes. • Le fini en porcelaine émaillée résiste à l'acide, mais n'est pas antiacide. Les aliments acides comme le jus d'agrumes, de tomates, de rhubarbe, ou le vinaigre, l'alcool et le lait - Thermador PRG364WLG | Instructions for Use - Page 110
sèches dans le gril avant de le réutiliser. • Vous pouvez vous procurer de nouvelles briquettes de céramique à la boutique électronique de Thermador (numéro de commande : PABRICKBKN). Consultez le verso pour obtenir des renseignements sur le soutien technique. 9 MISE EN GARDE : Vous devez remplacer - Thermador PRG364WLG | Instructions for Use - Page 111
Cleaner -- Poli de nettoyage : Stainless Steel Magicmc pour protéger le fini des taches et piqûres ; améliore l'apparence. -- Thermador Stainless Steel Conditioner (0057669) -- Taches d'eau dure : Vinaigre. • Décoloration due à la chaleur; rincez et séchez à fond : -- Barkeepers Friend® -- Wright - Thermador PRG364WLG | Instructions for Use - Page 112
Pièce/matériau Grilles / Porcelaine émaillée sur fonte Plaque chauffante / Aluminium avec revêtement anti-adhésif Plateau collecteur de graisse de la plaque chauffante Notes concernant le nettoyage • Les grilles sont lourdes ; soyez prudent lorsque vous les soulevez. Déposez-les sur une surface - Thermador PRG364WLG | Instructions for Use - Page 113
Pièce/matériau Notes concernant le nettoyage Grilles du gril / Porcelaine • Nettoyez les grilles après chaque utilisation. émaillée sur fonte • Placez la grille du gril dans l'évier et versez de l'eau bouillante sur la grille. Mettez un linge à vaisselle sur la grille et versez de l'eau - Thermador PRG364WLG | Instructions for Use - Page 114
Pièce/matériau Grilles du four et glissières • des grilles • • • • Plateau collecteur de • surface / Porcelaine émaillée • • • Notes concernant le nettoyage Certains produits nettoyants commerciaux pour four peuvent noircir et décolorer la surface. Avant de nettoyer la grille, testez le - Thermador PRG364WLG | Instructions for Use - Page 115
dans le four. Appelez le centre de service à la clientèle de Thermador au 1-800-735-4328 ou le détaillant Thermador le plus près de chez vous pour la faisant glisser vers l'arrière jusqu'à ce que les deux broches sortent du support en céramique (figure, b). 7. Ne touchez pas au verre de la nouvelle - Thermador PRG364WLG | Instructions for Use - Page 116
technique Dépannage Avant d'appeler le service technique, vérifiez les points suivants afin d'éviter des Utilisation de la cuisinière » dans le Guide d'utilisation et d'entretien. Remplacez l'ampoule du four selon les instructions fournies dans le Guide d'utilisation et d'entretien. Si le four est - Thermador PRG364WLG | Instructions for Use - Page 117
de la base ne doivent pas être enlevés sauf par un technicien de service. Remettez-les en place après l'entretien. Plaque signalétique La plaque signal Thermador complétée. • Enregistrez votre produit en ligne à l'adresse www.thermador.ca. • Communiquez avec le service à la clientèle de Thermador - Thermador PRG364WLG | Instructions for Use - Page 118
accéder à l'appareil électroménager par la connexion Home ConnectTM. Octroi de l'accès à l'appareil électroménager, au Service après-vente : 1. Communiquez avec le service d'assistance technique (consultez la dernière page). Respectez les directives données par le technicien. - L'écran affiche la - Thermador PRG364WLG | Instructions for Use - Page 119
de plancher, « tel quel » et remis à neuf. Réparation ou remplacement comme recours exclusif Durant cette période de garantie, Thermador ou l'un de ses fournisseurs de service autorisés réparera votre appareil sans frais (sujet à certaines limitations établies dans les présentes) s'il est prouvé qu - Thermador PRG364WLG | Instructions for Use - Page 120
ou dommages qui ne sont pas du fait direct de Thermador, incluant, mais sans s'y limiter, un ou plusieurs des , modification, non-respect des instructions d'utilisation, manutention inappropriée, ré aux règlements et codes du bâtiment et des services d'incendie. • L'usure normale, les déversements - Thermador PRG364WLG | Instructions for Use - Page 121
o a la propiedad como resultado de la falta de cumplimiento de este aviso. Nota: Esto lo alerta sobre información y/o consejos importantes. Este electrodoméstico de THERMADOR® está hecho por BSH Home Appliances Corporation 1901 Main Street, Suite 600 Irvine, CA 92614 ¿Preguntas? 1-800-735-4328 www - Thermador PRG364WLG | Instructions for Use - Page 122
. No utilice el aparato si el dispositivo antivuelco no está instalado y no retiene el aparato. El hecho de no leer las instrucciones de este manual puede causar la muerte o graves quemaduras a niños y adultos. Cuando jale la estufa de la pared por motivos de limpieza, servicio u otra razón, aseg - Thermador PRG364WLG | Instructions for Use - Page 123
en T. 3. El conducto flexible de gas no debe medir más de 36 pulg. (914 mm). Garantice una instalación y servicio técnico adecuados. Siga el Manual de instalación que se proporciona con este producto. Llame a un técnico calificado para que instale y conecte eléctricamente a tierra el aparato. Aseg - Thermador PRG364WLG | Instructions for Use - Page 124
9 INSTRUCCIONES IMPORTANTES DE SEGURIDAD LEA TODAS LAS INSTRUCCIONES ANTES DE CONTINUAR Requisitos eléctricos ADVERTENCIA EN CASO DE FALLO ELÉCTRICO Si por algún motivo una perilla de gas está prendida y no hay corriente eléctrica para operar los encendedores eléctricos en los quemadores de gas de - Thermador PRG364WLG | Instructions for Use - Page 125
9 INSTRUCCIONES IMPORTANTES DE SEGURIDAD LEA TODAS LAS INSTRUCCIONES ANTES DE CONTINUAR Cuando los niños cuenten con edad suficiente para utilizar el artefacto, es responsabilidad legal de los padres o tutores legales asegurarse de que sean instruidos por personas calificadas en cuanto al - Thermador PRG364WLG | Instructions for Use - Page 126
9 INSTRUCCIONES IMPORTANTES DE SEGURIDAD LEA TODAS LAS INSTRUCCIONES ANTES DE CONTINUAR Sofoque las llamas del fuego ocasionado por alimentos que no sean grasa con bicarbonato de sodio. NUNCA utilice agua para apagar el fuego ocasionado por cocinar. NUNCA permita que la ropa, los agarradores de - Thermador PRG364WLG | Instructions for Use - Page 127
9 INSTRUCCIONES IMPORTANTES DE SEGURIDAD LEA TODAS LAS INSTRUCCIONES ANTES DE CONTINUAR Limpie el electrodoméstico cuidadosamente. Evite quemaduras de vapor: NO use una esponja o un trapo húmedo para limpiar el electrodoméstico cuando esté caliente. Algunos detergentes producen vapores nocivos - Thermador PRG364WLG | Instructions for Use - Page 128
de comida, reemplácela para asegurar un sellado hermético. Preserve la función de autolimpieza. Limpie únicamente aquellas piezas indicadas en este manual. NO utilice limpiadores para hornos de uso comercial ni recubrimientos de protección de ningún tipo para revestir los hornos adentro o alrededor - Thermador PRG364WLG | Instructions for Use - Page 129
Descripción Descripción de las estufas El modelo mostrado es la placas de cocción de 48 pulg. con opción plancha (los modelos varían). 4 5 3 2 1 9 6 7 8 1 Moldura para isla ilustración o consola trasera baja vendida por separado (Sin embargo, consulte la advertencia acerca del espacio detrás - Thermador PRG364WLG | Instructions for Use - Page 130
Descripción de los tableros de control NOTA: Todas las perillas, modos y funciones están disponibles en todos los modelos. ExtraLow® Estándar Plancha Parrilla Inducción Selector de temperatura de la hornilla Indicador de temperatura 350 300 400 250 450 200 100 500 BROIL CLEAN Selector - Thermador PRG364WLG | Instructions for Use - Page 131
Identificación de superficie superior Modelo 364 con parrilla Modelo 364 con inducción 1 3 5 2 4 1 Quemador ExtraLow Natural 15000, LP 12000 BTU 2 Quemador ExtraLow Natural 22000, LP 18000 BTU y PowerBoost 3 Quemador estándar Natural 15000, LP 12000 BTU 4 Quemador estándar Natural 18000, - Thermador PRG364WLG | Instructions for Use - Page 132
Modelo 486 con inducción Modelo 486 con plancha 1 3 5 7 2 4 6 1 3 2 4 6 5 7 1 Quemador ExtraLow Natural 15000, LP 12000 BTU 2 Quemador ExtraLow Natural 22000, LP 18000 BTU y PowerBoost 3 Quemador estándar Natural 15000, LP 12000 BTU 4 Quemador estándar Natural 18000, LP 15000 BTU 5 - Thermador PRG364WLG | Instructions for Use - Page 133
Identificación de interior de la hornilla Interior del horno de eléctrico 1 2 3 1 2 3 4 1 9 8 7 65 4 1 Luz interior del horno 2 Elemento de asar 3 Termostato del horno 4 Guías para rejillas 5 Rejillas deslizantes del horno Interior del horno de gas 1 23 4 5 7 6 8 6 Quemador - Thermador PRG364WLG | Instructions for Use - Page 134
Antes de comenzar Cómo comenzar Debido a nuestras actividades de mejora continua en mejoras de diseño y calidad, las imágenes pueden no ser representativas del producto final. Instalación de la rejilla de la hornilla 1. Sujete la rejilla en ángulo. Coloque los ganchos bajo la parte delantera de - Thermador PRG364WLG | Instructions for Use - Page 135
Introducir la rejilla plana en el horno La rejilla está diseñada con un tope para que no se salga por completo del horno y no se incline. 1. Tome la rejilla firmemente de ambos lados. 2. Introduzca la rejilla (vea la imagen). 3. Incline hacia arriba la rejilla para que se detenga al insertarse en la - Thermador PRG364WLG | Instructions for Use - Page 136
Usar la placa de cocción Quemadores STAR® sellados 9 ADVERTENCIA Para evitar que los productos se prendan fuego o que se creen gases nocivos, no use la superficie de la estufa si las tapas y las rejillas no están todas colocadas correctamente. 9 ADVERTENCIA Para prevenir quemaduras, evite tocar las - Thermador PRG364WLG | Instructions for Use - Page 137
Perillas de control Las perillas de control para dos quemadores sellados de gas, uno en la parte delantera y uno en el fondo, se encuentran directamente en frente de y debajo del par de quemadores en el panel de control. Operación de los quemadores 1. Oprima la perilla y gírela en sentido opuesto a - Thermador PRG364WLG | Instructions for Use - Page 138
Si se apagan las llamas de uno o más quemadores, el encendedor electrónico echa chispas automáticamente para volver a encender la llama. No toque los quemadores cuando los encendedores echen chispas. IMPORTANTE: • Para una combustión adecuada, no use la estufa sin tener las rejillas de los - Thermador PRG364WLG | Instructions for Use - Page 139
Recomendaciones para los utensilios de cocina 9 PRECAUCIÓN Para evitar dañar seriamente el aparato o las ollas, lea las siguientes instrucciones: • Nunca se deben usar grandes utensilios en la superficie de la estufa, como cazuelas grandes, bandejas para galletas, etc. • Las ollas grandes para - Thermador PRG364WLG | Instructions for Use - Page 140
Utensilios especiales de cocina Wok • Se pueden usar tanto woks de base plana como redonda con el anillo de soporte en todos los modelos. Para los woks de base redonda se debe usar un anillo de soporte. El wok y el anillo de soporte para wok de hierro fundido esmaltado de porcelana se venden por - Thermador PRG364WLG | Instructions for Use - Page 141
Recomendaciones de cocción con los quemadores de la estufa Alimento Ajuste inicial Ajuste final - quemador estándar Ajuste final - quemador XLO Bebidas Cacao (Chocolate) MED - calentar la leche, cubrir LO - terminar de calentar XLO - para mantener caliente, tapar* Panes Pan Francés, crepas, - Thermador PRG364WLG | Instructions for Use - Page 142
Alimento Ajuste inicial Ajuste final - quemador estándar Ajuste final - quemador XLO Escalfado: pollo, entero o piezas, pescado MED HI - tapar, hervir los líquidos Para terminar de cocinar Hervido a fuego lento: HI - tapar, hervir los Pollo estofado, carne líquidos curada, lengua, etc. Dejar - Thermador PRG364WLG | Instructions for Use - Page 143
la plancha si la bandeja o la parrilla no están instaladas. No utilice la plancha de una forma distinta de lo que está indicado en el manual de uso y cuidado. 2. Si la estufa está equipada con una plancha eléctrica, compruebe el ajuste de la tabla de la plancha echando dos cucharadas - Thermador PRG364WLG | Instructions for Use - Page 144
Recomendaciones para usar la 12'' plancha Bandeja de grasa de la plancha Alimento Ajuste Huevos 325° - 350°F Tocino, salchichas de desayuno 450° - 475°F Sándwich tostado 375° - 400°F Pechuga pollo sin hueso 425° - 450°F Chuletas de 1 pulg. (25,4 mm) 425° - 450°F Filete de 1 pulg. (25,4 - Thermador PRG364WLG | Instructions for Use - Page 145
• Tenga cuidado de no dañar la superficie. • No corte alimentos directamente sobre la plancha. • No utilice utensilios de metal. • Utilice utensilios de plástico o madera para evitar rayar la superficie antiadherente. • Se puede lavar la plancha en el lavaplatos. Sin embargo, recomendamos lavarla a - Thermador PRG364WLG | Instructions for Use - Page 146
Parrilla eléctrica Descripción 9 ADVERTENCIA • Para evitar todo riesgo de lesión, NUNCA use la parrilla si no hay rejillas o una plancha. • NUNCA deje la parrilla sin atención mientras cocine. • Tenga cuidado con el aceite y la grasa. Los aceites y grasas sobrecalentados pueden provocar incendios. • - Thermador PRG364WLG | Instructions for Use - Page 147
grasa para evitar riesgo de incendio. Debería limpiar periódicamente la campana y las superficies alrededor de la parrilla según las recomendaciones del manual de uso. • Tenga un extintor cerca y fácilmente accesible. Funcionamiento de la parrilla 1. Antes de encender el aparato, asegúrese de que - Thermador PRG364WLG | Instructions for Use - Page 148
Recomendaciones para cocinar con la parrilla IMPORTANTE: • NO SE DEBERÍA USAR LA PARRILLA SIN UNA VENTILACIÓN ADECUADA. • No deberían prepararse alimentos muy grasientos sobre una parrilla interior. La cocción de alimentos grasientos (como algunas variedades de carne picada o de salchichas, etc.) - Thermador PRG364WLG | Instructions for Use - Page 149
Usar el horno Símbolos y descripciones Símbolo/modo Definiciones y recomendaciones Hornear Cocina con aire caliente y seco. Variedad de alimentos, por ejemplo, tartas, galletas, pastas, panes rápidos, quiché y guisos. Horn. aire cal. Similar a Hornear, pero un ventilador situado en la parte - Thermador PRG364WLG | Instructions for Use - Page 150
Símbolo/modo Autolimpieza Precalentamiento rápido Sonda de temp. Definiciones y recomendaciones El horno alcanza una temperatura alta, aproximadamente de 850 °F (454 °C), para quemar los restos de alimentos. El símbolo se muestra cuando el horno se está precalentando. Se muestra cuando se detecta - Thermador PRG364WLG | Instructions for Use - Page 151
Inicio para poner en funcionamiento Iniciar ajustes básicos Se puede acceder a los ajustes en cualquier momento; para ello, presionar AJUSTES mientras el electrodoméstico está en modo de espera. El aparato debe estar apagado. 1. Conectar el electrodoméstico a la fuente de alimentación. Time of Day - Thermador PRG364WLG | Instructions for Use - Page 152
Configuración de Home Connect Se puede iniciar el asistente de Home Connect para conectarse con la red Home Connect y emparejar el dispositivo móvil. 1. Empezar desde el modo de espera y seleccionar AJUSTES (SETTINGS). 2. Seleccione el ajuste con la izquierda ( o ) y desplácese hasta HOME CONNECT. - Thermador PRG364WLG | Instructions for Use - Page 153
- Suena un bip cuando finaliza el temporizador. Presionar ENTER para finalizar el bip y el temporizador. Cambiar un temporizador en marcha 1. Tocar TEMPORIZADORES (TIMERS). 2. Tocar el derecho ( o ) para seleccionar el tiempo deseado y tocar INTRO (ENTER). Oven timer (temporizador del horno) Sobre - Thermador PRG364WLG | Instructions for Use - Page 154
Panel lock (bloqueo de panel) Sobre el bloqueo de panel • El bloqueo de panel es un mecanismo de seguridad para niños para impedir que enciendan el horno o cambien su programación accidentalmente. • El bloqueo del panel solo se puede activar en el modo reposo. • Cuando el bloqueo de panel está - Thermador PRG364WLG | Instructions for Use - Page 155
Probe (sonda térmica) Sobre el sonda térmica La sonda térmica le permite controlar mejor la forma de cocer los alimentos, anulando automáticamente el modo de cocción elegido cuando la temperatura alcanza la temperatura seleccionada. La sonda da la temperatura actual de la carne según se va cociendo. - Thermador PRG364WLG | Instructions for Use - Page 156
Sabbath (Sabbat) El modo Sabbat cumple los estándares enunciados por Star K. Debe saber que existen restricciones en el uso de aparatos de cocina durante el Sabbat y las festividades. Tenga en cuenta que si coinciden el Sabbat y una festividad, prevalecen las leyes del Sabbat. Si le son ajenas las - Thermador PRG364WLG | Instructions for Use - Page 157
6. Oprimir el ( o ) izquierdo para desplazarse a TEMPORIZADOR SABBAT. 06:30 › Sabbath Timer --min--s TIMERS SETTINGS ENTER 7. Oprimir el ( o ) derecho e introducir el TIEMPO DE DURACIÓN en intervalos de 30 minutos. 8. Oprimir ENTER. - Aparece una notificación de espera. Sabbath Mode - Thermador PRG364WLG | Instructions for Use - Page 158
funcionamiento del horno. • 24 horas después de haber activado el inicio a distancia. IMPORTANTE: • Asegurarse de seguir las instrucciones de seguridad de este manual de instrucciones y que estas también se cumplen al manejar el aparato a través de la aplicación Home Connect y cuando se esté fuera - Thermador PRG364WLG | Instructions for Use - Page 159
Sacar lo mejor del electrodoméstico Posiciones de las rejillas para hornear Posiciones de las rejillas Las posiciones de las rejillas en la hornilla están numeradas como un elevador. La posición número uno es la más baja. Hornear con dos rejillas, hornilla principal Nivel 2 y 5 mixtas 3 y 4 gas - Thermador PRG364WLG | Instructions for Use - Page 160
altitud Cuando hornee a grandes altitudes, las recetas y las duraciones de cocción recomendadas pueden variar. Para tener más información, escriba a Extension Service, Colorado State University, Fort Collins, Colorado 80521. Puede ser que tenga que pagar para obtener los boletines. Especifique el - Thermador PRG364WLG | Instructions for Use - Page 161
Para obtener los mejores resultados Consejos: • Se recomienda precalentar el quemador aparato del grill antes de comenzar a cocinar. Precaliente el horno durante tres minutos, luego coloque el plato en el horno. • Descongele los alimentos antes de gratinarlos. • Asegúrese de que la puerta esté - Thermador PRG364WLG | Instructions for Use - Page 162
• Para dorar mejor, se deben colocar algunos utensilios, como las bandejas para galletas, los moldes para brazos de gitano y pasteles rectangulares en la rejilla con los costados más cortos en el lado derecho e izquierdo. Esto permite al aire circular libremente. • Cuando hornee en más de una - Thermador PRG364WLG | Instructions for Use - Page 163
Pieles de naranja Corte pieles finas de la peladura de las naranjas. 1 - 4 Secas y quebradizas Rodajas de naranja ¼'' rebanadas 9 - 16 Piel seca y quebradiza, fruta ligeramente húmeda Rodajas de piña en conserva Seque con un trapo. 8 - 13 Lonchas blandas y flexibles Rodajas de piña - Thermador PRG364WLG | Instructions for Use - Page 164
Roast (asar) Sobre asar Asar utiliza tanto los elementos superiores e inferiores para mantener la temperatura del horno. En el asado se utiliza un calor más intenso desde el elemento superior que desde el inferior. Esto se traduce en un mayor dorado del exterior mientras el interior se mantiene - Thermador PRG364WLG | Instructions for Use - Page 165
consideradas como seguras para que se pueda comer un alimento, tal y como lo estableció el U. S Department of Agriculture Food Safety and Inspection Service, son las siguientes: Platos de huevo, cazuelas Sobras Carne de res molida fresca, ternera, cordero, cerdo Carne de vaca, ternera, asados de - Thermador PRG364WLG | Instructions for Use - Page 166
funcionar como de costumbre a través del Tocar panel de control. NOTA: Asegurarse de seguir las instrucciones de seguridad proporcionadas al principio de este manual de instrucciones y que éstas también se observen al operar el aparato a través de la aplicación Home Connect y cuando se esté fuera de - Thermador PRG364WLG | Instructions for Use - Page 167
petición para presionar el botón WPS del router antes de que transcurran 2 minutos. 3. Presionar el botón WPS en el router. -- Consultar el manual del router para localizar el botón WPS. -- La aplicación recibirá una notificación cuando el electrodoméstico se haya conectado correctamente a la red Wi - Thermador PRG364WLG | Instructions for Use - Page 168
Actualización de software Mediante la función de actualización de software, se puede actualizar el software (por ejemplo, para optimizarlo, solucionar problemas o para recibir actualizaciones de seguridad). Para ello, se debe ser usuario registrado de Home Connect, tener instalada la aplicación en - Thermador PRG364WLG | Instructions for Use - Page 169
Cuidado y mantenimiento 9 ADVERTENCIA • No deje niños solos en un lugar donde se utilizan electrodomésticos. • Durante el ciclo de autolimpieza, las superficies exteriores del aparato pueden estar más calientes que de costumbre. Algunas piezas del aparato pueden ser peligrosas para los niños y para - Thermador PRG364WLG | Instructions for Use - Page 170
Self-clean (autolimpieza) Autolimpieza (sólo en algunos modelos) Para configurar la autolimpieza en modelos de la serie Harmony de 30'' 1. Saque todos los utensilios y rejillas de la hornilla. Cierre la puerta del horno. 2. Seleccione SELF CLEAN con el anillo de selección de modo. 3. Ponga la - Thermador PRG364WLG | Instructions for Use - Page 171
Consejos de limpieza 9 ADVERTENCIA Evite limpiar la estufa o sus piezas mientras estén calientest. • El acabado esmaltado de porcelana es resistente a ácidos, pero no a prueba de ácidos. Los alimentos ácidos, como los zumos cítricos, tomates, ruibarbo, vinagre, alcohol o leche, deben limpiarse y no - Thermador PRG364WLG | Instructions for Use - Page 172
Recomendaciones de limpieza Parte / material Notas acerca de la limpieza Base de quemador de latón y tapa de hierro fundido • Cepillo dental de cerdas de nylon duras para limpiar los orificios. • Después de limpiar, comprobar que la tapa de quemador queda bien colocada sobre la base de quemador. - Thermador PRG364WLG | Instructions for Use - Page 173
y secas en la parrilla antes de volver a utilizarla. • Puede comprar nuevas briquetas de cerámica en la tienda electrónica de Thermador (número de pieza: PABRICKBKN). Consulte el dorso para obtener más información sobre el soporte técnico. Acabado exterior / acero inoxidable Junta / junta de - Thermador PRG364WLG | Instructions for Use - Page 174
Parte / material Notas acerca de la limpieza Rejillas / esmalte de porcelana en hierro fundido • Las parrillas son pesadas; levántelas con cuidado. Colóquelas sobre una superficie protegida. • A veces, la textura áspera de las rejillas puede arrancar virutas de aluminio de la parte inferior de - Thermador PRG364WLG | Instructions for Use - Page 175
Parte / material Generadores de chispas • / cerámica • Cavidad / esmalte de • porcelana o acero • • Rejillas y guías de rejilla • del horno / revestimiento niquelado • • • • Bandejas de protección • de la superficie / esmalte de porcelana • • • • Notas acerca de la limpieza NO utilice - Thermador PRG364WLG | Instructions for Use - Page 176
diseñada para hornillas. NO USE una bombilla estándar en la hornilla. Póngase en contacto con atención al cliente de Thermador en el 1-800-735-4328 o con la tienda Thermador más cerca para obtener información sobre las bombillas que tiene que utilizar con su estufa. Debe tener el número de serie de - Thermador PRG364WLG | Instructions for Use - Page 177
úrese de que la hornilla no esté en modo Sabbat. Consulte la sección "Usar la estufa" en el Manual de uso y cuidado. Reemplace la bombilla de la hornilla según las instrucciones proporcionadas en el Manual de uso y cuidado. Si la hornilla está caliente, el pestillo de la puerta se abrirá sólo cuando - Thermador PRG364WLG | Instructions for Use - Page 178
obtener acceso al aparato. Do you want to grant access to customer service? Allow with Enter TIMERS SETTINGS ENTER 2. Presionar puntos ( ). PHOTOREGISTERSM Número de modelo Número de serie Fecha de compra THERMADOR 2. Envíe la foto al 21432. (Solo EE. UU.; pueden aplicar - Thermador PRG364WLG | Instructions for Use - Page 179
efectiva la cobertura de la garantía, es la mejor manera para que Thermador le notifique en el caso poco probable de que se emita un aviso seguridad o se retire del mercado un producto. Duración de la garantía Thermador garantiza que el Producto no tiene defectos de materiales ni de mano de obra - Thermador PRG364WLG | Instructions for Use - Page 180
cargas especiales de la compañía de servicio técnico, suponiendo que acepte hacer la visita de servicio técnico. Producto fuera de garantía Thermador no tiene obligación alguna, en virtud de la ley o por otro motivo, de otorgarle ninguna concesión, incluidos reparaciones, prorrateos o reemplazo del - Thermador PRG364WLG | Instructions for Use - Page 181
to help you with cleaning and care instructions, cooking tips, accessories, troubleshooting, and more. USA: 1-800-735-4328 thermador.com/customer-care Canada: 1-800-735-4328 thermador.ca/support Accessories and parts Filters, Thermador cleaners, teppanyaki pans, griddles, replacement parts, and
-
 1
1 -
 2
2 -
 3
3 -
 4
4 -
 5
5 -
 6
6 -
 7
7 -
8
-
9
-
10
-
11
-
12
-
13
-
14
-
15
-
16
-
17
-
18
-
19
-
20
-
21
-
22
-
23
-
24
-
25
-
26
-
27
-
28
-
29
-
30
-
31
-
32
-
33
-
34
-
35
-
36
-
37
-
38
-
39
-
40
-
41
-
42
-
43
-
44
-
45
-
46
-
47
-
48
-
49
-
50
-
51
-
52
-
53
-
54
-
55
-
56
-
57
-
58
-
59
-
60
-
61
-
62
-
63
-
64
-
65
-
66
-
67
-
68
-
69
-
70
-
71
-
72
-
73
-
74
-
75
-
76
-
77
-
78
-
79
-
80
-
81
-
82
-
83
-
84
-
85
-
86
-
87
-
88
-
89
-
90
-
91
-
92
-
93
-
94
-
95
-
96
-
97
-
98
-
99
-
100
-
101
-
102
-
103
-
104
-
105
-
106
-
107
-
108
-
109
-
110
-
111
-
112
-
113
-
114
-
115
-
116
-
117
-
118
-
119
-
120
-
121
-
122
-
123
-
124
-
125
-
126
-
127
-
128
-
129
-
130
-
131
-
132
-
133
-
134
-
135
-
136
-
137
-
138
-
139
-
140
-
141
-
142
-
143
-
144
-
145
-
146
-
147
-
148
-
149
-
150
-
151
-
152
-
153
-
154
-
155
-
156
-
157
-
158
-
159
-
160
-
161
-
162
-
163
-
164
-
165
-
166
-
167
-
168
-
169
-
170
-
171
-
172
-
173
-
174
-
175
-
176
-
177
-
178
-
179
-
180
-
181
 |
 |

THERMADOR.COM
Use and care
GUIDE
Professional Series Pro Grand
®
Ranges