Thermador T36IB800SP Installation Manual - Page 22
Attaching the lower bracket
 |
View all Thermador T36IB800SP manuals
Add to My Manuals
Save this manual to your list of manuals |
Page 22 highlights
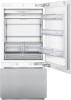
4. Hang the door panel with adjusting rail over the double threaded bolts (1.). 5. Lower door panel and push the fixing brackets down over the fastening screws (2.). 10. Screw nuts onto the double threaded bolts and tighten. This will fix the side alignment of the door. 6. Adjust the door panel using the double threaded bolts (Torx screwdriver). Re-examine the dimensions of the gap continuously. 7. Close the door and check that the depth of the door panel is aligned with the adjacent fronts. If required, correct. 8. Tighten the bracket screws to fix the depth alignment. 9. Close the door and check the side alignment. Correct by gently tapping the edge of the open door panel with your hand. 10. Attaching the lower bracket The lower bracket fixes the side position of the door. The number of lower brackets depends on the width and the design of the door panel. Screw on the lower brackets (Installation kit). Predrill holes in the door panel! 1. Loosen the screw. 2. Push the bracket over the screw. 3. Check the side position of the door. 4. Screw in the screw. 5. Tighten the screw. 6. Put the cover on the brackets. 22
-
 1
1 -
2
-
3
-
4
-
5
-
6
-
7
-
8
-
9
-
10
-
11
-
12
-
13
-
14
-
15
-
16
-
 17
17 -
 18
18 -
 19
19 -
 20
20 -
 21
21 -
 22
22 -
 23
23 -
 24
24 -
 25
25 -
 26
26 -
 27
27 -
28
-
29
-
30
-
31
-
32
-
33
-
34
-
35
-
36
-
37
-
38
-
39
-
40
-
41
-
42
-
43
-
44
-
45
-
46
-
47
-
48
-
49
-
50
-
51
-
52
-
53
-
54
-
55
-
56
-
57
-
58
-
59
-
60
-
61
-
62
-
63
-
64
-
65
-
66
-
67
-
68
-
69
-
70
-
71
-
72
-
73
-
74
-
75
-
76
-
77
-
78
-
79
-
80
-
81
-
82
-
83
-
84
-
85
-
86
-
87
-
88
-
89
-
90
-
91
-
92
-
93
-
94
 |
 |
