Tineco A10 Dash Instruction Manual - Page 8
Assembly
 |
View all Tineco A10 Dash manuals
Add to My Manuals
Save this manual to your list of manuals |
Page 8 highlights
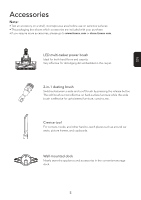
Assembly Tube Installation Insert tube. Brush Installation Press the release button to remove the tube. EN Insert the power brush. Press the release button to remove the power brush. Wall-mounted Dock Installation 1. Install the wall-mounted dock to the wall with the screws provided by Tineco. 2. Determine the best wall location for mounting the dock. We recommend placing it 47.25" (120cm) from the middle screw hole to the floor (may need to be adjusted based on the actual situation). 47.25" (120cm) Warning: • Ensure the wall surrounding the mounting area is free of gas, water pipes, electrical cables and wires. • To avoid the dock falling, ensure it is firmly installed. 6
-
 1
1 -
2
-
 3
3 -
 4
4 -
 5
5 -
 6
6 -
 7
7 -
 8
8 -
 9
9 -
 10
10 -
 11
11 -
 12
12 -
 13
13 -
14
-
15
-
16
-
17
-
18
-
19
-
20
-
21
-
22
-
23
-
24
-
25
-
26
-
27
-
28
-
29
-
30
-
31
-
32
-
33
-
34
-
35
-
36
-
37
-
38
-
39
-
40
-
41
-
42
-
43
-
44
-
45
-
46
-
47
-
48
-
49
-
50
 |
 |
EN
6
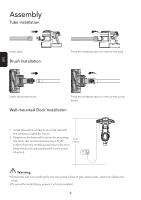
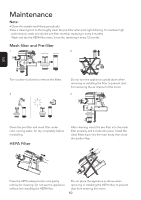
Assembly
Tube Installation
Insert tube.
Press the release button to remove the tube.
Brush Installation
Insert the power brush.
Press the release button to remove the power
brush.
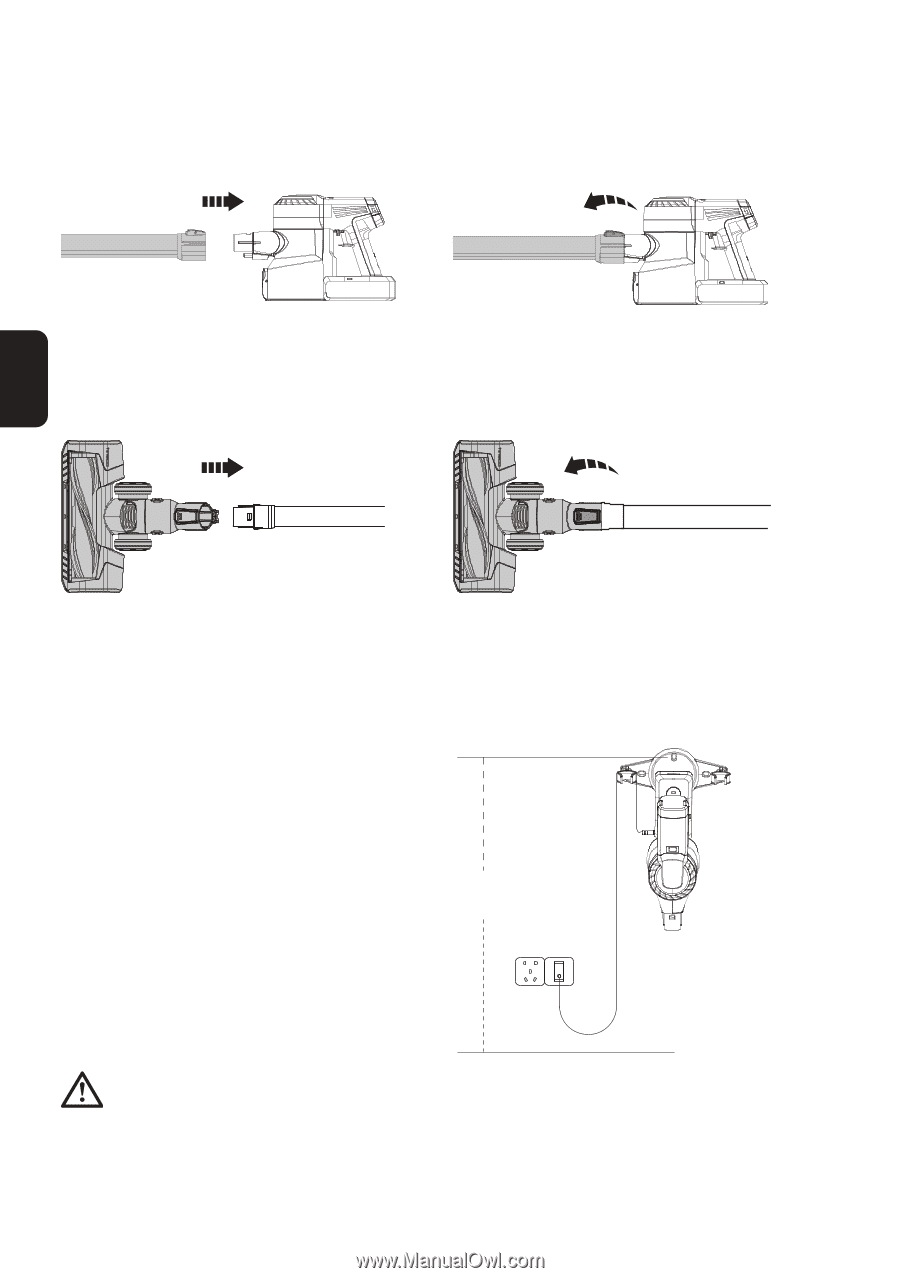
Wall-mounted Dock Installation
1. Install the wall-mounted dock to the wall with
the screws provided by Tineco.
2. Determine the best wall location for mounting
the dock. We recommend placing it 47.25”
(120cm) from the middle screw hole to the floor
(may need to be adjusted based on the actual
situation).
47.25"
(120cm)
Warning:
• Ensure the wall surrounding the mounting area is free of gas, water pipes, electrical cables and
wires.
• To avoid the dock falling, ensure it is firmly installed.