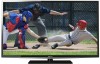
Toshiba 40L5200U User Guide - Page 19
TV back panel connec - firmware
 |
View all Toshiba 40L5200U manuals
Add to My Manuals
Save this manual to your list of manuals |
Page 19 highlights
Introduction 19 TV back panel connections 3 POWER-Turns the TV On/Off. If the TV stops responding to the buttons on the remote control or TV control panel and you cannot turn off the TV, press and hold the POWER button on the TV control panel for a few seconds to reset the TV. 4 ARROWS / / / -When a menu is onscreen, these buttons function as up/down/left/right menu navigation buttons. 5 MENU (ENTER)-Accesses the on-screen menus. When a menu is displayed, this button also functions as the ENTER button. 6 EXIT-Instantly closes an onscreen menu. 7 CHANNEL / -When no menu is onscreen, these buttons change the channel (programmed channels only, see "Storing channels in memory (optional)" on page 52). 8 VOLUME buttons / -When no menu is onscreen, these buttons adjust the volume level. 9 INPUT-Changes the source you are viewing. Press repeatedly to change from one source to the next. 10 USB port (L5200U Series)-Accesses JPEG or MP3 files, or updates TV firmware. TV back panel connections For explanations of cable types and connections, see "Overview of cable types" on page 22. (Sample Illustration) L4200U Series back panel connections 1 PC IN-Connects a personal computer. 2 HDMI® IN-High-Definition Multimedia Interface input receives digital audio and uncompressed digital video from an HDMI® device or uncompressed digital video from a DVI
-
 1
1 -
2
-
3
-
4
-
5
-
6
-
7
-
8
-
9
-
10
-
11
-
12
-
13
-
 14
14 -
 15
15 -
 16
16 -
 17
17 -
 18
18 -
 19
19 -
 20
20 -
 21
21 -
 22
22 -
 23
23 -
 24
24 -
25
-
26
-
27
-
28
-
29
-
30
-
31
-
32
-
33
-
34
-
35
-
36
-
37
-
38
-
39
-
40
-
41
-
42
-
43
-
44
-
45
-
46
-
47
-
48
-
49
-
50
-
51
-
52
-
53
-
54
-
55
-
56
-
57
-
58
-
59
-
60
-
61
-
62
-
63
-
64
-
65
-
66
-
67
-
68
-
69
-
70
-
71
-
72
-
73
-
74
-
75
-
76
-
77
-
78
-
79
-
80
-
81
-
82
-
83
-
84
-
85
-
86
-
87
-
88
-
89
-
90
-
91
-
92
-
93
-
94
-
95
-
96
-
97
-
98
-
99
-
100
-
101
-
102
-
103
-
104
-
105
-
106
-
107
-
108
-
109
-
110
-
111
-
112
-
113
-
114
-
115
-
116
-
117
-
118
-
119
-
120
-
121
-
122
-
123
-
124
-
125
-
126
-
127
-
128
-
129
-
130
-
131
-
132
-
133
-
134
-
135
-
136
-
137
-
138
-
139
-
140
-
141
 |
 |
