Toshiba 72MX196 Operating Guide - Page 65
D. Setting up file sharing on the TV
 |
UPC - 022265251492
View all Toshiba 72MX196 manuals
Add to My Manuals
Save this manual to your list of manuals |
Page 65 highlights
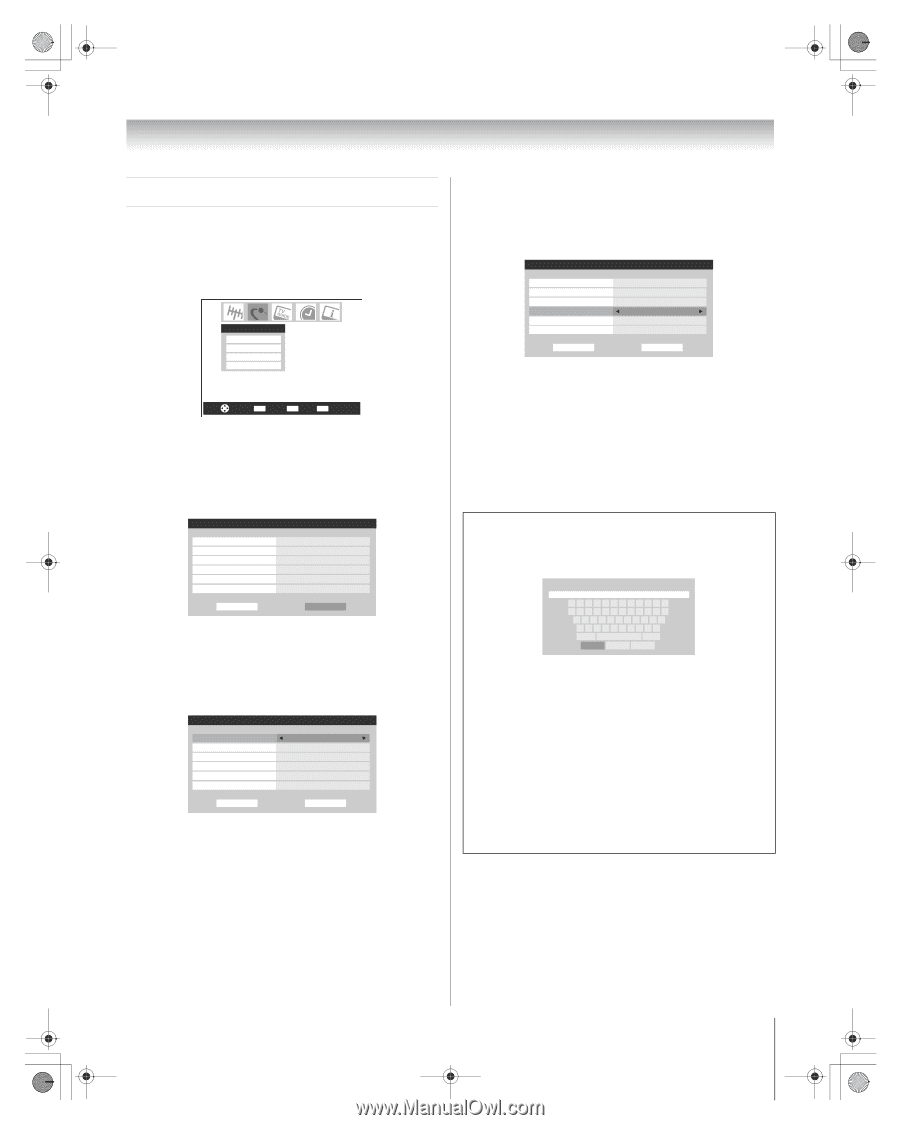
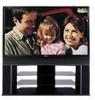
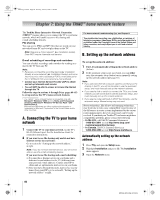
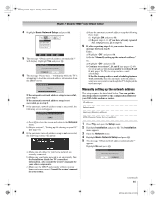
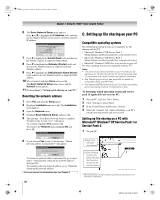
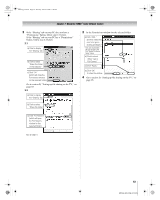
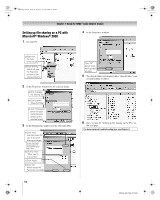
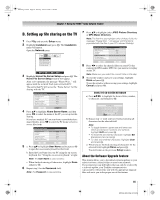
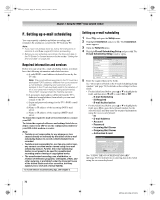
MX196_EN.book Page 65 Tuesday, June 27, 2006 1:43 PM Chapter 7: Using the THINC™ home network feature D. Setting up file sharing on the TV 1 Press Y and open the Setup menu. 2 Highlight Installation and press T. The Installation menu will appear. Open the Network menu. Network Basic Network Setup E-mail Scheduling Setup Home File Server Setup Software Upgrade Navigate ENTER Select CH RTN Back EXIT Exit 3 Highlight Home File Server Setup and press T. The Home File Server Setup window will appear. After a few moments, the message "Please Wait..." will appear until the network finds your networked PC. The networked PC will act as the "Home Server" for file sharing with the TV. Home File Server Setup Please enter your Home Server Setup Information. Home Server Name ABCD User Name XYZ Password JPEG Picture Directory ******* JPEG MP3 Music Directory MP3 Software Upgrade Directory -- Cancel Done 4 Press Bb to highlight Home Server Name, and then press C c to select the name of the PC you set up for file sharing. If you have multiple PCs on your home network that have shared folders, press C c to select the PC (home server) to access files from. Home File Server Setup Please enter your Home Server Setup Information. Home Server Name ABCD User Name XYZ Password JPEG Picture Directory ******* JPEG MP3 Music Directory MP3 Software Upgrade Directory -- Cancel Done 5 a. Press Bb to highlight User Name and then press T to open the on-screen keyboard for that field. b. Enter the User Name for your PC using the on-screen keyboard. See "Using the on-screen keyboard," at right. Note: The User Name is case sensitive. c. When finished entering all characters, highlight Done and press T. 6 Repeat step 5 for the Password field. Note: The Password is case sensitive. 7 Press Bb to highlight either JPEG Picture Directory or MP3 Music Directory. Note: The first time you highlight either of these fields, the message "Please Wait..." will appear until the field is populated with the files in your PC's shared folder(s). Home File Server Setup Please Wait... Please enter your Home Server Setup Information. Home Server Name ABCD User Name XYZ Password JPEG Picture Directory ******* -- MP3 Music Directory -- Software Upgrade Directory -- Cancel Done 8 Press C c to select the shared folder (on your PC) that contains the JPEG and/or MP3 files you want to view/play on the TV. Note: Make sure you select the correct folder in this step. 9 To exit the window and save your settings, highlight Done and press T. To exit the window without saving your settings, highlight Cancel and press T. USING THE ON-SCREEN KEYBOARD a) Press BbC c to highlight the desired letter, number, or character, and then press T. [email protected]_ 1234 567890 - = qwe r t y u i op [ ] asd f gh j k l ; ' z x c v b nm , . / Shift BS Done Clear Cancel b) Repeat step "a" until you have finished entering all characters for the selected field. Note: • To toggle between uppercase and lowercase letters and between numbers and symbols, highlight Shift and press T. • To erase the last entered character, highlight BS (backspace) and press T. • To clear your entered characters, highlight Clear and press T. c) When you are finished entering all characters for the selected field, highlight Done and press T. You will return to the previous Setup window. About the Software Upgrade feature This feature allows you to download software updates to your television from a shared folder on your home network. If you experience any difficulties that can only be resolved by a software update, your Toshiba customer service representative will provide you with the appropriate upgrade files and assist you in the proper use of this feature. 65 MX196 (E/F) Web 213:276
-
 1
1 -
2
-
3
-
4
-
5
-
6
-
7
-
8
-
9
-
10
-
11
-
12
-
13
-
14
-
15
-
16
-
17
-
18
-
19
-
20
-
21
-
22
-
23
-
24
-
25
-
26
-
27
-
28
-
29
-
30
-
31
-
32
-
33
-
34
-
35
-
36
-
37
-
38
-
39
-
40
-
41
-
42
-
43
-
44
-
45
-
46
-
47
-
48
-
49
-
50
-
51
-
52
-
53
-
54
-
55
-
56
-
57
-
58
-
59
-
 60
60 -
 61
61 -
 62
62 -
 63
63 -
 64
64 -
 65
65 -
 66
66 -
 67
67 -
 68
68 -
 69
69 -
 70
70 -
71
-
72
-
73
-
74
-
75
-
76
-
77
-
78
-
79
-
80
-
81
-
82
-
83
-
84
-
85
-
86
-
87
-
88
-
89
-
90
-
91
-
92
-
93
-
94
-
95
-
96
 |
 |