Toshiba SD-4200KU Owner's Manual - English - Page 20
Digital Output, Night Mode, Down Sampling, 3D Effects, Rating Level settings
 |
View all Toshiba SD-4200KU manuals
Add to My Manuals
Save this manual to your list of manuals |
Page 20 highlights
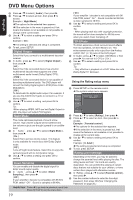
DVD Menu Options English B Press / to select { Audio }, then press . C Press / to select an item, then press to access. Example: { Night Mode } The options for the selected item appears. If the selection in the menu is greyed out, that means the feature is not available or not possible to change at the current state. D Use / to select a setting and press OK to confirm. Example: { On } The setting is selected and setup is completed. E To exit, press SETUP. Digital Output Select this if you connect to a multichannel decoder/ receiver. A In 'Audio', press / to select { Digital Output }, then press . { All } Select this if the connected device has a built-in multichannel decoder that supports one of the multichannel audio format (Dolby Digital, DTS). { PCM } Select this if the connected device is not capable of decoding multichannel audio. The DVD player will convert the Dolby Digital signal to PCM (Pulse Code Modulation). { Off } To deactivate the digital audio output. For example, if you use the AUDIO OUT jacks to connect to a TV or stereo system. B Use / to select a setting and press OK to confirm. Tip: -When playing MPEG, MP3 and set Digital Output to {All}, the player will output PCM signals. { On } If your amplifier / decoder is not compatible with 96 KHz PCM, select " On " . Sound recorded at 96 KHz is down sampled to 48 KHz. B Use / to select a setting and press OK to confirm. Tip: - When playing back disc with copyright protection, the sound will be down sampled to 48 KHz even when you select Down Sampling off. 3D Effects To obtain expansive virtual surround sound effects from two speakers, set 3D Effects to on. This enhancement sounds only output from the Analog AUDIO OUT (L / R) jacks of the DVD player. A In 'Audio', press / to select { 3D Effects }, then press .You can set to { Off } or { On }. B Use / to select a setting and press OK to confirm. Tip: - Only effective in playback of a DVD Video disc with Dolby Digital 5.1 bitstream. Using the Rating setup menu A Press SETUP on the remote control. The system setup menu appears. Language Video Parental control : 8.Adult Set Password Audio Rating Misc Night Mode This mode optimizes playback of sound at low volume. High volume outputs will be softened and low volume outputs are brought upward to an audible level. A In ' Audio', press / to select { Night Mode }, then press . { On } Select this to set low volume output. This feature is only available for movie discs with Dolby Digital mode. { Off } Turns off night mode feature. Select this to enjoy the surround sound with its full dynamic range. B Use / to select a setting and press OK to confirm. Down Sampling You can enable and disable the digital signal for better sound output quality. A In 'Audio', press / to select { Down Sampling }, then press . { Off } If your amplifier / decoder is compatible with 96 KHz PCM, select " Off " . Sound is sampled at 96 KHz. B Press / to select {Rating }, then press . C Press / to select an item, then press to access. Example: { Parental control } The options for the selected item appears. If the selection in the menu is greyed out, that means the feature is not available or not possible to change at the current state. D Use / to select a setting and press OK to confirm. Example: { 8. Adult } The setting is selected and setup is completed. E To exit, press SETUP. Rating Level settings Depending on the DVD, you may be asked to change the parental level while playing the disc. The rating levels are from 1 to 8 and are country dependent. You can prohibit the playing of certain discs that are not suitable for your children, or have certain discs played with alternative scenes. A In ' Rating ', press / to select {Parental control }, then press . B Use the number buttons to enter the four-digit password, then press OK.(See 'Changing the Password' on page 20.) Helpful hint: Press to go back to previous menu item. Press SETUP to exit the menu item. 19
-
 1
1 -
2
-
3
-
4
-
5
-
6
-
7
-
8
-
9
-
10
-
11
-
12
-
13
-
14
-
 15
15 -
 16
16 -
 17
17 -
 18
18 -
 19
19 -
 20
20 -
 21
21 -
 22
22 -
 23
23 -
 24
24 -
 25
25 -
26
-
27
-
28
 |
 |
