Toshiba Satellite A100 PSAA8C-TA402C User Manual - Page 74
Opening the display, Turning on the power
 |
View all Toshiba Satellite A100 PSAA8C-TA402C manuals
Add to My Manuals
Save this manual to your list of manuals |
Page 74 highlights
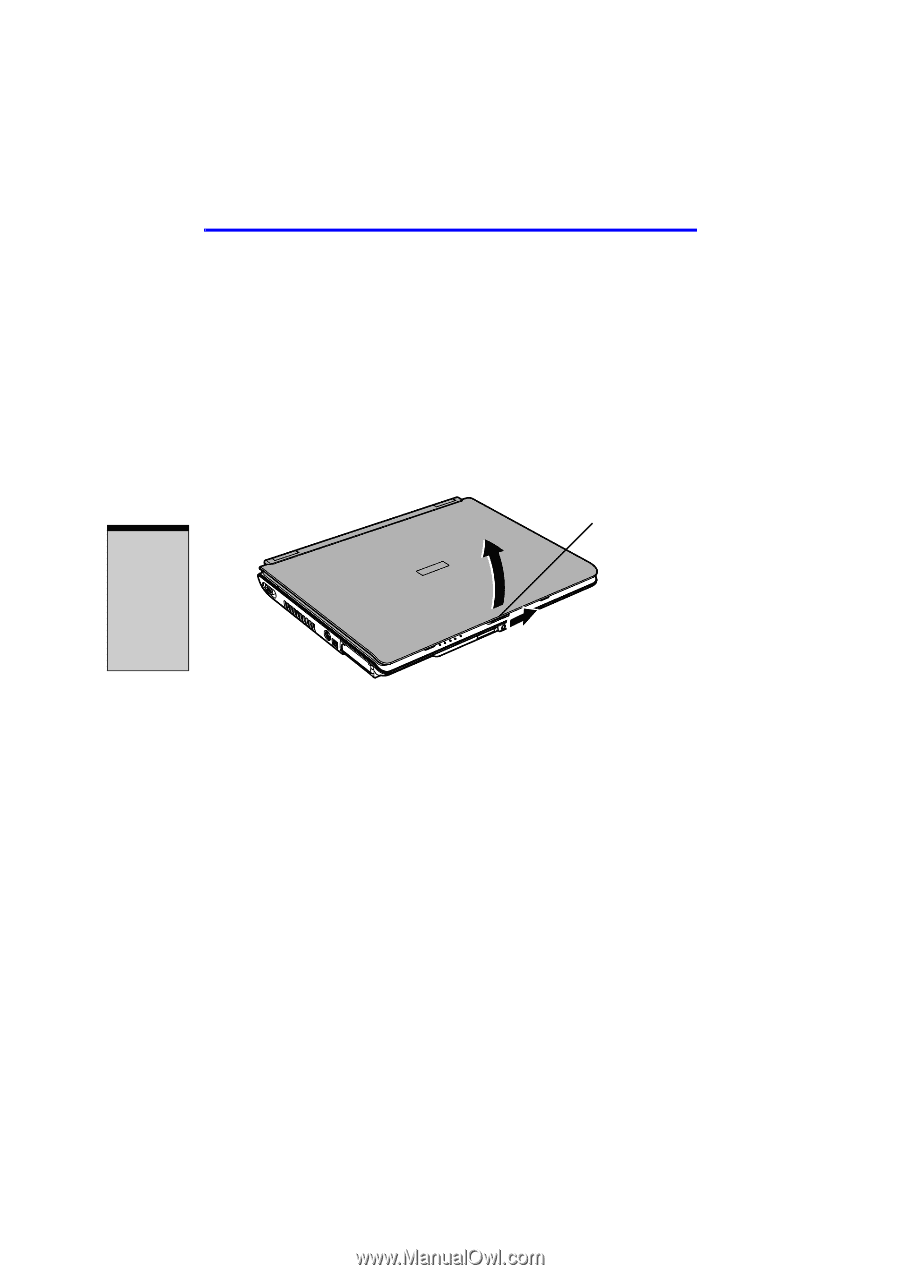
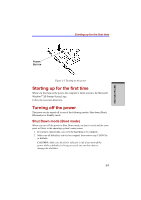
GETTING STARTED User's Manual 3. Plug the power cord into a live wall outlet. The Battery and DC IN indicator on the front of the computer should glow. Opening the display The display panel can be rotated in a wide range of angles for optimal viewing. 1. Slide the display latch on the front of the computer to the right to unlatch the display panel. 2. Lift the panel up and adjust it to the best viewing angle for you. NOTE: When you open the display, hold it with both hands and lift up slowly. DISPLAY LATCH Figure 3-4 Opening the display panel Turning on the power This section describes how to turn on the power. NOTE: After you turn on the power for the first time, do not turn it off until you have set up the operating system (OS) and the OS has started up. 1. If the external diskette drive is connected, make sure it is empty. If a diskette is in the drive, press the eject button and remove the diskette. 2. Open the display panel. 3. Press and hold the computer's power button for two or three seconds. 3-6
-
 1
1 -
2
-
3
-
4
-
5
-
6
-
7
-
8
-
9
-
10
-
11
-
12
-
13
-
14
-
15
-
16
-
17
-
18
-
19
-
20
-
21
-
22
-
23
-
24
-
25
-
26
-
27
-
28
-
29
-
30
-
31
-
32
-
33
-
34
-
35
-
36
-
37
-
38
-
39
-
40
-
41
-
42
-
43
-
44
-
45
-
46
-
47
-
48
-
49
-
50
-
51
-
52
-
53
-
54
-
55
-
56
-
57
-
58
-
59
-
60
-
61
-
62
-
63
-
64
-
65
-
66
-
67
-
68
-
 69
69 -
 70
70 -
 71
71 -
 72
72 -
 73
73 -
 74
74 -
 75
75 -
 76
76 -
 77
77 -
 78
78 -
 79
79 -
80
-
81
-
82
-
83
-
84
-
85
-
86
-
87
-
88
-
89
-
90
-
91
-
92
-
93
-
94
-
95
-
96
-
97
-
98
-
99
-
100
-
101
-
102
-
103
-
104
-
105
-
106
-
107
-
108
-
109
-
110
-
111
-
112
-
113
-
114
-
115
-
116
-
117
-
118
-
119
-
120
-
121
-
122
-
123
-
124
-
125
-
126
-
127
-
128
-
129
-
130
-
131
-
132
-
133
-
134
-
135
-
136
-
137
-
138
-
139
-
140
-
141
-
142
-
143
-
144
-
145
-
146
-
147
-
148
-
149
-
150
-
151
-
152
-
153
-
154
-
155
-
156
-
157
-
158
-
159
-
160
-
161
-
162
-
163
-
164
-
165
-
166
-
167
-
168
-
169
-
170
-
171
-
172
-
173
-
174
-
175
-
176
-
177
-
178
-
179
-
180
-
181
-
182
-
183
-
184
-
185
-
186
-
187
-
188
-
189
-
190
-
191
-
192
-
193
-
194
-
195
-
196
-
197
-
198
-
199
-
200
-
201
-
202
-
203
-
204
-
205
-
206
-
207
-
208
-
209
-
210
-
211
-
212
-
213
-
214
-
215
-
216
-
217
-
218
-
219
-
220
-
221
-
222
-
223
-
224
-
225
-
226
-
227
-
228
-
229
-
230
-
231
-
232
-
233
-
234
-
235
-
236
-
237
-
238
-
239
-
240
-
241
-
242
-
243
-
244
-
245
-
246
-
247
-
248
 |
 |