Toshiba Satellite Pro U400-SP2908A User Guide - Page 71
Disabling or enabling the TouchPad™, Using external display devices
 |
View all Toshiba Satellite Pro U400-SP2908A manuals
Add to My Manuals
Save this manual to your list of manuals |
Page 71 highlights
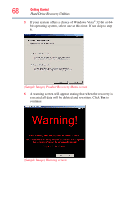
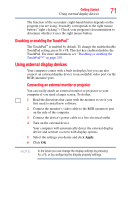
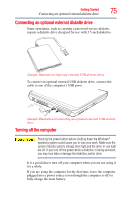
Getting Started Using external display devices 71 The function of the secondary (right-hand) button depends on the program you are using. It usually corresponds to the right mouse button ("right-clicking"). Check your program's documentation to determine whether it uses the right mouse button. Disabling or enabling the TouchPad™ The TouchPad™ is enabled by default. To change the enable/disable TouchPad setting, press Fn + F9. This hot key enables/disables the TouchPad. For more information, see "Disabling or enabling the TouchPad™" on page 210. Using external display devices Your computer comes with a built-in display, but you can also connect an external display device to an available video port via the RGB (monitor) port. Connecting an external monitor or projector You can easily attach an external monitor or projector to your computer if you need a larger screen. To do this: 1 Read the directions that came with the monitor to see if you first need to install new software. 2 Connect the monitor's video cable to the RGB (monitor) port on the side of the computer. 3 Connect the device's power cable to a live electrical outlet. 4 Turn on the external device. Your computer will automatically detect the external display device and activate a screen with display options. 5 Select the settings you desire and click Apply. 6 Click OK. NOTE In the future you can change the display settings by pressing Fn + F5, or by configuring the display property settings.
-
 1
1 -
2
-
3
-
4
-
5
-
6
-
7
-
8
-
9
-
10
-
11
-
12
-
13
-
14
-
15
-
16
-
17
-
18
-
19
-
20
-
21
-
22
-
23
-
24
-
25
-
26
-
27
-
28
-
29
-
30
-
31
-
32
-
33
-
34
-
35
-
36
-
37
-
38
-
39
-
40
-
41
-
42
-
43
-
44
-
45
-
46
-
47
-
48
-
49
-
50
-
51
-
52
-
53
-
54
-
55
-
56
-
57
-
58
-
59
-
60
-
61
-
62
-
63
-
64
-
65
-
 66
66 -
 67
67 -
 68
68 -
 69
69 -
 70
70 -
 71
71 -
 72
72 -
 73
73 -
 74
74 -
 75
75 -
 76
76 -
77
-
78
-
79
-
80
-
81
-
82
-
83
-
84
-
85
-
86
-
87
-
88
-
89
-
90
-
91
-
92
-
93
-
94
-
95
-
96
-
97
-
98
-
99
-
100
-
101
-
102
-
103
-
104
-
105
-
106
-
107
-
108
-
109
-
110
-
111
-
112
-
113
-
114
-
115
-
116
-
117
-
118
-
119
-
120
-
121
-
122
-
123
-
124
-
125
-
126
-
127
-
128
-
129
-
130
-
131
-
132
-
133
-
134
-
135
-
136
-
137
-
138
-
139
-
140
-
141
-
142
-
143
-
144
-
145
-
146
-
147
-
148
-
149
-
150
-
151
-
152
-
153
-
154
-
155
-
156
-
157
-
158
-
159
-
160
-
161
-
162
-
163
-
164
-
165
-
166
-
167
-
168
-
169
-
170
-
171
-
172
-
173
-
174
-
175
-
176
-
177
-
178
-
179
-
180
-
181
-
182
-
183
-
184
-
185
-
186
-
187
-
188
-
189
-
190
-
191
-
192
-
193
-
194
-
195
-
196
-
197
-
198
-
199
-
200
-
201
-
202
-
203
-
204
-
205
-
206
-
207
-
208
-
209
-
210
-
211
-
212
-
213
-
214
-
215
-
216
-
217
-
218
-
219
-
220
-
221
-
222
-
223
-
224
-
225
-
226
-
227
-
228
-
229
-
230
-
231
-
232
-
233
 |
 |