Toshiba Satellite T230 PST4AC-01H014 Users Manual Canada; English - Page 79
TOSHIBA Disc Creator, 1 Mode Login screen
 |
View all Toshiba Satellite T230 PST4AC-01H014 manuals
Add to My Manuals
Save this manual to your list of manuals |
Page 79 highlights
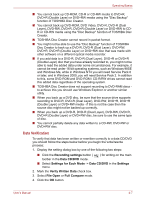
Operating Basics 5. Verification will be performed. If the authentication is successful, the image data taken in step 4 will be faded in and placed over one another. ■ If an error occurs during authentication, you will be returned to the Select Tiles screen. 6. The Windows Welcome screen will be displayed, and will be logged in automatically to Windows. 1:1 Mode Login screen 1. Turn on the computer. 2. The Select Tiles screen will be displayed. 3. Select Start face recognition ( ). 4. The Select Account screen will be displayed. 5. Select the account, and click the arrow button. 6. "Please face the camera" will be displayed. 7. Verification will be performed. If the authentication is successful, the image data taken in step 6 will be faded in and placed over one another. ■ If an error occurs during authentication, you will be returned to the Select Tiles screen. 8. The Windows Welcome screen will be displayed, and will be logged in automatically to Windows. ■ If authentication was successful, but an authentication error subsequently occurred during the login to Windows, you will be asked to provide your account information. TOSHIBA Disc Creator You can use TOSHIBA Disc Creator when you connect External ODD. Please be aware of the following limitations when you use the TOSHIBA Disc Creator: ■ DVD Video cannot be created using TOSHIBA Disc Creator. ■ DVD Audio cannot be created using TOSHIBA Disc Creator. ■ You cannot use TOSHIBA Disc Creator's "Audio CD" function to record music to DVD-R, DVD-R (Dual Layer), DVD-RW, DVD+R, DVD+R (Double Layer) or DVD+RW media. ■ Do not use the "Disc Backup" function of TOSHIBA Disc Creator in order to copy DVD Video or DVD-ROM material that has copyright protection. ■ DVD-RAM discs cannot be backed up using the "Disc Backup" function of TOSHIBA Disc Creator. ■ You cannot back up CD-ROM, CD-R or CD-RW media to DVD-R, DVDR (Dual Layer) or DVD-RW media using the "Disc Backup" function of TOSHIBA Disc Creator. User's Manual 4-6
-
 1
1 -
2
-
3
-
4
-
5
-
6
-
7
-
8
-
9
-
10
-
11
-
12
-
13
-
14
-
15
-
16
-
17
-
18
-
19
-
20
-
21
-
22
-
23
-
24
-
25
-
26
-
27
-
28
-
29
-
30
-
31
-
32
-
33
-
34
-
35
-
36
-
37
-
38
-
39
-
40
-
41
-
42
-
43
-
44
-
45
-
46
-
47
-
48
-
49
-
50
-
51
-
52
-
53
-
54
-
55
-
56
-
57
-
58
-
59
-
60
-
61
-
62
-
63
-
64
-
65
-
66
-
67
-
68
-
69
-
70
-
71
-
72
-
73
-
 74
74 -
 75
75 -
 76
76 -
 77
77 -
 78
78 -
 79
79 -
 80
80 -
 81
81 -
 82
82 -
 83
83 -
 84
84 -
85
-
86
-
87
-
88
-
89
-
90
-
91
-
92
-
93
-
94
-
95
-
96
-
97
-
98
-
99
-
100
-
101
-
102
-
103
-
104
-
105
-
106
-
107
-
108
-
109
-
110
-
111
-
112
-
113
-
114
-
115
-
116
-
117
-
118
-
119
-
120
-
121
-
122
-
123
-
124
-
125
-
126
-
127
-
128
-
129
-
130
-
131
-
132
-
133
-
134
-
135
-
136
-
137
-
138
-
139
-
140
-
141
-
142
-
143
-
144
-
145
-
146
-
147
-
148
-
149
-
150
-
151
-
152
-
153
-
154
-
155
-
156
-
157
-
158
-
159
-
160
-
161
-
162
-
163
-
164
-
165
-
166
 |
 |