Toshiba TLP 651 Owners Manual - Page 21
Picture Projection, Press ON/STANDBY.
 |
UPC - 022265950296
View all Toshiba TLP 651 manuals
Add to My Manuals
Save this manual to your list of manuals |
Page 21 highlights
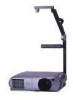
Operations Picture projection CAUTION Do not look into the projection lens while operating the projector. Preparation • Install and connect the projector properly. • Take off the lens cover. • Set the POINTER/PJ to "PJ". ON/STANDBY MENU SELECT/ADJUST ENTER INPUT ON LAMP TEMP 1 3 Indicators 5 4 AUTO SET ON/STANDBY KEYSTONE MARKER POINTER PJ LASER 1 L-CLICK MENU R-CLICK ENTER RGB VIDEO CAMERA RESIZE RESET FREEZE 3 1 Press ON/STANDBY. Both the ON and LAMP indicators light up in green. ON On (Green) ON On (Green) LAMP Flashing (Green) LAMP On (Green) 2 Turn on the connected equipment and put it in playback mode. CONTENTS 21 3 Select the input source. (On the remote control) Press RGB or VIDEO. (On the control panel of the main unit) Press INPUT repeatedly. Each time the button is pressed, the source indication on the screen changes as follows: → → RGB: To project pictures from a computer connected to RGB INPUT. → Video: To project pictures from a video player connected to VIDEO INPUT. Camera: To project pictures from a document imaging camera. (For document imaging camera model only) 4 Adjust the picture size by turning the zooming ring. Turn to the right to enlarge the picture. Turn to the left to reduce the picture. 5 Focus on the picture by turning the focusing ring. A still picture is recommended for focusing. (Continued)
-
 1
1 -
2
-
3
-
4
-
5
-
6
-
7
-
8
-
9
-
10
-
11
-
12
-
13
-
14
-
15
-
 16
16 -
 17
17 -
 18
18 -
 19
19 -
 20
20 -
 21
21 -
 22
22 -
 23
23 -
 24
24 -
 25
25 -
 26
26 -
27
-
28
-
29
-
30
-
31
-
32
-
33
-
34
-
35
-
36
-
37
-
38
-
39
-
40
-
41
-
42
-
43
-
44
-
45
-
46
-
47
-
48
-
49
-
50
-
51
-
52
-
53
-
54
 |
 |
