Toshiba TLP 651 Owners Manual - Page 31
Projection Adjustments - Image, Press, to select Auto sync., Press ENTER., to select - lcd projector
 |
UPC - 022265950296
View all Toshiba TLP 651 manuals
Add to My Manuals
Save this manual to your list of manuals |
Page 31 highlights
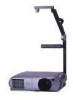
Adjustments Projection adjustments - Image Preparation • Display the image as explained in "Picture Projection". 21 • Set the POINTER/PJ selector to "PJ". ON/STANDBY MENU SELECT/ADJUST ENTER INPUT ON LAMP TEMP 1,7 AUTO SET ON/STANDBY KEYSTONE MARKER POINTER PJ LASER AUTO SET 2,3,5,6 4 L-CLICK MENU R-CLICK ENTER RGB VIDEO CAMERA RESIZE RESET FREEZE RESET 1 Press MENU to display the menu. 2 Press or to select . I ma g e Au t o sync . Phase - + H-pos i t i on - + V-pos i t i on - + Cl ock - + 3 Press to select "Auto sync." 4 Press ENTER. The image is automatically adjusted. For further adjustments, follow the below steps. 5 Press or to select a preferred item. 6 Press or to adjust the item. To select another item, go back to step 5. Phase: To reduce flickers. H-position: To shift the image to the left (-), to the right (+). V-position: To shift the image down (-), to up (+). Clock To remove vertical stripes. 7 Press MENU. The menu disappears. CONTENTS 31 Notes • Pressing AUTO SET on the remote control can also adjust the image automatically. 23 • If you project an image from a computer with an LCD screen while monitoring the image on the computer, the image may not be projected properly, depending on the computer model. In this case, turn off the computer display, or make the necessary picture adjustments on the projector. For details on controlling the computer display, etc., refer to the computer's manual and description on the software for the computer used. • During adjustments of "H-position" or "Vposition", the image may not be projected properly. • While using, an aberration of the phase may occur. In that case, adjust "Phase" again. • These adjustments are stored until you turn the power off. • To store the adjustments even if the power is turned off, follow the procedure of "Saving data". 34 • Pressing RESET will return all the adjustments or settings currently displayed to their default.
-
 1
1 -
2
-
3
-
4
-
5
-
6
-
7
-
8
-
9
-
10
-
11
-
12
-
13
-
14
-
15
-
16
-
17
-
18
-
19
-
20
-
21
-
22
-
23
-
24
-
25
-
 26
26 -
 27
27 -
 28
28 -
 29
29 -
 30
30 -
 31
31 -
 32
32 -
 33
33 -
 34
34 -
 35
35 -
 36
36 -
37
-
38
-
39
-
40
-
41
-
42
-
43
-
44
-
45
-
46
-
47
-
48
-
49
-
50
-
51
-
52
-
53
-
54
 |
 |
