Toshiba TLP-T721U Owners Manual - Page 25
Sending the camera, s images to a computer, Correcting illuminated defects
 |
View all Toshiba TLP-T721U manuals
Add to My Manuals
Save this manual to your list of manuals |
Page 25 highlights
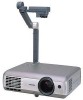
Using the document camera (Continued) 2 Press the W.BALANCE button. The LOCK indicator lights. Lit The white balance is locked. The white balance returns to automatic adjustment when W.BALANCE OVERLAY ARM LIGHT LOCK pressing the W.BALANCE button again. Then LOCK indicator STORE IMAGE CAMERA GAIN CAMERA goes out. Notes • When the white balance is locked (the LOCK indicator is lit), folding and extending the arm will automatically return to automatic adjustment. • The color of the room lighting may prevent the white balance from being adjusted to the optimum level. In this situation, or if you want to use a certain tinting, adjust the R-level, G-level, and B-level on the Image adjustment menu p.54 . I Correcting illuminated defects In rare cases, a portion of the pixels of CCD image sensor used by the camera could be damaged by cosmic rays and the like. This damage could cause white spots (illuminated defects) to appear on the screen. If illuminated defects appear in the images of the document camera, correct them as follows: 1 With the document camera in use, cover the camera lens completely with black paper, cloth, or the like. Camera lens 2 Press the ARM LIGHT button on the Camera control panel and the button on the control panel (main unit side) simultaneously. (The remote control buttons cannot be used.) The illuminated defects are corrected. PRECAUTION • Do not press both the ARM LIGHT button and button when the camera lens is not blocked. Doing so will erase correction data that has already been stored, or add corrections to normal areas. This should also take care when camera input is not selected. 48 I Sending the camera's images to a computer (Models equipped with PC card slot) Models equipped with a PC card slot can use a wireless LAN PC card to send images taken with the document camera to a computer in JPEG format, and open them, or save them to disk. 1 Preparing the computer and projector • Set up the computer and projector in accordance with "Preparation" p.34 , and enable wireless LAN communication. 2 Operating the projector q Switch to camera input. w Display the camera image, and press the STORE IMAGE button. A message appears on the screen, confirming that you wish to save the image. W.BALANCE OVERLAY ARM LIGHT LOCK STORE IMAGE CAMERA GAIN CAMERA e Press the button to save the image. (To not save the image, use the buttons to select No, then press the button.) The image data is temporarily saved in the projector as a JPEG file. When the save is complete a message appears, then disappears after a moment. 3 Operating the computer q Launch the Wireless Utility software application. w Click on the Document camera icon . The Wireless Utility window changes to Document camera mode. e Select Open a file or Save to Disk. If you only want to view the image taken with the document camera on the computer screen, select Open a file. To save the JPEG file sent from the projector to disk, select Save to Disk. 49 Operations
-
 1
1 -
2
-
3
-
4
-
5
-
6
-
7
-
8
-
9
-
10
-
11
-
12
-
13
-
14
-
15
-
16
-
17
-
18
-
19
-
 20
20 -
 21
21 -
 22
22 -
 23
23 -
 24
24 -
 25
25 -
 26
26 -
 27
27 -
 28
28 -
 29
29 -
 30
30 -
31
-
32
-
33
-
34
-
35
-
36
-
37
 |
 |
