Toshiba TLP-T721U Owners Manual - Page 26
Storing the camera images into the memory PC card
 |
View all Toshiba TLP-T721U manuals
Add to My Manuals
Save this manual to your list of manuals |
Page 26 highlights
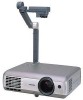
Using the document camera (Continued) r Select the projector on which the images were temporarily saved in step 2 . A list of the MAC addresses of the wireless LAN PC cards p.32 , p.60 mounted on the projectors that are available for communication appears. (If projector name has been set up already, it is shown instead of the MAC address.) Select the desired projector from this list. Then icon is displayed on the projector's screen for few seconds. t Click on the button. If Open a file was selected in step e Open the JPEG file sent from the projector, and display it on the computer. The software application linked to the jpg extension on that computer displays the file. If Save to Disk was selected in step e A dialog box appears, prompting you to select a location in which to save the JPEG file sent from the projector. Specify a file name in this dialog box to save the file. To view or save another image from the camera, repeat w and e of step 2 , and t of step 3 as many times as necessary. Notes • Only one image can be saved on this projector temporarily at a time. If another image is saved, the current one is overwritten. • Any adjustments other than CAMERA GAIN (+/-) and Sharpness will not be reflected on the forwarded image. • It is not possible to photograph resized or frozen images. • The size of the saved file will vary, depending on the image. 50 I Storing the camera images into the memory PC card (Models equipped with PC card slot) Models equipped with a PC card slot are able to save image data taken with the document camera onto a memory PC card (sold separately) in JPEG format. 1 Mount a memory PC card into the PC card slot p.23 . Mounting a PC card will switch to PC card input if Input select mode is set to Auto on the PC card setting menu p.55 . In this case, press the CAMERA button on the Camera control panel to switch to camera input. 2 Display the camera image, and press the STORE IMAGE button. A message appears on the screen, confirming that you wish to save the image. W.BALANCE OVERLAY ARM LIGHT LOCK STORE IMAGE CAMERA GAIN CAMERA 3 Press the buttons to save the image. (To not save the image, use the buttons to select No, then press the button.) Data save to the memory PC card begins. The icon will appear on the upper left of the screen during saving. Never remove the memory PC card during a save. Doing so could corrupt your data, or damage the PC card. When the writing is complete, the icon disappears and a message appears informing you that saving is complete, then disappears after a few seconds. Repeat step 2 3 as necessary to store more images. 4 Check the saved file, if necessary. Use the steps in "Projecting images stored in a memory PC card" p.42 to check the contents of the file or image. Images are saved in the memory PC card's _doccam folder in JPEG format. If there is no _doccam folder, the images are created in the memory PC card's root directory. Notes • Any adjustments other than CAMERA GAIN (+/-) and Sharpness will not be reflected on a JPEG file saved on the memory PC card. • It is not possible to photograph resized or frozen images. • Saved files are saved with names in the range of pix001.jpg to pix999.jpg. If there is already a file named pix999.jpg, no more files can be saved. • The size of the file will vary, depending on the image. The number of files that can be saved depends on the size of the files and the capacity of the memory PC card. • Do not mount a write-protected memory PC card into the projector. It may become impossible to access the memory PC card. 51 Operations
-
 1
1 -
2
-
3
-
4
-
5
-
6
-
7
-
8
-
9
-
10
-
11
-
12
-
13
-
14
-
15
-
16
-
17
-
18
-
19
-
20
-
 21
21 -
 22
22 -
 23
23 -
 24
24 -
 25
25 -
 26
26 -
 27
27 -
 28
28 -
 29
29 -
 30
30 -
 31
31 -
32
-
33
-
34
-
35
-
36
-
37
 |
 |
