Toshiba Tecra A50-CSMBNX1 Tecra A50-C/Z50-C Series Windows 10 Users Guide - Page 140
Web Camera help, Testing your internal Web Camera
 |
View all Toshiba Tecra A50-CSMBNX1 manuals
Add to My Manuals
Save this manual to your list of manuals |
Page 140 highlights
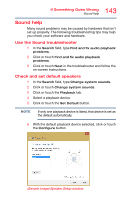
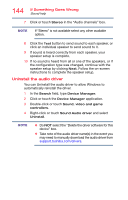
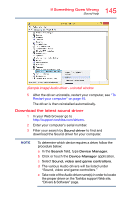
140 If Something Goes Wrong Web Camera help Never use a pencil to press the manual eject button. Pencil lead can break off inside the computer and damage it. Some discs run correctly but others do not. Check that the type of disc you are using is compatible with your optical disc drive. For more information regarding supported optical media formats, refer to the complete detail specifications for your computer at support.toshiba.com. If the problem is with an optical data disc, refer to the software's documentation and check that the hardware configuration meets the program's needs. The disc will not come out of the drive when you click the eject button on the screen. Press the button on the optical disc drive itself. For additional information see "You press the disc eject button, but the drive tray does not slide out." on page 139. Web Camera help There are a few easy steps to troubleshooting and fixing Web Camera issues. Any one of the steps below may fix the problem. After each step, test the Web Camera. If it works, stop troubleshooting. If you do not wish to go through each troubleshooting step, you may skip to "Perform a system restore" on page 142. Testing your internal Web Camera 1 In the Search field, type Camera. 2 Click or touch the Camera application. NOTE If the Camera application is not available you can download the Camera application from the Windows store. 3 If the internal Web Camera works using the default camera application but does not work with your third party camera application contact the provider.
-
 1
1 -
2
-
3
-
4
-
5
-
6
-
7
-
8
-
9
-
10
-
11
-
12
-
13
-
14
-
15
-
16
-
17
-
18
-
19
-
20
-
21
-
22
-
23
-
24
-
25
-
26
-
27
-
28
-
29
-
30
-
31
-
32
-
33
-
34
-
35
-
36
-
37
-
38
-
39
-
40
-
41
-
42
-
43
-
44
-
45
-
46
-
47
-
48
-
49
-
50
-
51
-
52
-
53
-
54
-
55
-
56
-
57
-
58
-
59
-
60
-
61
-
62
-
63
-
64
-
65
-
66
-
67
-
68
-
69
-
70
-
71
-
72
-
73
-
74
-
75
-
76
-
77
-
78
-
79
-
80
-
81
-
82
-
83
-
84
-
85
-
86
-
87
-
88
-
89
-
90
-
91
-
92
-
93
-
94
-
95
-
96
-
97
-
98
-
99
-
100
-
101
-
102
-
103
-
104
-
105
-
106
-
107
-
108
-
109
-
110
-
111
-
112
-
113
-
114
-
115
-
116
-
117
-
118
-
119
-
120
-
121
-
122
-
123
-
124
-
125
-
126
-
127
-
128
-
129
-
130
-
131
-
132
-
133
-
134
-
 135
135 -
 136
136 -
 137
137 -
 138
138 -
 139
139 -
 140
140 -
 141
141 -
 142
142 -
 143
143 -
 144
144 -
 145
145 -
146
-
147
-
148
-
149
-
150
-
151
-
152
-
153
-
154
-
155
-
156
-
157
-
158
-
159
-
160
-
161
-
162
-
163
-
164
-
165
-
166
-
167
-
168
-
169
-
170
-
171
-
172
-
173
-
174
-
175
-
176
-
177
-
178
-
179
-
180
-
181
-
182
-
183
-
184
-
185
-
186
-
187
-
188
-
189
-
190
-
191
 |
 |
