Toshiba Tecra A9-S9013 User Manual - Page 196
Start, Network, View Status, Details, DHCP Enabled, Close, Enter, MAC address filtering
 |
View all Toshiba Tecra A9-S9013 manuals
Add to My Manuals
Save this manual to your list of manuals |
Page 196 highlights
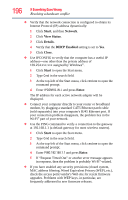
196 If Something Goes Wrong Resolving a hardware conflict ❖ Verify that the network connection is configured to obtain its Internet Protocol (IP) address dynamically: 1 Click Start, and then Network. 2 Click View Status. 3 Click Details. 4 Verify that the DHCP Enabled setting is set to Yes. 5 Click Close. ❖ Use IPCONFIG to verify that the computer has a useful IP address-one other than the private address of 169.254.xxx.xxx assigned by Windows®. 1 Click Start to open the Start menu. 2 Type Cmd in the search field. 3 At the top-left of the Start menu, click cmd.exe to open the command prompt. 4 Enter IPCONFIG /ALL and press Enter. The IP address for each active network adapter will be displayed. ❖ Connect your computer directly to your router or broadband modem, by plugging a standard CAT5 Ethernet patch cable (sold separately) into your computer's RJ45 Ethernet port. If your connection problem disappears, the problem lies in the Wi-Fi® part of your network. ❖ Use the PING command to verify a connection to the gateway at 192.168.1.1 (a default gateway for most wireless routers). 1 Click Start to open the Start menu. 2 Type Cmd in the search field. 3 At the top-left of the Start menu, click cmd.exe to open the command prompt. 4 Enter PING 192.168.1.1 and press Enter. 5 If "Request Timed Out" or another error message appears in response, then the problem is probably Wi-Fi®-related. ❖ If you have enabled any security provisions (closed system, MAC address filtering, Wired Equivalent Privacy (WEP), etc.), check the access point vendor's Web site for recent firmware upgrades. Problems with WEP keys, in particular, are frequently addressed in new firmware releases.
-
 1
1 -
2
-
3
-
4
-
5
-
6
-
7
-
8
-
9
-
10
-
11
-
12
-
13
-
14
-
15
-
16
-
17
-
18
-
19
-
20
-
21
-
22
-
23
-
24
-
25
-
26
-
27
-
28
-
29
-
30
-
31
-
32
-
33
-
34
-
35
-
36
-
37
-
38
-
39
-
40
-
41
-
42
-
43
-
44
-
45
-
46
-
47
-
48
-
49
-
50
-
51
-
52
-
53
-
54
-
55
-
56
-
57
-
58
-
59
-
60
-
61
-
62
-
63
-
64
-
65
-
66
-
67
-
68
-
69
-
70
-
71
-
72
-
73
-
74
-
75
-
76
-
77
-
78
-
79
-
80
-
81
-
82
-
83
-
84
-
85
-
86
-
87
-
88
-
89
-
90
-
91
-
92
-
93
-
94
-
95
-
96
-
97
-
98
-
99
-
100
-
101
-
102
-
103
-
104
-
105
-
106
-
107
-
108
-
109
-
110
-
111
-
112
-
113
-
114
-
115
-
116
-
117
-
118
-
119
-
120
-
121
-
122
-
123
-
124
-
125
-
126
-
127
-
128
-
129
-
130
-
131
-
132
-
133
-
134
-
135
-
136
-
137
-
138
-
139
-
140
-
141
-
142
-
143
-
144
-
145
-
146
-
147
-
148
-
149
-
150
-
151
-
152
-
153
-
154
-
155
-
156
-
157
-
158
-
159
-
160
-
161
-
162
-
163
-
164
-
165
-
166
-
167
-
168
-
169
-
170
-
171
-
172
-
173
-
174
-
175
-
176
-
177
-
178
-
179
-
180
-
181
-
182
-
183
-
184
-
185
-
186
-
187
-
188
-
189
-
190
-
 191
191 -
 192
192 -
 193
193 -
 194
194 -
 195
195 -
 196
196 -
 197
197 -
 198
198 -
 199
199 -
 200
200 -
 201
201 -
202
-
203
-
204
-
205
-
206
-
207
-
208
-
209
-
210
-
211
-
212
-
213
-
214
-
215
-
216
-
217
-
218
-
219
-
220
-
221
-
222
-
223
-
224
-
225
-
226
-
227
-
228
-
229
-
230
-
231
-
232
-
233
-
234
-
235
-
236
-
237
-
238
-
239
-
240
-
241
-
242
-
243
 |
 |
