Tripp Lite B0930082E4U Quick Start Guide for B093-004-2E4U B093-008-2E4U B093- - Page 3
Connect the Console Server, Set a Strong, High-Entropy Passcode, for the Root User
 |
View all Tripp Lite B0930082E4U manuals
Add to My Manuals
Save this manual to your list of manuals |
Page 3 highlights
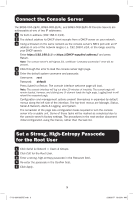
Connect the Console Server The B093-004-2E4U, B093-008-2E4U, and B093-008-2E4U-M Console Servers are addressable at one of two IP addresses: 1 Its built-in address (192.168.0.1/24). 2 The default address its DHCP client accepts from a DHCP server on your network. 3 Using a browser on the same network as the console server's NET1 port with an IP address in one of the network ranges (i.e. 192.168.0.x/24, or the range used by your DHCP server): Enter https://192.168.0.1/ or https://[DHCP-supplied address]/ and press Return. Note: The console server's self-signed SSL certificate "untrusted connection" error will be present. 4 Click through the error to load the console server login page. 5 Enter the default system username and passcode. Username: root Password: default Press Submit or Return. The console interface welcome page will load. Note: The console interface will log out after 20 minutes of inactivity. The current page will remain loaded, however, and clicking any UI element loads the login page. Logging back in will reload the requested page. Configuration and management options present themselves in expanded-by-default menus along the left side of the interface. The top-level menus are Manage, Status, Serial & Network, Alerts & Logging, and System. The remainder of the page lists configuration tasks required to turn the console server into a usable unit. Some of these tasks will be marked as completed due to the console server's factory settings. The procedures in the next section document initial configuration using the menus, rather than the task list. Set a Strong, High-Entropy Passcode for the Root User 1 Click Serial & Network > Users & Groups. 2 Click Edit for the Root User. 3 Enter a strong, high-entropy passcode in the Password field. 4 Re-enter the passcode in the Confirm field. 5 Click Apply. 3 17-12-034-933787.indb 3 12/8/2017 10:03:41 AM
-
 1
1 -
 2
2 -
 3
3 -
 4
4 -
 5
5 -
 6
6 -
 7
7 -
 8
8 -
 9
9 -
10
-
11
-
12
-
13
-
14
-
15
-
16
-
17
-
18
-
19
-
20
 |
 |
