Tripp Lite B098016 Quick Start Guide for Console Servers English - Page 3
Connect to the Console Server
 |
View all Tripp Lite B098016 manuals
Add to My Manuals
Save this manual to your list of manuals |
Page 3 highlights
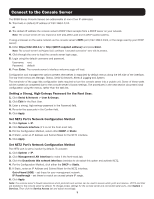
Connect to the Console Server The B098-Series Console Servers are addressable at one of two IP addresses: 1. Their built-in (default) IP address of 192.168.0.1/24. or 2. The default IP address the console server's DHCP Client accepts from a DHCP server on your network. Note: The console server will now respond at both 192.168.0.1/24 and its DHCP-supplied address. If using a browser on the same network as the console server's NET1 port (192.168.0.X/24, or the range used by your DHCP server): 3. Enter https://192.168.0.1/ or http://[DHCP-supplied address]/ and press Enter. Note: The console server's self-signed SSL certificate "untrusted connection" error will be present. 4. Click through the error to load the console server login page. 5. Login using the default username and password. Username: root Password: default 6. Press Enter. The console server's interface welcome page will load. Configuration and management options present themselves in expanded-by-default menus along the left side of the interface. The top-level menus are Manage, Status, Serial & Network, Alerts & Logging and System. The remainder of the page lists configuration tasks required to turn the console server into a usable unit. Some of these tasks will be marked as completed due to the console server's factory settings. The procedures in the next section document initial configuration using the menus, rather than the task list. Setting a Strong, High-Entropy Password for the Root User: 1. Click Serial & Network > User & Groups. 2. Click Edit for the Root User. 3. Enter a strong, high-entropy password in the Password field. 4. Re-enter the passcode in the Confirm field. 5. Click Apply. Set NET1 Port's Network Configuration Method 1. Click System > IP. 2. Click Network Interface (if it is not the front-most tab). 3. For the Configuration Method, select either DHCP or Static. 4. If Static, enter an IP Address and Subnet Mask for the NET1 interface. 5. Click Apply. Set NET2 Port's Network Configuration Method The NET2 port is set to inactive by default. To activate: 1. Click System > IP. 2. Click Management LAN Interface to make it the front-most tab. 3. Click the Deactivate this network interface checkbox to de-select this option and activate NET2. 4. For the Configuration Method, click either the DHCP or Static. 5. If Static, enter an IP Address and Subnet Mask for the NET2 interface. Out-of-band (OOB) - set these for your management network. IP Passthrough - set these to match an unused private IP range. 6. Click Apply. Note: The console server's firewall determines which protocols and services can be used to access which ports and devices. HTTPS and SSH are enabled to the console server by default. To change access settings for the console server and connected serial ports, click System > Services. Then click the Service Access tab and adjust accordingly. 3
-
 1
1 -
 2
2 -
 3
3 -
 4
4 -
 5
5 -
 6
6 -
 7
7 -
 8
8
 |
 |
