Tripp Lite B098048 Quick Start Guide for Console Servers English - Page 4
Configuring Managed Devices, Connecting to Wi-Fi
 |
View all Tripp Lite B098048 manuals
Add to My Manuals
Save this manual to your list of manuals |
Page 4 highlights
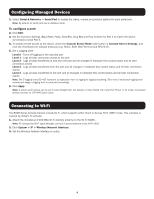
Configuring Managed Devices 1. Select Serial & Networks > Serial Port to display the labels, modes and protocol options for each serial port. Note: By default, all serial ports are in disabled mode. To configure a port: 2. Click Edit. 3. Set the Common Settings (Baud Rate, Parity, Data Bits, Stop Bits and Flow Control) for Port X to match the device connected to serial Port X. 4. To enable remote access to the device, check the Console Server Mode radio button in Console Server Settings, and click the checkboxes for allowed protocols (e.g. Telnet, SSH, Web Terminal and RFC2217). 5. Set a Logging Level Level 0 - Turns off logging for the selected port Level 1 - Logs all User connection events to the port Level 2 - Logs all data transferred to and from the port and all changes in hardware flow control status and all User connection events Level 3 - Logs all data transferred from the port and all changes in hardware flow control status and all User connection events Level 4 - Logs all data transferred to the port and all changes in hardware flow control status and all User connection events Note: The 5 logging levels DO NOT represent a progression from no logging to logging everything. Take note of what each logging level records and assign a logging level to each port accordingly. 6. Click Apply. Note: A serial's port's pinout can be set to Cisco Straight (X2: the default) or Cisco Rolled (X1) using Port Pinout. In X2 mode, most serial devices connect via UTP RJ45 patch cable. Connecting to Wi-Fi The B098-Series Console Servers include Wi-Fi, which supports either Client or Access Point (WAP) mode. This interface is inactive by default. To activate: 1. Attach the included 2.4 GHz SMA Wi-Fi diversity antenna to the Wi-Fi (MAIN). Note: To increase the Wi-Fi signal strength, connect a second antenna to the Wi-Fi (AUX). 2. Click System > IP > Wireless Network Interface. 3. Set the Wireless Network Interface to active. 4
-
 1
1 -
 2
2 -
 3
3 -
 4
4 -
 5
5 -
 6
6 -
 7
7 -
 8
8
 |
 |
