Tripp Lite SMART5000TEL3U Owner's Manual for SmartPro 3U Rackmount UPS 932459 - Page 7
Basic Operation
 |
View all Tripp Lite SMART5000TEL3U manuals
Add to My Manuals
Save this manual to your list of manuals |
Page 7 highlights
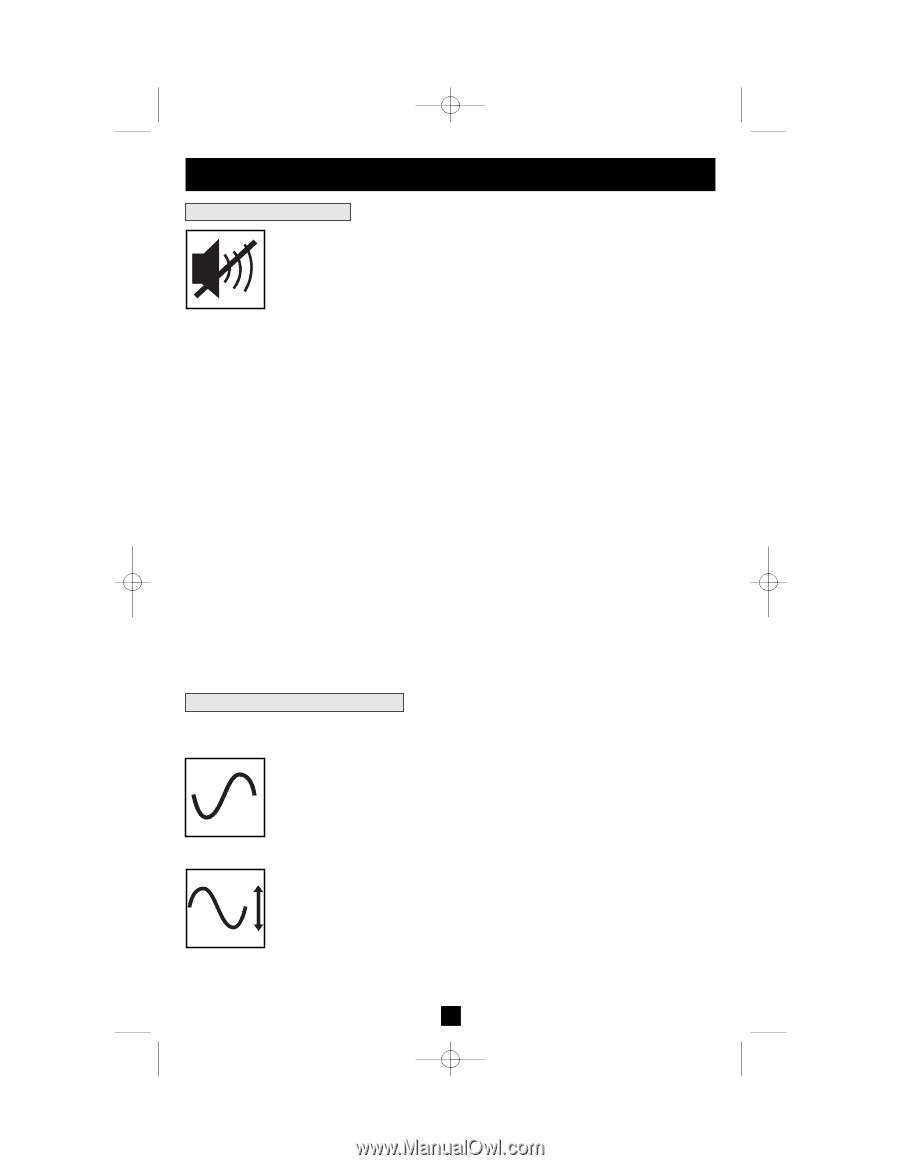
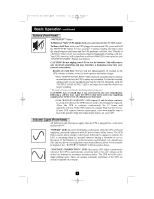
201112103 93-2459.qxd 1/9/2012 12:21 PM Page 7 Basic Operation continued Buttons (Front Panel) "MUTE/TEST" Button To Silence (or"Mute") UPSAlarms: briefly press and release the MUTE/TESTbutton.* To Run a Self-Test: with your UPS plugged in and turned ON, press and hold the MUTE/TEST button for two seconds.* Continue holding the button until the alarm beeps several times and the UPS performs a self test. See "Results of a Self-Test" below. Note: you can leave connected equipment on during a self-test. Your UPS, however, will not perform a self-test if the UPS is not turned on (see "ON/OFF/STANDBY" Button description). CAUTION! Do not unplug your UPS to test its batteries. This will remove safe electrical grounding and may introduce a damaging surge into your network connections. Results of a Self-Test: The test will last approximately 10 seconds as the UPS switches to battery to test its load capacity and battery charge. • If the "OUTPUT LOAD LEVEL" LED remains lit red and the alarm continues to sound after the test, the UPS's outlets are overloaded. To clear the overload, unplug some of your equipment and run the self-test repeatedly until the "OUTPUT LOAD LEVEL" LED is no longer lit red and the alarm is no longer sounding. * The alarm will beep once briefly after the indicated interval has passed. CAUTION! Any overload that is not corrected by the user immediately following a self-test may cause the UPS to shut down and cease supplying output power in the event of a blackout or brownout. • If the "BATTERY WARNING" LED remains lit and the alarm continues to sound after the test, the UPS batteries need to be recharged or replaced. Allow the UPS to recharge continuously for 12 hours, and repeat the self-test. If the LED remains lit, contact Tripp Lite for service. If your UPS requires battery replacement, visit www.tripplite.com to locate the specific Tripp Lite replacement battery for your UPS. Indicator Lights (Front Panel) All Indicator Light descriptions apply when the UPS is plugged into a wall outlet and turned ON. "POWER" LED: this green LED lights continuously when the UPS is ON and supplying connected equipment with AC power from a utility source. The LED flashes and an alarm sounds (4 short beeps followed by a pause) to indicate the UPS is operating from its internal batteries during a blackout or severe brownout. If the blackout or severe brownout is prolonged, you should save files and shut down your equipment since internal battery power will eventually be depleted. See "BATTERY CHARGE" LED description below. "VOLTAGE CORRECTION" LED: this green LED lights continuously whenever the UPS is automatically correcting high or low AC voltage on the utility line without the assistance of battery power. The UPS will also emit a slight clicking noise. These are normal, automatic operations of the UPS, no action is required on your part. 7
-
 1
1 -
 2
2 -
 3
3 -
 4
4 -
 5
5 -
 6
6 -
 7
7 -
 8
8 -
 9
9 -
 10
10 -
 11
11 -
 12
12 -
13
-
14
-
15
-
16
-
17
-
18
-
19
-
20
-
21
-
22
-
23
-
24
-
25
-
26
-
27
-
28
-
29
-
30
-
31
-
32
-
33
-
34
-
35
-
36
 |
 |