Tripp Lite SMX1500LCDT 9332B0.pdf - Page 4
Basic Operation - battery
 |
View all Tripp Lite SMX1500LCDT manuals
Add to My Manuals
Save this manual to your list of manuals |
Page 4 highlights
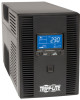
Basic Operation UPS ON/OFF • Plug the UPS into a live, grounded outlet. The LCD display will illuminate, the battery charger will engage as necessary and the SURGE PROTECTED outlets will begin passing power. Before turning the UPS on, the input voltage range of the UPS can be selected after plugging it into a live grounded outlet. To select the input voltage range for the UPS, press and hold the MUTE/SELECT button until the UPS beeps and displays 0, 1 or 2 on the LCD screen (repeat this procedure until the desired number is displayed). The number on the LCD screen corresponds to the following input voltage ranges, 0: 170-280V (DEFAULT, WIDE); 1: 175-275V (MEDIUM); 2: 180-270V (NARROW). Note: The input voltage range can only be changed while the UPS is in standby mode. Selection Value 0 1 2 Input Voltage Range 170-280VAC 175-275VAC 180-270VAC • Plug equipment into the UPS: Your UPS is designed to support electronic equipment only. You will overload the UPS if the total VA ratings for all the equipment you connect to the "Battery, Surge and Noise Protected" outlets exceed the UPS's Output Capacity. To estimate your equipment's power requirements, look on the nameplate. If the equipment is listed in amps, multiply the number of amps by 230 to determine VA, (Example: 1 amp x 230 = 230 VA). Your UPS is fully loaded when the display indicates 100% load. • Turn the UPS on: Press and hold the POWER BUTTON for one second. The UPS alarm will beep once briefly. The BATTERY/SURGE PROTECTED outlets will begin passing AC line power. The UPS will automatically recharge internal batteries as needed. Once turned on, your UPS is ready to protect connected equipment from blackouts, brownouts, overvoltages and transient surges. • Turn the UPS off: Press and hold the POWER BUTTON for one second. 4 13-03-278-9332B0.indb 4 6/4/2013 12:01:06 PM
-
 1
1 -
 2
2 -
 3
3 -
 4
4 -
 5
5 -
 6
6 -
 7
7 -
 8
8 -
 9
9 -
 10
10 -
11
-
12
-
13
-
14
-
15
-
16
-
17
-
18
-
19
-
20
-
21
-
22
-
23
-
24
-
25
-
26
-
27
-
28
-
29
-
30
-
31
-
32
-
33
-
34
-
35
-
36
-
37
-
38
-
39
-
40
-
41
-
42
-
43
-
44
 |
 |
