URC CAM-MC Owners Manual - Page 6
Basic Installation, Fasten
 |
View all URC CAM-MC manuals
Add to My Manuals
Save this manual to your list of manuals |
Page 6 highlights
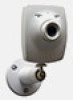
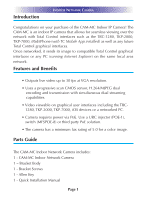
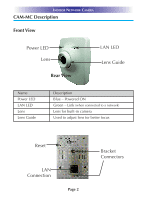
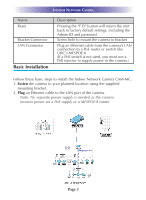
INDOOR NETWORK CAMERA Name Reset Bracket Connector LAN Connector Basic Installation Description Pressing the "F.D" button will return the unit back to factory default settings, including the Admin ID and password. Screw hole to mount the camera to bracket Plug an Ethernet cable from the camera's LAN connection to a PoE router or switch like URC's MFSPOE-8. (If a PoE switch is not used, you must use a PoE injector to supply power to the camera.) Follow these basic steps to install the Indoor Network Camera CAM-MC. 1. Fasten the camera to your planned location using the supplied mounting bracket. 2. Plug an Ethernet cable to the LAN port of the camera. Note: No separate power supply is needed as the camera receives power via a PoE supply or a MFSPOE-8 router. Page 3
-
 1
1 -
 2
2 -
 3
3 -
 4
4 -
 5
5 -
 6
6 -
 7
7 -
 8
8 -
 9
9 -
 10
10 -
 11
11 -
 12
12 -
13
-
14
-
15
-
16
-
17
-
18
-
19
-
20
 |
 |
