Uniden DXAI4588-2 English Owners Manual - Page 4
Installing the Phone - black
 |
UPC - 050633300657
View all Uniden DXAI4588-2 manuals
Add to My Manuals
Save this manual to your list of manuals |
Page 4 highlights
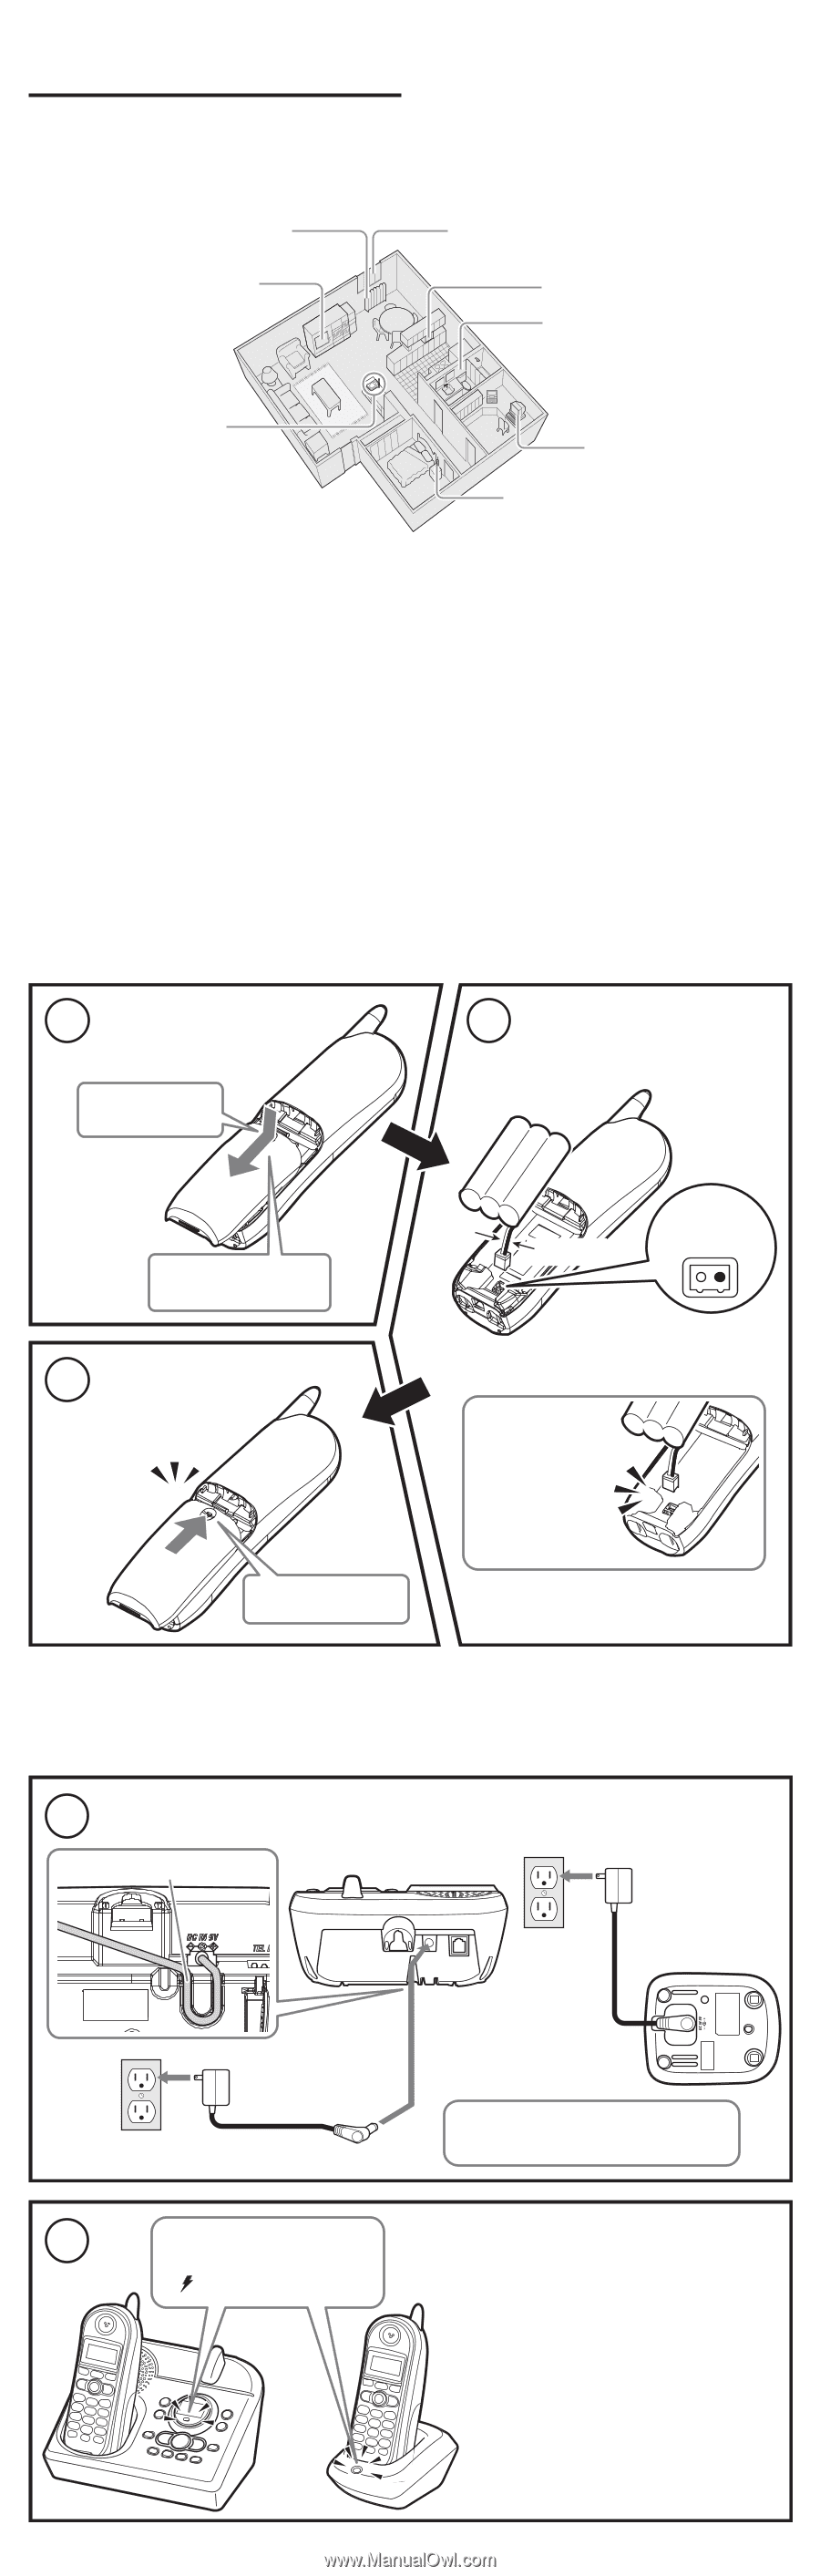
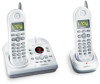
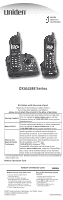
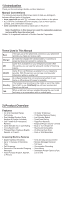
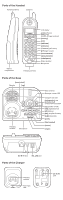
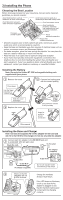
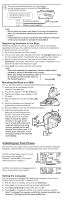
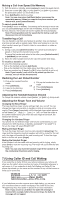
3) Installing the Phone Choosing the Best Location Before choosing a location for your new phone, here are some important guidelines you should consider: Avoid heat sources, such as radiators, air ducts, and sunlight Avoid noise sources such as a window by a street with heavy traffic Avoid television sets and other electronic equipment Choose a central location Avoid microwave ovens Avoid excessive moisture, extremely low temperatures, dust, mechanical vibration, or shock Avoid personal computers Avoid other cordless telephones • Choose a location close to both a phone jack and a continuous power outlet (one which is not connected to a switch). • Keep the base and handsets away from sources of electrical noise such as motors, microwave ovens, and fluorescent lighting. • For better reception, place the base as high as possible. You can place the base on a desk or table top or mount it on the wall. • Place the base in an open area for optimum range and reception. • If your home has specially wired alarm equipment connected to the telephone line, be sure that installing the system does not disable your alarm equipment. If you have questions about what will disable your alarm equipment, contact your telephone company or a qualified installer. Installing the Battery Note: Use only the Uniden BT-1006 rechargeable battery pack supplied with your phone. 1 Remove the cover. 2 Connect the battery pack with the correct polarity. Press down Use the finger indention for a better grip Slide the cover downward 3 Replace the cover. Red Red Black Black Wire Wire The connector notches fit only one way. Click Listen for a click to ensure connection. Slide upwards Installing the Base and Charger Note: Use only the supplied AD-314 AC adapter for the base and AD-310 or AD-1010 for the charger. Do not use any other AC adapter. 1 Connect each AC adapter to the DC IN 9V jack and to a standard 120V AC wall outlet. Route the cord. To AC outlet AC adapter (supplied) To AC outlet To DC IN 9V AC adapter (supplied) To DC IN 9V Do not use a power outlet controlled by a wall switch. 2 Make sure that the charge/in use and LEDs illuminate. Charge the handsets at least 15-20 hours. If the LED does not illuminate, check to see that the AC adapter is plugged in and that the handset makes good contact with the charging contacts.
-
 1
1 -
 2
2 -
 3
3 -
 4
4 -
 5
5 -
 6
6 -
 7
7 -
 8
8 -
 9
9 -
 10
10 -
11
-
12
-
13
-
14
-
15
-
16
 |
 |