Uniden GC45W User Manual - Page 8
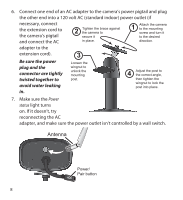
Be sure the power, plug and the, connector are tightly, twisted together to, avoid water leaking
 |
View all Uniden GC45W manuals
Add to My Manuals
Save this manual to your list of manuals |
Page 8 highlights
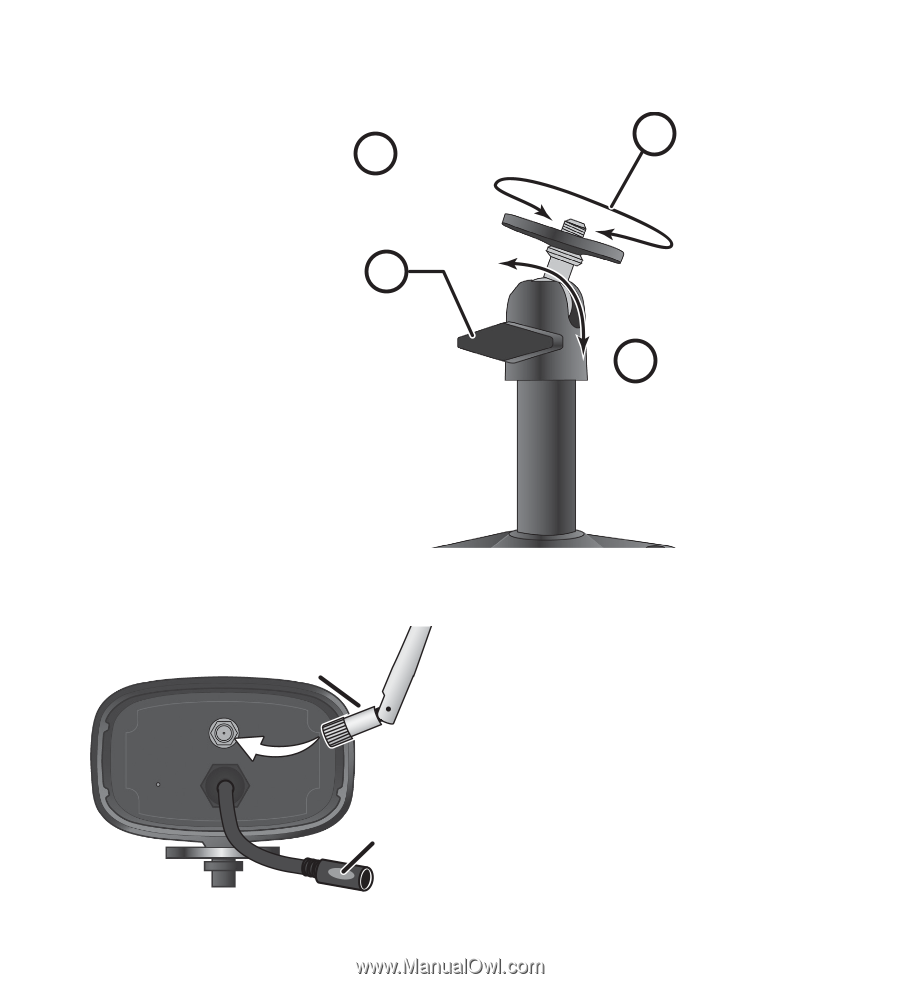
6. Connect one end of an AC adapter to the camera's power pigtail and plug the other end into a 120 volt AC (standard indoor) power outlet (if necessary, connect the extension cord to the camera's pigtail and connect the AC 2 Tighten the brace against the camera to secure it in place. 1 Attach the camera to the mounting screw and turn it to the desired direction. adapter to the extension cord). Be sure the power plug and the connector are tightly twisted together to avoid water leaking in. 3 Loosen the wingnut to unlock the mounting post. 4 Adjust the post to the correct angle, then tighten the wingnut to lock the post into place. 7. Make sure the Power status light turns on. If it doesn't, try reconnecting the AC adapter, and make sure the power outlet isn't controlled by a wall switch. Antenna Power/ Pair button 8
-
 1
1 -
2
-
 3
3 -
 4
4 -
 5
5 -
 6
6 -
 7
7 -
 8
8 -
 9
9 -
 10
10 -
 11
11 -
 12
12 -
 13
13 -
14
-
15
-
16
-
17
-
18
 |
 |