Uniden SCP1 Owner s Manual - Page 9
How to Install
 |
View all Uniden SCP1 manuals
Add to My Manuals
Save this manual to your list of manuals |
Page 9 highlights
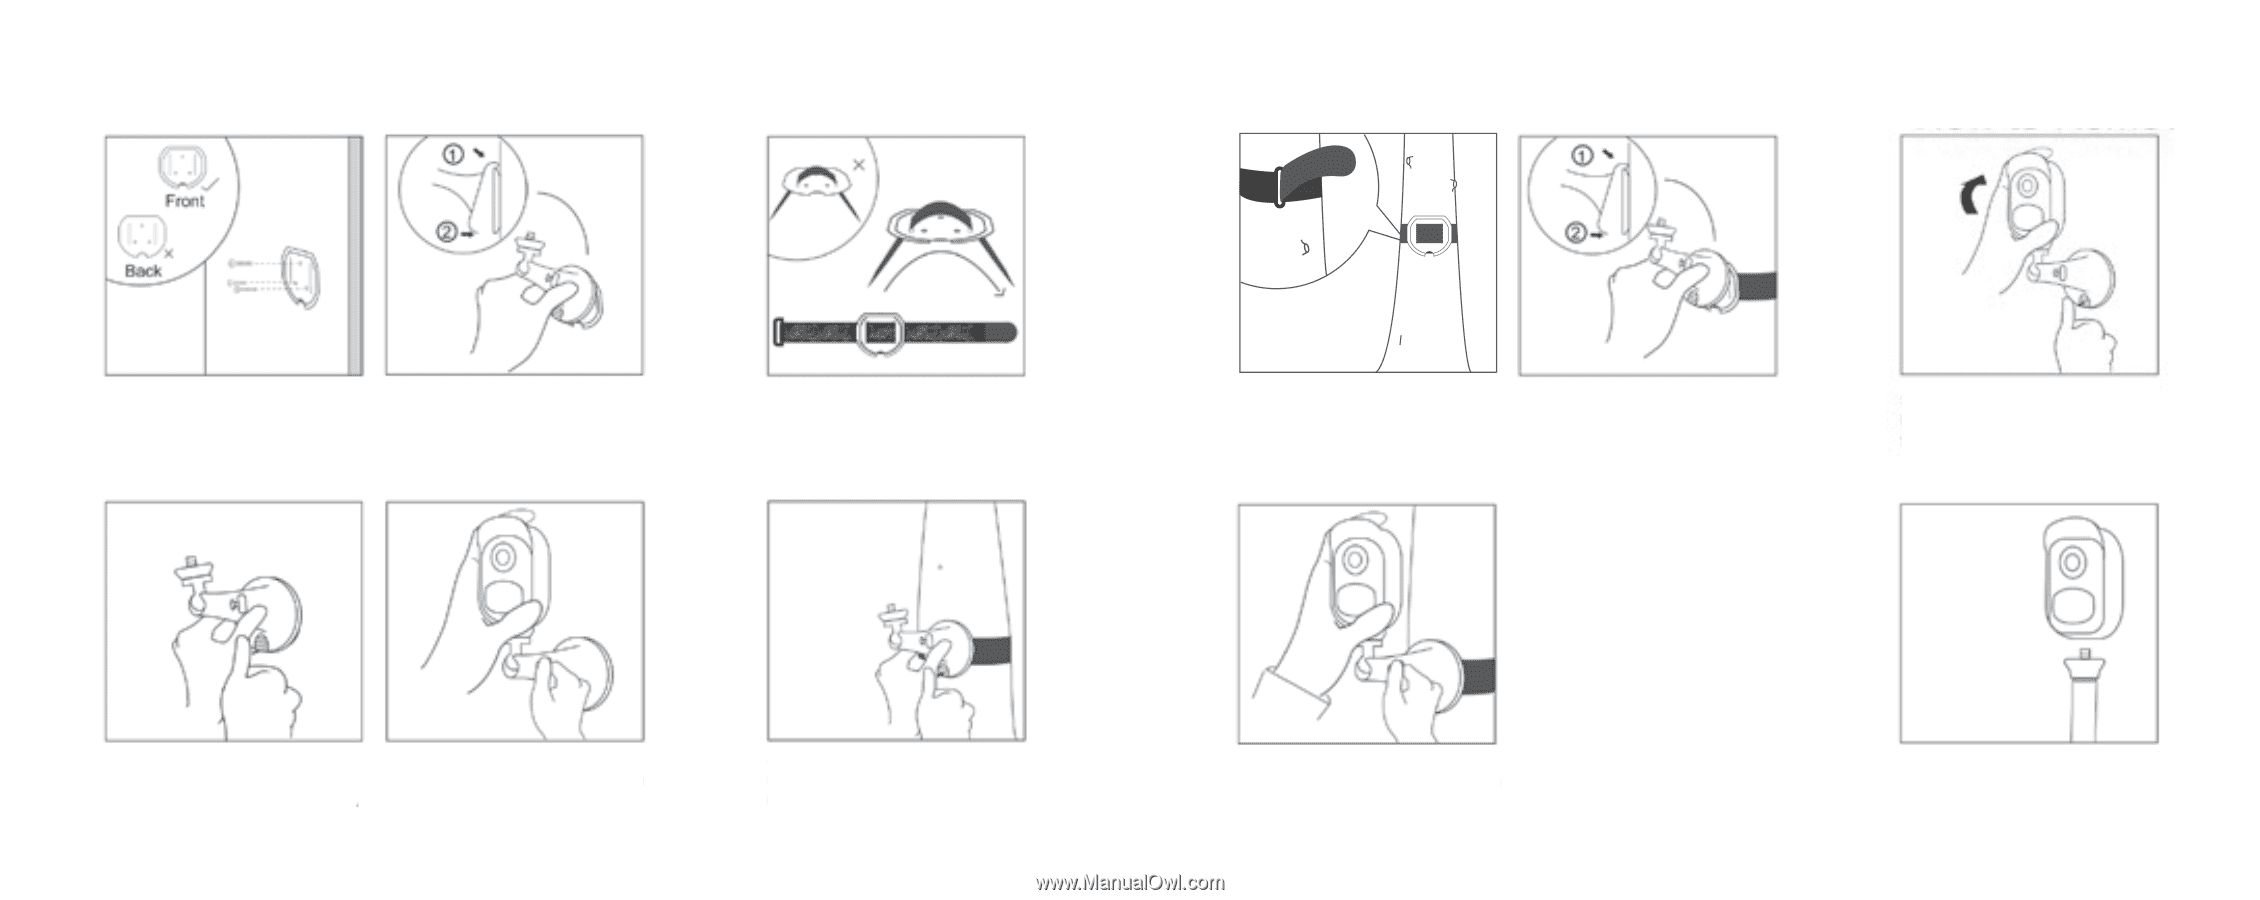
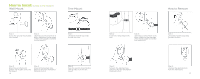
How to Install How to Install (using screw moun(uts)ing screw mount) Wall Mount Wall Mount 1 Front 2 Back Tree Mount Tree Mount How to Remove Step 1: Step 1: Step 2: Step 2: Step 1: Step 1: Screw the security mounStcprelawtethe seLcautcrihtytmheousnetcpulraittey mounLtaotnchittshe security mount oTnhritesad the hook & loop Tsthrraepad the hook & loop strap into the wall. into the wallp. late. (Make sure the toppleadteg(eMake sure the top etdhgroeuogf hthtehe slots. of the backing plate into the mount.) is inbsaecrkteindg mount). plate is inserted into the through the slots. 1 SSttep 2: FFaasstten tthhee wwaarrppsstrtarapptotothtehteree. tree. Step 3: Step 5: Step 1: Latch the SseccreuwrittyhemSooulon,taodnjuisttsits direction Thread the hook & loop strap plate. (Makaendsutirgehttehnetthoepkneodbgeto fix it. of the backing plate is inserted through the slots. How into the mount.) to Remove 2 SPbthtureeetpstmos3not:huuenntst.iel citusriptylatmeoculinctkSPusntreetiipsnl sitt3ost:hpelasteeSSatchdtccueelrjiruepciktskwyn4tsom:iiitnnbsottuotdhoniterthfebeiAcxumpttiittpooo.Cnunnaatmn. dStoSSaiglnotchedr,tepetwi4ng:hthteenStohleo,kandojbustot itfsixSPumdintrtio.reeteupislcsnit4tittos.:hnpelasetecucrliictyksminotuonSLptthaltbaeettucpehtt3(otM:hneakseecsuurrietythmeotuonpt on its edge 16 of thebacking plate is inserted into the mount). SSatSPuhdtcntreeeerjtuieppslkswsint45tsto::iihtnpbeslattdshtoeeiercfeciAucxlircptiitiktpyo.sCnminaaotmnoudntShttoebigluomht,ttooeunnnt. Step 1: Press the security mount button to pull the mount out. SUtnSUferstponcesmr2pec:wr2teh:wtehewthSaeolllAompforpouCmnatwm. aSll omloount. 17
-
 1
1 -
2
-
3
-
 4
4 -
 5
5 -
 6
6 -
 7
7 -
 8
8 -
 9
9 -
 10
10 -
 11
11
 |
 |