Vaddio EasyTALK Audio Bundle System A EasyTalk Solutions Manual - Page 28
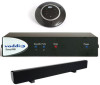
STEP 1, STEP 2, STEP 3, STEP 4, Step 5, Connecting Speaker to EasyUSB Mixer/Amp
 |
View all Vaddio EasyTALK Audio Bundle System A manuals
Add to My Manuals
Save this manual to your list of manuals |
Page 28 highlights
EasyTalk USB Solutions Diagram: Installing Ceiling Speakers in Ceiling Tile STEP 1: Identify desired location of the ceiling tile for the speaker to be installed in. Use included template to cut hole in tile. Again safety comes first. STEP 2: Place Tile Support Brace in ceiling over the top of the open hole. STEP 3: Insert ceiling speaker in the hole extending through the Tile Brace. STEP 4: Tighten hanging tabs with screws located on the face of speaker to adhere to Tile Support Brace. Step 5: Connecting Speaker to EasyUSB Mixer/Amp After the ceiling speaker is installed, the speaker must be attached to the speaker terminals of the EasyUSB Mixer/Amp. Remove the connector cover on top of ceiling speaker. Connect speaker wire to the terminal block using the 8-ohm and common terminals. Replace the wire cover. Put the plenum back cans on when finished. Behind the grill of the speaker, set the rotary dial to 8 ohm. 8-ohm setting on front of speaker Vaddio EasyUSB Solutions - Document Number 342-0449 Rev C Page 28 of 48
-
 1
1 -
2
-
3
-
4
-
5
-
6
-
7
-
8
-
9
-
10
-
11
-
12
-
13
-
14
-
15
-
16
-
17
-
18
-
19
-
20
-
21
-
22
-
 23
23 -
 24
24 -
 25
25 -
 26
26 -
 27
27 -
 28
28 -
 29
29 -
 30
30 -
 31
31 -
 32
32 -
 33
33 -
34
-
35
-
36
-
37
-
38
-
39
-
40
-
41
-
42
-
43
-
44
-
45
-
46
-
47
-
48
 |
 |
