Vaddio RoboSHOT 12 RoboSHOT 12 and 30 QDVI System Manual - Page 11
Diagram, Basic Connectivity Example of the RoboSHOT and the Quick Connect SR
 |
View all Vaddio RoboSHOT 12 manuals
Add to My Manuals
Save this manual to your list of manuals |
Page 11 highlights
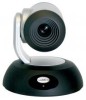
RoboSHOT HD Cameras SYSTEM CONFIGURATION EXAMPLE The Quick-Connect DVI-HDMI-SR interface uses two (2) Cat-5e cables to supply power to the camera, return differential video from the camera while providing bi-directional control (RS-232) for the camera over a distance of up to 100' (30.48m). Diagram: Basic Connectivity Example of the RoboSHOT and the Quick Connect SR RoboSHOT Camera Connected to Quick-Connect DVI/HDMI-SR Interface, ProductionVIEW™ Precision Camera Controller and HD Monitor. Rear View of RoboSHOT Camera Network Connection for Camera Configuration and Control (web server or Telnet control). Two (2) Cat-5e cables between the Camera and the Quick-Connect DVI/HDMI SR Interface RS-232 Cat-5e Cat-5e ◄ Power to Camera Video to Interface ► 24VDC, 2.0 A Power Supply RS-232 Quick-Connect DVI/HDMI SR Interface HDMI or DVI Video ProductionVIEW Precision Camera Controller HD Monitor (Simulated Video Feed) PRE-INSTALLATION Choose a camera mounting location while paying close attention to camera viewing angles, lighting conditions, possible line of site obstructions, and checking for in-wall obstructions where the camera is to be mounted. Always pick a mounting location that will optimize the performance of the camera. The included RoboSHOT wall mount can be mounted directly to a 2-gang wall box or can be mounted to a wall using dry wall anchors. RoboSHOT HD Cameras - Document Number 342-0795 Rev A Page 11 of 44
-
 1
1 -
2
-
3
-
4
-
5
-
 6
6 -
 7
7 -
 8
8 -
 9
9 -
 10
10 -
 11
11 -
 12
12 -
 13
13 -
 14
14 -
 15
15 -
 16
16 -
17
-
18
-
19
-
20
-
21
-
22
-
23
-
24
-
25
-
26
-
27
-
28
-
29
-
30
-
31
-
32
-
33
-
34
-
35
-
36
-
37
-
38
-
39
-
40
-
41
-
42
-
43
-
44
 |
 |
