ViewSonic P810 User Guide - Page 7
ViewSonic P810 - 21" CRT Display Manual
 |
View all ViewSonic P810 manuals
Add to My Manuals
Save this manual to your list of manuals |
Page 7 highlights
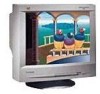
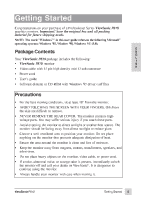
Quick Installation 1 Write the serial number on the back of the monitor in the space provided on page 1 labeled "For your records." 2 Read the Precautions section thoroughly (page 5) before installing the monitor. Make sure the computer and the monitor are both turned off before connecting any cables. 3a PC users: Attach the video cable to the computer. 3b Macintosh® users: A Macintosh computer requires a Viewsonic® Macintosh adapter. To order an adapter, contact ViewSonic Customer Support. See the back cover of this manual. 4 Attach the power cord to the back of the monitor, then plug the other end of the power cord into the power source (wall socket). 5 Turn the computer on. 6 Press the POWER button on the front of the monitor ON. (The Power light turns green.) 7 Adjust the user controls to suit your personal preference. See the Operation section (page 7), and if there are any problems, see the Troubleshooting section (page 13). For the recommended screen resolution, see Preset Modes (page 12) as well as your graphics card user guide for more detail. Installation is complete! Enjoy your new P810 Color Monitor! E N G L I S H 6 Getting Started ViewSonic P810
-
 1
1 -
 2
2 -
 3
3 -
 4
4 -
 5
5 -
 6
6 -
 7
7 -
 8
8 -
 9
9 -
 10
10 -
 11
11 -
 12
12 -
13
-
14
-
15
-
16
-
17
-
18
 |
 |
