ViewSonic PJ501 User Guide - Page 9
Installation - lcd projector
 |
UPC - 766907692815
View all ViewSonic PJ501 manuals
Add to My Manuals
Save this manual to your list of manuals |
Page 9 highlights
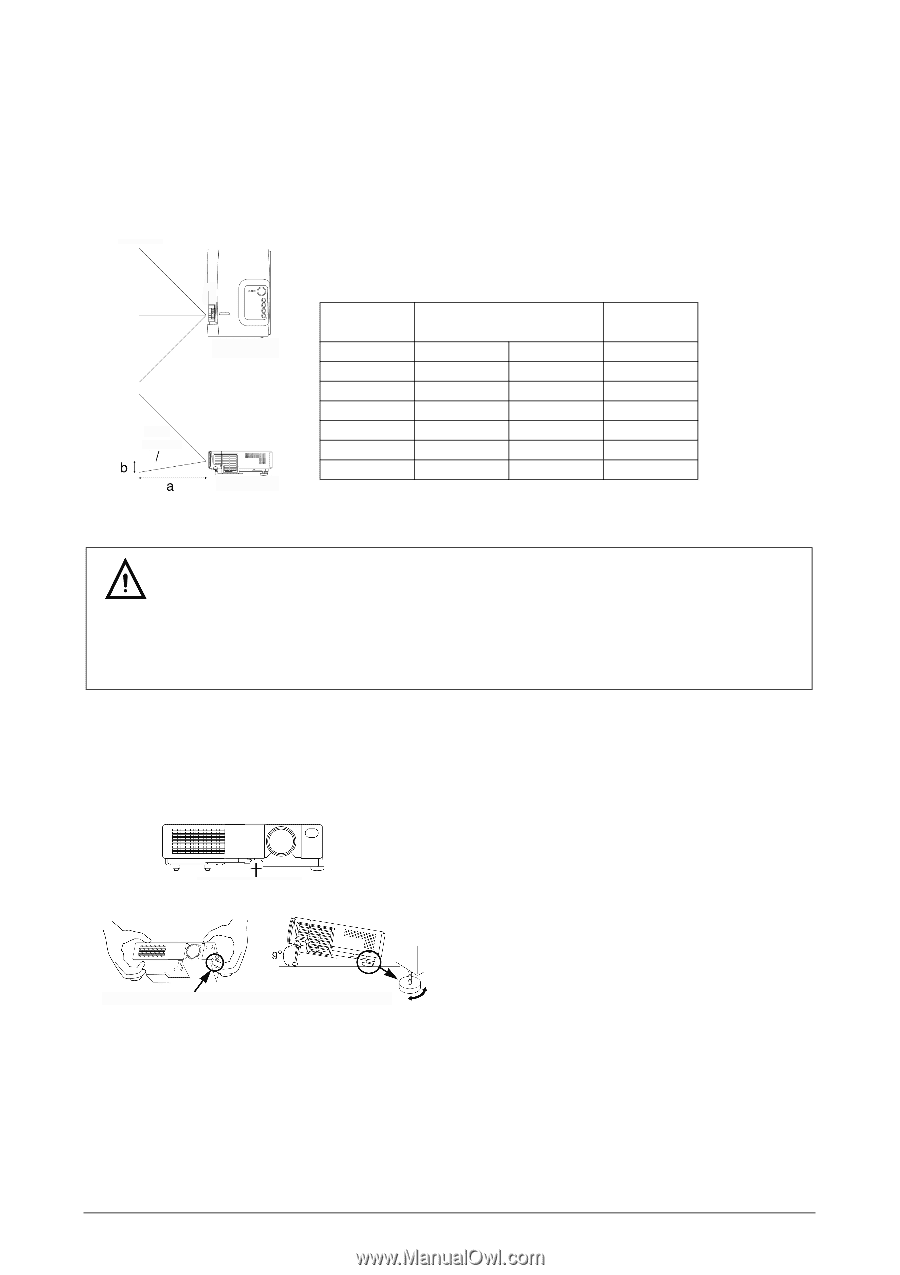
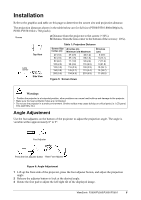
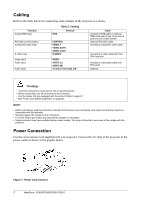
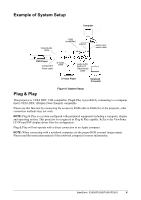
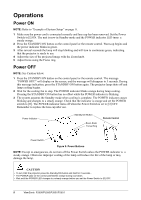
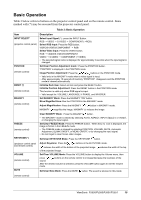
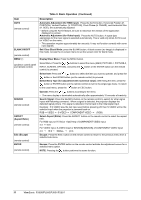
Installation Refer to the graphics and table on this page to determine the screen size and projection distance. The projection distances shown in the table below are for full size (PJ500/PJ501:800x600pixels, PJ501/PJ550:1024 x 768 pixels). Screen a Distance from the projector to the screen (+10%). b Distance from the lens center to the bottom of the screen (+10%). Top View cLeenntser Side View Table 1: Projection Distance Screen Size Inches (m) 40 (1.0) 60 (1.5) 80 (2.0) 100 (2.5) 120 (3.0) 150 (3.8) 200 (5.0) a Inches (m) Minimum and Maximum 37 (0.9) 46 (1.2) 57 (1.5) 69 (1.8) 77 (1.9) 93 (2.4) 96 (2.4) 116 (2.9) 116 (2.9) 139 (3.5) 145 (3.7) 174 (4.4) 194 (4.9) 233 (5.9) b Inches (cm) 3 (8.7) 5 (13.1) 7 (17.4) 9 (21.8) 10 (26.1) 13 (32.7) 17 (43.5) Figure 5: Screen Views Warnings • Position the projector in a horizontal position; other positions can cause heat build-up and damage to the projector. • Make sure the heat ventilation holes are not blocked. • Do not use the projector in a smoky environment. Smoke residue may cause buildup on critical parts (i.e. LCD panel, lens assembly, etc.) Angle Adjustment Use the foot adjusters on the bottom of the projector to adjust the projection angle. The angle is variable within approximately 0° to 9°. Foot Adjuster Press the foot adjuster button Rear Foot Adjuster Figure 6: Angle Adjustment 1 Lift up the front side of the projector, press the foot adjuster button, and adjust the projection angle. 2 Release the adjuster button to lock at the desired angle. 3 Rotate the foot pad to adjust the left/right tilt of the displayed image. ViewSonic PJ500/PJ550/PJ501/PJ551 6
-
 1
1 -
2
-
3
-
 4
4 -
 5
5 -
 6
6 -
 7
7 -
 8
8 -
 9
9 -
 10
10 -
 11
11 -
 12
12 -
 13
13 -
 14
14 -
15
-
16
-
17
-
18
-
19
-
20
-
21
-
22
-
23
-
24
-
25
-
26
-
27
-
28
-
29
-
30
-
31
-
32
 |
 |