ViewSonic PS750HD PJ-VTOUCH-50S User Guide English - Page 21
Automatic Calibration
 |
View all ViewSonic PS750HD manuals
Add to My Manuals
Save this manual to your list of manuals |
Page 21 highlights
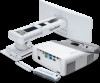
Automatic Calibration Click "Automatic Calibration" from operation menu. The image will be calibrated automatically; the "Auto Calibrate Succeed" message will appear once Automatic Calibration has been completed; if Automatic Calibration has failed, the "Auto Calibrate Failed" message will appear. In this event, please refer to the Troubleshooting Guide. Manual Calibration 1. Touch the four corners of the projection screen with your finger or the IR Pen. Make sure the light spots are positioned correctly on the four corners of screen and that the size of each spot is over 3x3 pixels. 2. Select "Manual Calibration" (25 dots/36 dots) from operation menu. The projected image on the screen will switch to the Manual Calibration screen and the icon will be displayed at the top left of the screen. 14
-
 1
1 -
2
-
3
-
4
-
5
-
6
-
7
-
8
-
9
-
10
-
11
-
12
-
13
-
14
-
15
-
 16
16 -
 17
17 -
 18
18 -
 19
19 -
 20
20 -
 21
21 -
 22
22 -
 23
23 -
 24
24 -
 25
25
 |
 |
