ViewSonic VP2365-LED VP2365-LED User Guide (English)
ViewSonic VP2365-LED Manual
 |
View all ViewSonic VP2365-LED manuals
Add to My Manuals
Save this manual to your list of manuals |
ViewSonic VP2365-LED manual content summary:
- ViewSonic VP2365-LED | VP2365-LED User Guide (English) - Page 1
ViewSonic® VP2365-LED LCD Display IMPORTANT: Please read this User Guide to obtain important information on installing and using your product in a safe manner, as well as registering your product for future service. Warranty information contained in this User Guide will describe your limited - ViewSonic VP2365-LED | VP2365-LED User Guide (English) - Page 2
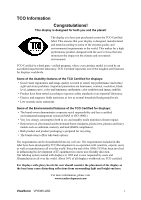
all displays worldwide are TCO certified. For displays with glossy bezels the user should consider the placement of the display as the bezel may cause disturbing reflections from surrounding light and bright surfaces. For more information, please visit www.tcodevelopment.com ViewSonic VP2365-LED i - ViewSonic VP2365-LED | VP2365-LED User Guide (English) - Page 3
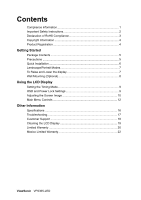
Contents Compliance Information 1 Important Safety Instructions 2 Declaration of RoHS Compliance 3 Copyright Information 4 Product Specifications 16 Troubleshooting 17 Customer Support 18 Cleaning the LCD Display 19 Limited Warranty 20 Mexico Limited Warranty 22 ViewSonic VP2365-LED - ViewSonic VP2365-LED | VP2365-LED User Guide (English) - Page 4
used in accordance with the instructions, may cause harmful interference to by turning the equipment off and on, the user is encouraged to try to correct the interference B est conforme à la norme NMB-003 du Canada. CE Conformity for European Countries The device complies with ViewSonic VP2365-LED 1 - ViewSonic VP2365-LED | VP2365-LED User Guide (English) - Page 5
guide for further instructions. 7. Do not block any ventilation openings. Install the equipment in accordance with the manufacturer's instructions third grounding prong. The wide blade and the third prong Refer all servicing to qualified service personnel. Service is required ViewSonic VP2365-LED 2 - ViewSonic VP2365-LED | VP2365-LED User Guide (English) - Page 6
steel containing up to 0.35% lead by weight, aluminium containing up to 0.4% lead by weight and as a cooper alloy containing up to 4% lead by weight. ViewSonic VP2365-LED 3 - ViewSonic VP2365-LED | VP2365-LED User Guide (English) - Page 7
of Smarter, Greener Computing. Please visit ViewSonic website to learn more. USA & Canada: http://www.viewsonic.com/company/green/recycle-program/ Europe: http://www.viewsoniceurope.com/uk/support/recycling-information/ Taiwan: http://recycle.epa.gov.tw/recycle/index2.aspx ViewSonic VP2365-LED 4 - ViewSonic VP2365-LED | VP2365-LED User Guide (English) - Page 8
only) • Quick Start Guide NOTE: The CD includes the User Guide PDF files and INF/ICM display optimization files. The INF file ensures compatibility with Windows operating systems, and the ICM file (Image Color Matching) ensures accurate on-screen colors. ViewSonic recommends that you install both - ViewSonic VP2365-LED | VP2365-LED User Guide (English) - Page 9
1920 x 1080 @ 60 Hz. For instructions on changing the resolution and refresh rate, see the graphics card's user guide. Installation is complete. Enjoy your new ViewSonic LCD display. To be best prepared for any future customer service needs: print this user guide and write the serial number in "For - ViewSonic VP2365-LED | VP2365-LED User Guide (English) - Page 10
display clockwise 90 degrees as shown above. To Raise and Lower the display You can easily raise and lower the display panel (the head) manually. As you face the front of the display, take hold of each side of the head and pull up or down. The panel should move easily. ViewSonic VP2365-LED 7 - ViewSonic VP2365-LED | VP2365-LED User Guide (English) - Page 11
VESA compatible wall mounting kit (100 mm x 100 mm distance), using screws of correct length. Step 5. Attach the LCD display to the wall, following the instructions in the wall-mounting kit. Step 3-4. Four screws attaching the base ViewSonic VP2365-LED 8 - ViewSonic VP2365-LED | VP2365-LED User Guide (English) - Page 12
the best picture quality set your LCD display timing mode to: VESA 1920 x 1080 @ 60Hz. To set the Timing Mode: 1. Set the resolution: Right-click on the Windows desktop > Properties > Settings > set the resolution. 2. Set the refresh rate: See your graphic card's user guide for instructions. WARNING - ViewSonic VP2365-LED | VP2365-LED User Guide (English) - Page 13
Orange = Power Saving Standby Power On/Off Scrolls through menu options and adjusts the displayed control. Also a shortcut to display the Contrast adjustment control screen. ViewSonic VP2365-LED 10 - ViewSonic VP2365-LED | VP2365-LED User Guide (English) - Page 14
in the graphics card's user guide.) • If necessary, make small adjustments using H. POSITION and V. POSITION until the screen image is completely visible. (The black border around the edge of the screen should barely touch the illuminated "active area" of the LCD display.) ViewSonic VP2365-LED 11 - ViewSonic VP2365-LED | VP2365-LED User Guide (English) - Page 15
more accurately display colors the way they were originally intended. Enabling the sRGB setting will cause the Contrast and Brightness adjustments to be disabled. 9300K-Adds blue to the screen image for cooler white (used in most office settings with fluorescent lighting). ViewSonic VP2365-LED 12 - ViewSonic VP2365-LED | VP2365-LED User Guide (English) - Page 16
Timing Mode, colors return to the 6500K factory preset. Information displays the timing mode (video signal input) coming from the graphics card in the computer, the LCD model number, the serial number, and the ViewSonic® website URL. See your graphics card's user guide for instructions on changing - ViewSonic VP2365-LED | VP2365-LED User Guide (English) - Page 17
the screen image. Dynamic Contrast allows the user to turn the contrast ratio enhancement on brightness. Standard: The default brightness setting. Optimize: Decreases the brightness by 25 %. Conserve: Decreases the brightness by 50 %. Setup Menu displays the menu shown below: ViewSonic VP2365-LED - ViewSonic VP2365-LED | VP2365-LED User Guide (English) - Page 18
. Memory Recall returns the adjustments back to factory settings if the display is operating in a factory Preset Timing Mode listed in the Specifications of this manual. Exception: This control does not affect changes made with the Language Select or Power Lock setting. ViewSonic VP2365-LED 15 - ViewSonic VP2365-LED | VP2365-LED User Guide (English) - Page 19
Color Filter Glass Surface TFT (Thin Film Transistor), Active Matrix 1920 x 1080 LCD, 0.2652mm pixel pitch Metric: 58 cm Imperial: 23" (23 x 1080 Resolution Recommended and supported 1920 x 1080 @ 60 ViewSonic® Macintosh adapter. To order an adapter, contact ViewSonic. ViewSonic VP2365-LED 16 - ViewSonic VP2365-LED | VP2365-LED User Guide (English) - Page 20
Troubleshooting No power Adjust brightness and contrast. • If you are using an Macintosh older than G3, you need a Macintosh adapter. Wrong or abnormal colors • If any colors ( ViewSonic® for a non-DDC adapter. Control buttons do not work • Press only one button at a time. ViewSonic VP2365-LED 17 - ViewSonic VP2365-LED | VP2365-LED User Guide (English) - Page 21
.viewsonic.com United Kingdom www.viewsoniceurope.com www.viewsoniceurope.com/ service_gb@viewsoniceurope /uk/ uk/support/call-desk/ .com United States www.viewsonic.com T (Toll-Free)= 1-800-688-6688 T (Toll)= 1-424-233-2530 [email protected] F= 1-909-468-3757 ViewSonic VP2365-LED - ViewSonic VP2365-LED | VP2365-LED User Guide (English) - Page 22
onto a clean, soft, lint-free cloth, then wipe the surface. Disclaimer • ViewSonic® does not recommend the use of any ammonia or alcohol-based cleaners on the LCD display. • ViewSonic will not be liable for damage resulting from use of any ammonia or alcoholbased cleaners. ViewSonic VP2365-LED 19 - ViewSonic VP2365-LED | VP2365-LED User Guide (English) - Page 23
, contact ViewSonic Customer Sup- port (Please refer to Customer Support page). You will need to provide your product's serial number. 2. To obtain warranty service, you will be required to provide (a) the original dated sales slip, (b) your name, (c) your address, (d) a description of the problem - ViewSonic VP2365-LED | VP2365-LED User Guide (English) - Page 24
to the terms and conditions of the Maintenance Guarantee Card. For users in Europe and Russia, full details of warranty provided can be found in www.viewsoniceurope.com under Support/Warranty Information. 4.3: ViewSonic LCD Warranty ViewSonic VP2365-LED Page 2 of 2 LCD_LW02 Rev. 1e 06-11-07 21 - ViewSonic VP2365-LED | VP2365-LED User Guide (English) - Page 25
other damages, whether incidental, consequential or otherwise. 3. Any claim against the customer by any other party. 4. Repair or attempted repair by anyone not authorized by ViewSonic. 4.3: ViewSonic Mexico Limited Warranty Page 1 of 2 LCD_LW03 Rev. 1a 06-11-07 ViewSonic VP2365-LED 22 - ViewSonic VP2365-LED | VP2365-LED User Guide (English) - Page 26
Services SUPPORT: ViewSonic Corporation 381 Brea Canyon Road, Walnut, CA. 91789 USA Tel: 800-688-6688 (English); 866-323-8056 (Spanish); Fax: 1-800-685-7276 E-Mail: http://www.viewsonic.com 4.3: ViewSonic Mexico Limited Warranty Page 2 of 2 LCD_LW03 Rev. 1a 06-11-07 ViewSonic VP2365-LED 23 - ViewSonic VP2365-LED | VP2365-LED User Guide (English) - Page 27
-
 1
1 -
 2
2 -
 3
3 -
 4
4 -
 5
5 -
 6
6 -
 7
7 -
8
-
9
-
10
-
11
-
12
-
13
-
14
-
15
-
16
-
17
-
18
-
19
-
20
-
21
-
22
-
23
-
24
-
25
-
26
-
27
 |
 |
ViewSonic
®
VP2365-LED
LCD Display
Model No. : VS12637
IMPORTANT:
Please read this User Guide to obtain important
information on installing and using your product in a safe manner, as
well as registering your product for future service.
Warranty information
contained in this User Guide will describe your limited coverage from
ViewSonic Corporation, which is also found on our web site at http://
www.viewsonic.com in English, or in specific languages using the
Regional selection box in the upper right corner of our website.
“Antes de operar su equipo lea cuidadosamente las instrucciones en
este manual”