Viking 30" Fully Integrated All Refrigerator Use and Care Manual - Page 10
Freezer, Automatic Ice Maker
 |
View all Viking 30" Fully Integrated All Refrigerator manuals
Add to My Manuals
Save this manual to your list of manuals |
Page 10 highlights
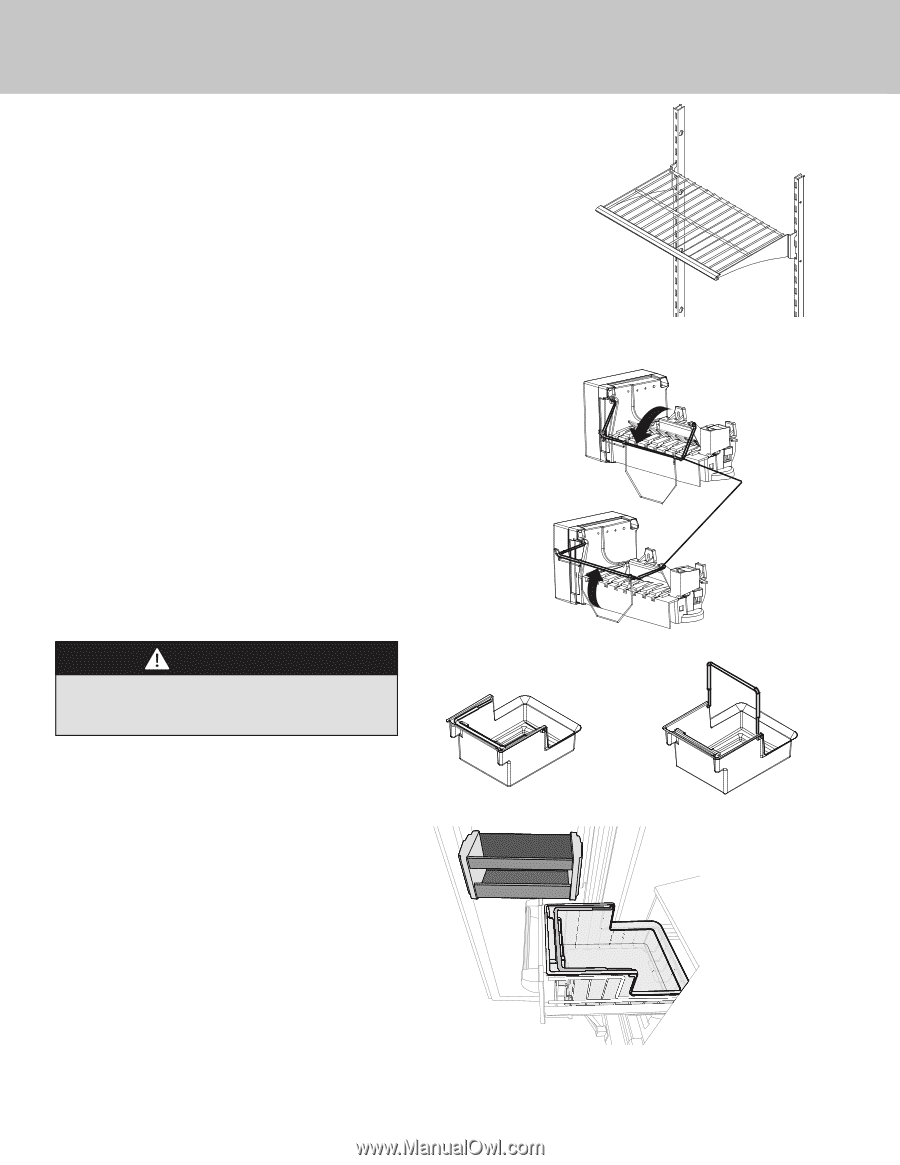
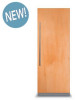
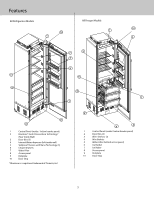
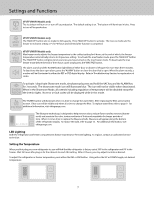
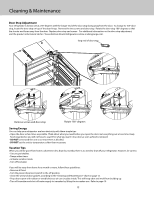
Freezer (VFI/FFI/MVFI/VFFI models) Wire Shelf Adjustment You can easily adjust your freezer's shelves. To remove a shelf, simply tilt it up at the front, releasing the hooks from the shelf support. Then, pull the shelf straight out. To replace, guide the rear hooks of the shelf into the slots in the shelf supports. Then, tilt the shelf up at the front until the hooks drop into the slots. Next, lower the front of the shelf to a level position. Automatic Ice Maker The ice maker is located above the upper freezer drawer on the left hand side. After the refrigerator reaches normal temperature, the ice maker fills with water and begins operating. Note: Allow 24 to 48 hours after installation before looking for ice in your ice drawer. You should discard the first three full drawers of ice produced by your refrigerator, and should also throw out the first drawer full of ice your refrigerator produces after extended periods of non-use. During ice production, the ice maker arm raises and lowers. When the ice bin is full, the ice maker arm automatically turns the ice maker off. To manually stop ice production, raise the ice maker arm. You will hear a definite click when you have the arm in the right position. The ice maker won't produce any more ice until you lower the ice maker arm. CAUTION To avoid damage to ice maker, observe the following: • DO NOT force ice maker arm down or up past stop position. • DO NOT place or store anything in ice bucket. Ice Bin Removal To remove the ice bin, pull top freezer drawer open. Raise handle and pull up. When replacing the ice bin, lower handle before closing drawer. Handle down NOTE: If the door bin on the freezer door is placed in the lower position, you may not be able to remove the ice bin. On Position Ice Maker Arm Off Position Handle up 10
-
 1
1 -
2
-
3
-
4
-
 5
5 -
 6
6 -
 7
7 -
 8
8 -
 9
9 -
 10
10 -
 11
11 -
 12
12 -
 13
13 -
 14
14 -
 15
15 -
16
-
17
-
18
-
19
-
20
 |
 |