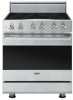
Viking DSCE1304BSS Installation Instructions - Page 10
Anti-tip Device Installation, Leveling/Adjustments/Alignment
 |
View all Viking DSCE1304BSS manuals
Add to My Manuals
Save this manual to your list of manuals |
Page 10 highlights
Leveling/Adjustments/Alignment 1 2 Measure the four corners in cutout area to verify if flooring is level. 3 For uneven or sloped floors, level unit with metal shims only, as the adjustment required may exceed the thread available in the leg. 4 Move unit into opening. 5 (03.9/58"cm) Check that unit is level side to side and front to back. Side trim of the high corner must be 3/8" (0.95 cm) above countertop. 6 If leveling is required, move unit out of opening. 18 1 1 2 Lift unit and prop on wood blocks. 7 Set the high corner of range so that the top of side trim is 3/8" (0.95 cm) above countertop. Level range to high corner. Anti-tip Device Installation WARNING Tipping hazard. To reduce the risk of the appliance tipping, it must be secured by a properly installed anti-tip bracket(s). To make sure the bracket has been installed properly, look behind the range with a flashlight to verify proper installation engaged in the rear top left corner of the range. • THIS RANGE CAN TIP. • INJURIES TO PERSONS CAN RESULT. • INSTALL ANTI-TIP DEVICE PACKED WITH RANGE. • SEE INSTALLATION INSTRUCTIONS. 1 (A) Measure from floor to bottom of the anit-tip opening located on the back of range. This will be measurement (A). 2 3 3(9-.52/c8m") +1/2"(A(1).3 cm) Locate anti-tip bracket on rear wall with the top left corner at measurement (A) plus 1/2" (1.3 cm) from the floor and 3-5/8" (9.2 cm) from where the right side of range (facing range) is to be located. 19 Mark and drill holes where bracket will be located.
-
 1
1 -
2
-
3
-
4
-
 5
5 -
 6
6 -
 7
7 -
 8
8 -
 9
9 -
 10
10 -
 11
11 -
 12
12
 |
 |
