Viking FPIM515 Installation Instructions - Page 10

Service Information, Electrical Connection, Final Installation, Installation Check List - parts

Page 10 highlights

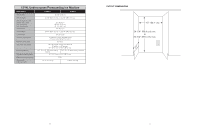
ELECTRICAL CONNECTION WARNING ELECTRICAL SHOCK HAZARD Failure to follow these instructions could result in fire or electrical shock. The ice machine is supplied with a power cord. DO NOT remove the grounding pin from the cord's plug. DO NOT use extension cords. Follow all codes. Connect the machine to its own 115 volt, 15 amp circuit. Grounding type wall receptacle FINAL INSTALLATION 1. If the electrical outlet for the ice maker is behind the unit, plug in the unit. 2. Snap the black caps over the bottom of the leveling legs. 3. Position the unit in the installation opening. 4. Turn on the water supply. Make sure that the ice maker is plugged in and the power is on. 5. Slide unit into installation opening, paying careful attention to water supply and drain connections. DO NOT kink! 6. Pour a couple of quarts of water into the ice storage bin; on drain pump equipped machines the drain pump should start and water should pump Power Supply with 3-prong grounding plug out. Check for leaks. 7. Replace the service access panel and insert access panel button cover (supplied).. 8. Level the unit as needed by turning the leveling legs clockwise to raise the unit and counterclockwise to lower the unit. INSTALLATION CHECK LIST 1. Has the unit been connected to the proper water supply? 2. Has the water supply been checked for leaks? 3. Has the unit been connected to a drain? 4. Has the drain been tested for flow and leaks? 5. Has the unit been connected to the proper electrical supply? 6. Has the unit been leveled? 7. Have all packing materials been removed from the machine? 8. Has the door covering been installed? SERVICE INFORMATION If service is required, call your dealer or authorized service agency. The name of the authorized service agency can be obtained from the dealer or distributor in your area. Have the following information readily available. • Model number • Serial number • Date purchased • Name of dealer from whom purchased Clearly describe the problem that you are having. If you are unable to obtain the name of an authorized service agency, or if you continue to have service problems, contact Viking Range Corporation at 1-888-VIKING1 (845-4641), or write to: VIKING RANGE CORPORATION PREFERRED SERVICE 1803 Hwy 82W Greenwood, Mississippi 38930 USA Record the information indicated below. You will need it if service is ever required. The model and serial number for your ice machine are located upper left interior compartment. Model and Serial number Model Number Serial Number Date of Purchase Date Installed Dealer's Name Address _____ If service requires installation of parts, use only authorized parts to insure protection under the warranty. KEEP THIS MANUAL FOR FUTURE REFERENCE. 18 19

  • 1
  • 2
  • 3
  • 4
  • 5
  • 6
  • 7
  • 8
  • 9
  • 10

19
18
SERVICE INFORMATION
If service is required, call your dealer or authorized service agency. The name of the authorized service agency can be
obtained from the dealer or distributor in your area.
Have the following information readily available.
• Model number
• Serial number
• Date purchased
• Name of dealer from whom purchased
Clearly describe the problem that you are having. If you are unable to obtain the name of an authorized service agency,
or if you continue to have service problems, contact Viking Range Corporation at 1-888-VIKING1 (845-4641), or write to:
VIKING RANGE CORPORATION
PREFERRED SERVICE
1803 Hwy 82W
Greenwood, Mississippi 38930 USA
Record the information indicated below. You will need it if service is ever
required. The model and serial number for your ice machine are located upper
left interior compartment.
Model Number ____________________________________Serial Number ____________________________________________
Date of Purchase ____________________________________________________________________________________________
Date Installed _______________________________________________________________________________________________
Dealer’s Name
______________________________________________________________________________________________
Address ____________________________________________________________________________________________________
If service requires installation of parts, use only authorized parts to insure protection under the warranty.
KEEP THIS MANUAL FOR FUTURE REFERENCE.
Model and
Serial number
ELECTRICAL CONNECTION
The ice machine is supplied with a power cord.
DO NOT
remove the
grounding pin from the cord’s plug.
DO NOT
use extension cords. Follow all
codes. Connect the machine to its own 115 volt, 15 amp circuit.
FINAL INSTALLATION
1. If the electrical outlet for the ice maker is behind the unit, plug in the unit.
2. Snap the black caps over the bottom of the leveling legs.
3. Position the unit in the installation opening.
4. Turn on the water supply. Make sure that the ice maker is plugged in and
the power is on.
5. Slide unit into installation opening, paying careful attention to water supply
and drain connections.
DO NOT
kink!
6. Pour a couple of quarts of water into the ice storage bin; on drain pump
equipped machines the drain pump should start and water should pump
out. Check for leaks.
7. Replace the service access panel and insert access panel button cover (supplied)..
8. Level the unit as needed by turning the leveling legs clockwise to raise the unit and counterclockwise to lower the
unit.
INSTALLATION CHECK LIST
1. Has the unit been connected to the proper water supply?
2. Has the water supply been checked for leaks?
3. Has the unit been connected to a drain?
4. Has the drain been tested for flow and leaks?
5. Has the unit been connected to the proper electrical supply?
6. Has the unit been leveled?
7. Have all packing materials been removed from the machine?
8. Has the door covering been installed?
Grounding type
wall receptacle
Power Supply
with 3-prong
grounding plug
WARNING
ELECTRICAL SHOCK HAZARD
Failure to follow these instructions could result in fire or electrical shock.