Viking FWCI1240GR Installation Instructions - Page 8
Custom Panel Dimensions, Custom Panel Installation, Custom Panel Handle Installation
 |
View all Viking FWCI1240GR manuals
Add to My Manuals
Save this manual to your list of manuals |
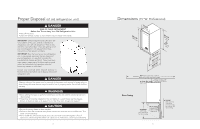
Page 8 highlights
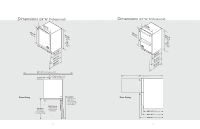
Custom Panel Dimensions (24"W. Refrigerated Drawers) 23-23/32" (60.2 cm) 1/2" (1.3 cm) 1-1/2" (3.8 cm) 1-1/2" (3.8 cm) 9/16" (1.4 cm) 3-57/64" (9.9 cm) CL BACK VIEW 3-57/64" (9.9 cm) 37/64" (0.6 cm) CL ø1/8" (0.3 cm) (14x) 1/2" (1.3 cm) deep 15-1/64" (38.1 cm) 5/8" (0.6 cm) 3/4" (1.9 cm) 14 Custom Panel Handle Installation CAUTION Handle should be mounted to custom door panels only (not the door) to avoid damage to the factory door. Handle must be attached to custom panel before attaching the custom panel to door. 1. Mark rear of panel with handle fastening locations. 2. Drill through custom panel at marked locations taking care not to damage panel. 3. Countersink screw heads so they are flush with backside of panel. 4. Attach handle. Custom Panel Installation A custom panel of wood or other material not exceeding 10 pounds can be attached to the door. Attachment is from the inside of the door. Holes are provided in the door for this purpose. 1. With the unit secured in position, open the door and make sure panel pre-drilled holes align with door frame holes. 2. Loosely attach four corners of the overlay panel to the door using #10 x 1" wood screws, installed through the door frame from the rear. 3. Check for overall wood overlay panel fit, position and function. Make minor adjustments as necessary. When panel is properly aligned, tighten mounting screws securely. Install the rest of the mounting screws and tighten securely. CAUTION Do not overtighten wood overlay attachment screws as this may damage factory supplied door frame. 15
-
 1
1 -
2
-
 3
3 -
 4
4 -
 5
5 -
 6
6 -
 7
7 -
 8
8 -
 9
9 -
 10
10 -
 11
11 -
 12
12
 |
 |
