Viking Induction Cooktop Installation Instructions - Page 17
Final Preparation, Performance Checklist
 |
View all Viking Induction Cooktop manuals
Add to My Manuals
Save this manual to your list of manuals |
Page 17 highlights
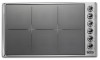
HFienadl Plinreeparation • Some stainless steel parts may have plastic protective wrap which must be peeled off. • All stainless steel body parts should be wiped with hot, soapy water and with a liquid cleaner designed for this material. If buildup occurs, DO NOT use steel wool, abrasive cloths, cleaners, or powders! • If it is necessary to scrape stainless steel to remove encrusted materials, soak with hot, wet cloths to loosen the material, then use a wood or nylon scraper. DO NOT use a metal knife, spatula, or any other metal tool to scrape stainless steel! Scratches are almost impossible to remove. Performance Checklist A qualified installer should carry out the following checks: Check top surface elements 1. Starting with the left front element, turn the corresponding knob to the HI position-left front indicator should flash. 2. Place an induction compatible piece of cookware onto the left front burner-left front indicator should be solid. 3. Remove cookware and repeat steps for other elements. 17
-
 1
1 -
2
-
3
-
4
-
5
-
6
-
7
-
8
-
9
-
10
-
11
-
 12
12 -
 13
13 -
 14
14 -
 15
15 -
 16
16 -
 17
17 -
 18
18 -
 19
19 -
 20
20
 |
 |
