Viking RDDOE306SS Installation Instructions - Page 7
Final Preparatio
 |
View all Viking RDDOE306SS manuals
Add to My Manuals
Save this manual to your list of manuals |
Page 7 highlights
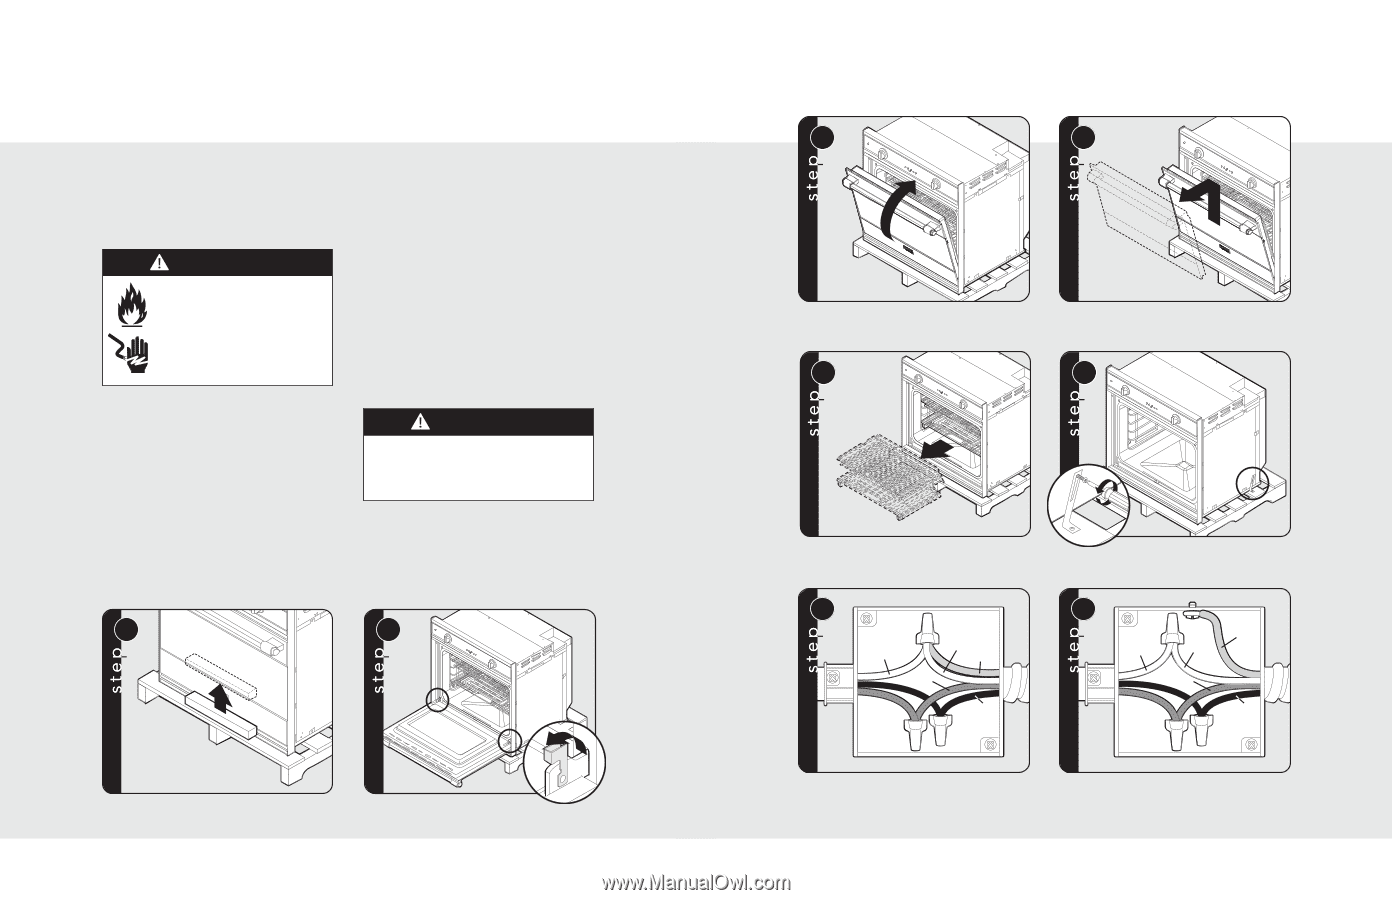
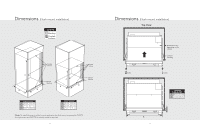
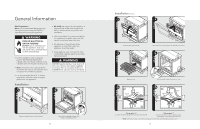
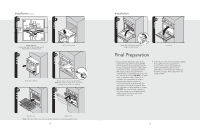
General Information Site Preparation Note: It is recommended that a thorough site inspection be conducted PRIOR to unpacking and moving this appliance. WARNING FIRE OR ELECTRICAL SHOCK HAZARD DO NOT use an extension cord with this appliance. Such use may result in fire, electrical shock or other personal injury. • Confirm available access to adequate power-see electrical requirements. ° Single oven units require a 30 amp circuit ° Double oven units require a 50 amp circuit • Note: A minimum of 2" spacing above and below the oven to any adjacent items is required for ventilation purposes. • It is recommended that 3/4" or thicker material be utilized to create a support platform for this appliance. Installation 1 • BE SURE that support for this appliance is perpendicular to the front facing of the wall or cabinet before you perform the installation. • Use of a hydraulic lift is recommended for the installation of double oven units. Be careful not to bend lower trim/vent. • All openings in the wall behind the appliance or in the floor under the appliance should be sealed. • Keep appliance area clear and free from combustible materials, gasoline and other flammable vapors. WARNING DO NOT use the handle or oven door to lift the oven. Remove door before installation to ensure that it is not used to lift the unit. DO NOT lift or carry the door by the handle. 2 1 2 Remove wooden brace on front of pallet. 12 Open door completely. Rotate door hinge to unlocked position. Installation (cont.) 3 4 Close the door until it stops. 5 Push in/lift door up/and then out. Repeat for all doors. 6 Remove racks. 7a Neutral White Green Red Black Unscrew pallet screws from side of oven. 7b Neutral White Green Red Black Wiring option 1* (connect the white and green to the incoming neutral) Wiring option 2* (connect the white to the incoming neutral, attach green to grounded junction box) *Note: Check local code to see which wiring option should be used when grounding the unit. 13
-
 1
1 -
 2
2 -
 3
3 -
 4
4 -
 5
5 -
 6
6 -
 7
7 -
 8
8 -
 9
9 -
 10
10
 |
 |