Viking RDDOE306SS Installation Instructions - Page 8
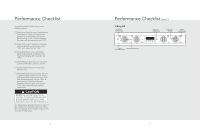
Performance Checklis
 |
View all Viking RDDOE306SS manuals
Add to My Manuals
Save this manual to your list of manuals |
Page 8 highlights
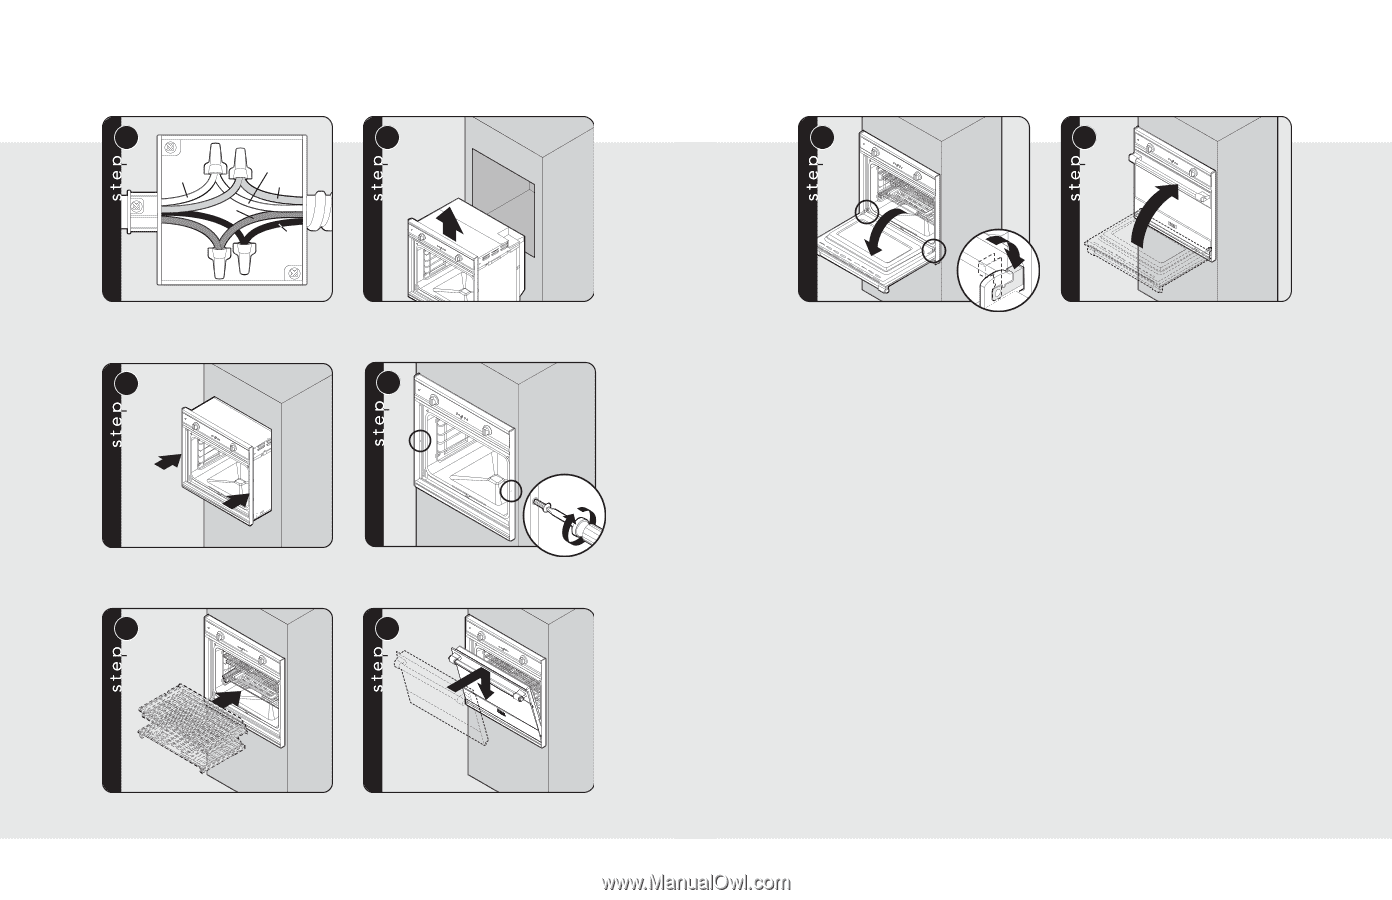
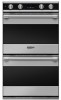
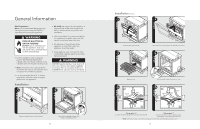
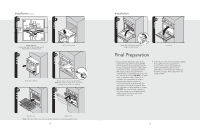
Installation (cont.) 7c 8 Neutral White Green Red Black Wiring option 3* (connect the white to the incoming neutral, attach green to suitable ground) 9 Lift oven into position. 10 Push oven straight in. 11 Attach screws to the side of the framing. Note: Two screws for single ovens, four screws for double ovens (screws not included). 12 Replace racks. Replace door. *Note: Check local code to see which wiring option should be used when grounding the unit. 14 Installation 13 14 1 2 Open door completely. Rotate door hinge to locked position. Close door. Final Preparation 1. Some stainless steel parts may have a protective wrap, which must be peeled off. All stainless steel body parts should be wiped regularly with hot, soapy water at the end of each cooling period and with liquid cleaner designed for this material when soapy water will not do the job. If build-up occurs, DO NOT use steel wool, or abrasive cloths, cleaners, or powders. If it is necessary to scrape stainless steel surface to remove encrusted material, soak area with hot, wet towels to loosen the material, then use a wooden or nylon spatula or scraper. DO NOT use a metal knife, spatula, or any other metal tool to scrape stainless steel surfaces. Scratches are almost impossible to remove. 2. The interior of the oven should be washed thoroughly with hot, soapy water to remove film residues and installation debris before being used for food preparation, then rinsed and wiped dry. Solutions stronger than soapy water are rarely needed. 15
-
 1
1 -
2
-
 3
3 -
 4
4 -
 5
5 -
 6
6 -
 7
7 -
 8
8 -
 9
9 -
 10
10
 |
 |